4. Adjustments RICOH Ri 2000 User Manual
182
After printing the pattern for the print position adjustment, you need to find an
appropriate value based on the alignment files to the 4 arrows on the platen.
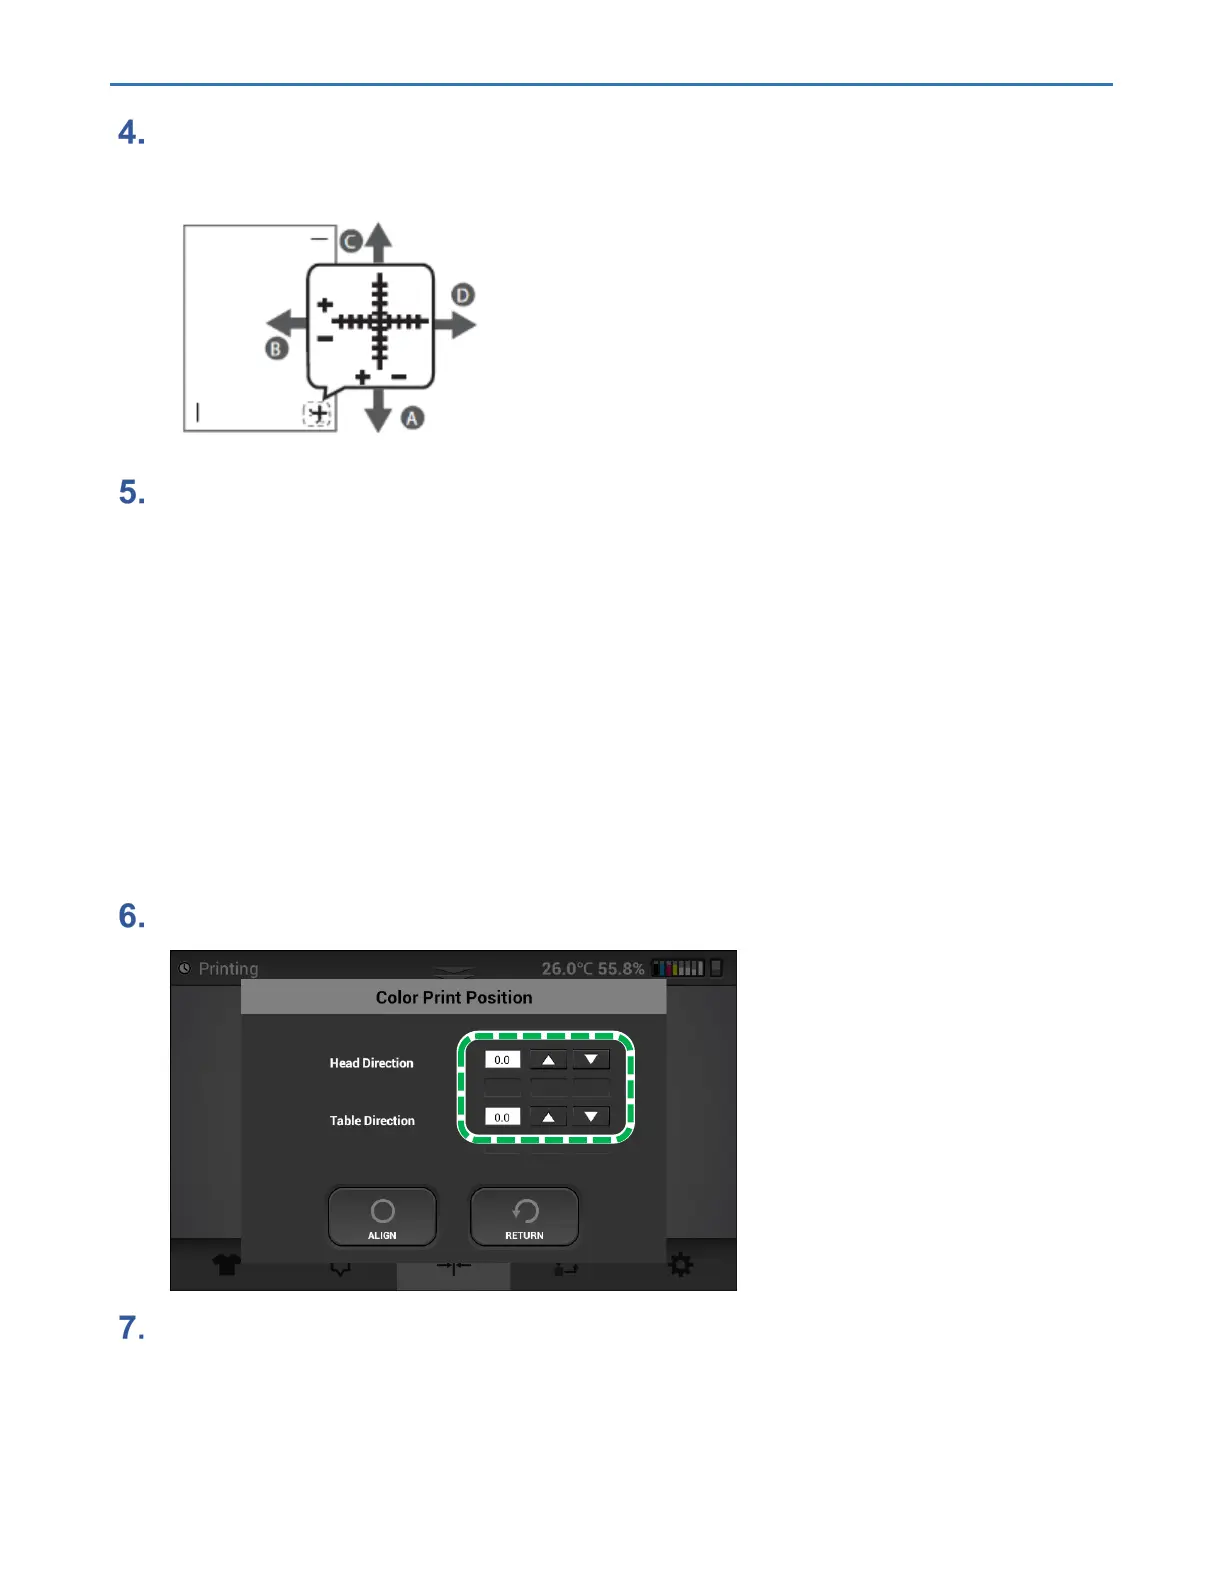
Position the paper so that the cross on the test print paper comes at the right
bottom corner.
• You can select values between “-5.0” and “+5.0” in the Head Direction and between “-8.0”
and “+8.0” in the Table Direction increments of 0.1 mm.
• To move the print position to the “A” direction, enter a value between “-0.1” and “-8.0” in the
Table input area.
• To move the print position to the “B” direction enter a value between “+0.1” and “+5.0” in the
head input area.
• To move the print position to the “C” direction enter a value between “+0.1” and “+8.0” in the
table input area.
• To move the print position to the “D” direction enter a value between “-0.1” and “-5.0” in the
Head input area.
After entering the values, press [ALIGN] to set the values.
Repeat the process until the print appears to be centered.