Reference Manual
00809-0100-4130, Rev AA
May 2009
Rosemount 2130
3-4
REPLACEMENT AND
CALIBRATION OF
ELECTRONIC
CASSETTES
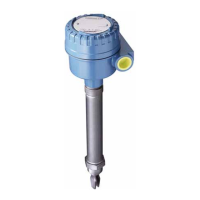
When replacing a damaged or faulty electronic cassette, calibrate the
replacement cassette to the operating frequency of the fork assembly.
This section describes what is required for calibration. Calibration sequence
steps 3 to 13 are time dependent and must be carried out within the noted
times. The purpose of the time dependency and switching sequence is to
prevent an accidental calibration from occurring.
If this replacement is taking place in a hazardous area, only qualified
personnel should perform the replacement. All work in hazardous areas must
be carried out in accordance with the local code. For general hazardous area
requirements of this equipment, refer to Appendix B: Product Certifications.
Calibration of the device is complex and it may take several attempts before
calibration is successful.
Replacement Sequence On Intrinsically Safe (I.S.) approved versions of the 2130, it is recommended
that replacement and calibration be performed in a non-hazardous (safe)
area.
NOTE:
• I.S. cassettes can only be replaced with I.S. cassettes
• Non-I.S. cassette types can be interchanged with other non-I.S.
cassettes, but a new label must be fitted and the original part number
transferred to the new label
• Before starting the replacement and calibration procedure, ensure that
any controlled process will not be adversely affected
To replace the cassette, do the following:
1. Isolate and disconnect the power to the 2130, and insulate the ends of the wires.
NOTE:
On units with a relay cassette, there may be more than one power source.
2. Remove the lid and disconnect the wires, noting any connections (Figure 3-1) and
the exact mode switch position (Figure 3-2 on page 3-5) on the cassette to be
replaced.
3. Remove and retain the two fixing screws from the base of the cassette and unplug
the cassette.
4. Plug in the replacement cassette, replace the screws, reconnect the wires, and set
the mode switch to “Wet On” with a one second delay (Figure 3-3 on page 3-5).
5. Reconnect the power to the unit.
Figure 3-1.
Cassette To Be Replaced
OPERATION MODE
Dry On Mode
Dry
Wet
Wet On Mode
Dry
Wet
Dry On Wet On
Seconds Delay
0.3 0.3
3
30
10
1
3
30
10
1
12
3
OUT
+
-
4
PLC/PNP