BRP-Rotax
INSTALLATION MANUAL
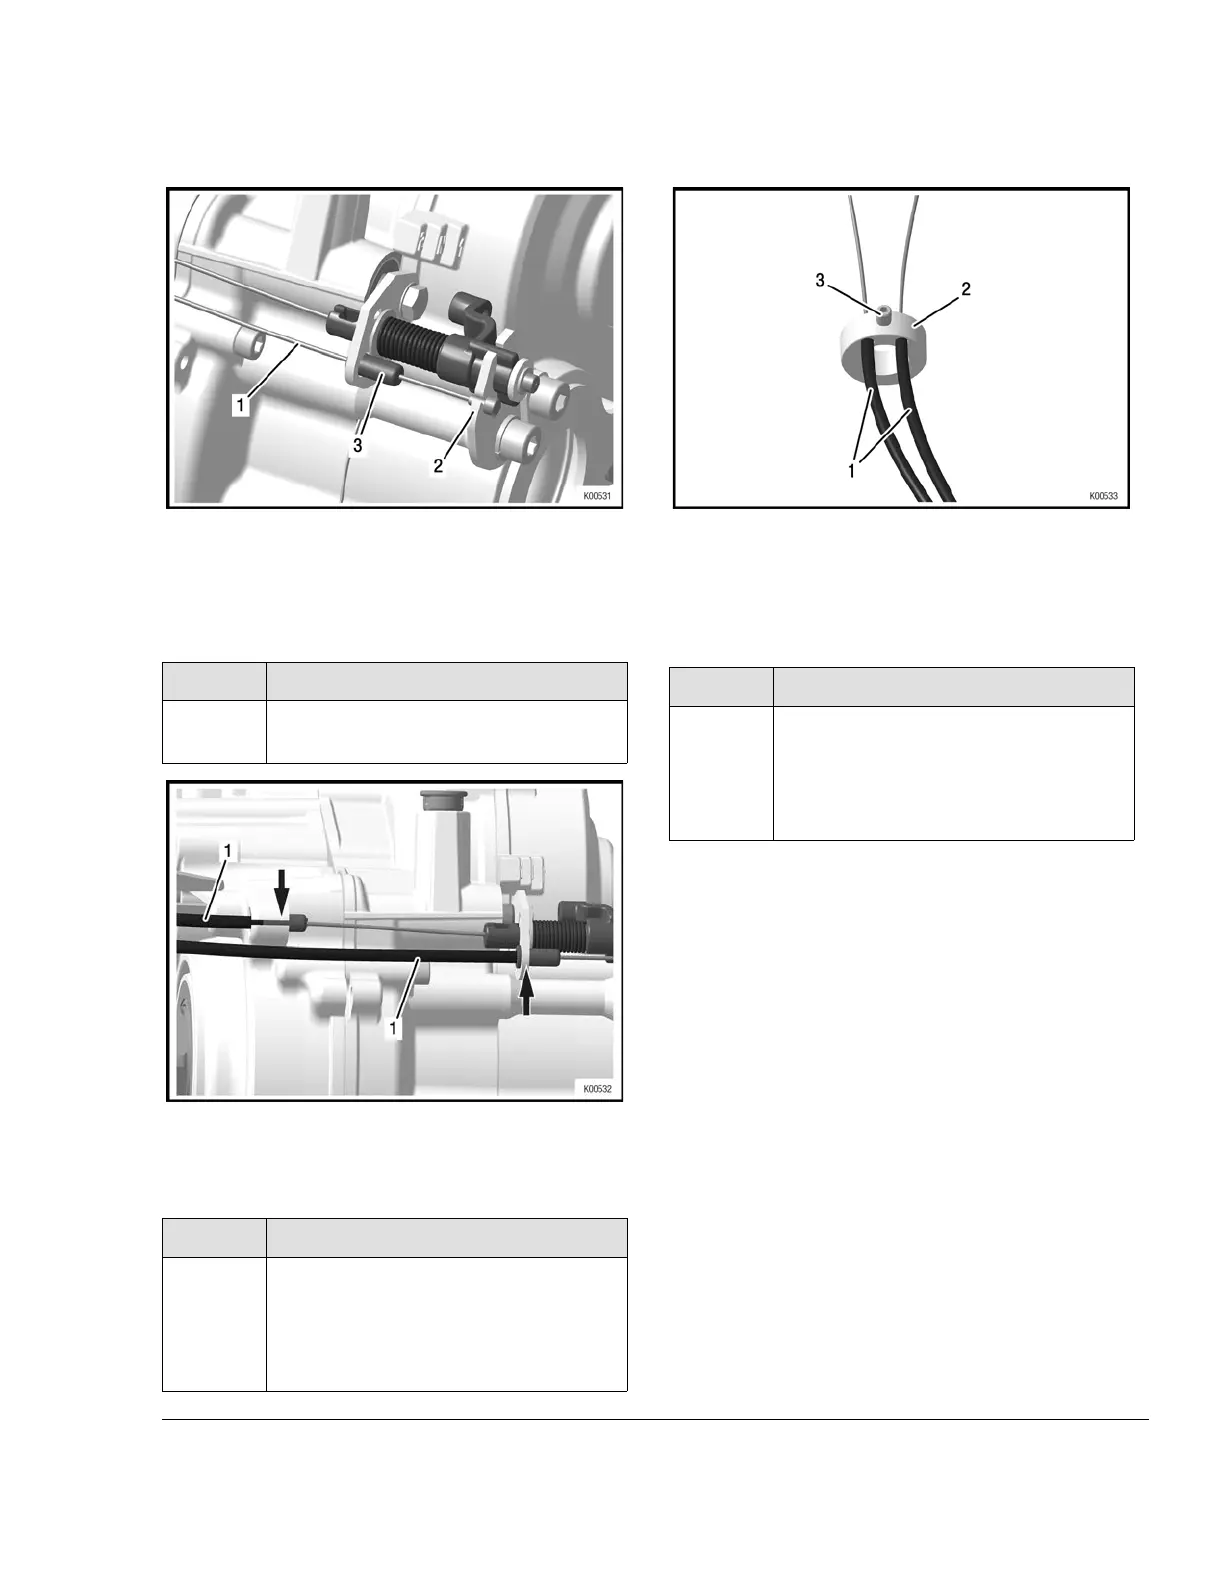
Figure 7.17
1 Bowden cable
2
Retaining plate
3 Guidance
Step
Procedure
9
Install Bowden cables (pos. 1) into the
support on the back of the engine.
Figure 7.18
1 Bowden cable
Step
Procedure
10
Thread both ends of the Bowden ca-
bles (pos. 1) through the cable support
(pos. 2). Install the set screw (pos. 3)
onto the cable support – just pre-as-
semble it, do not tighten yet.
Figure 7.19
1 Bowden cables
2
Cable support
3 Set screw
Step
Procedure
11 Hand-tighten both Bowden cables
(pos. 1) onto the control whip (pos. 2),
using M6. Allen screws (pos. 3) and
washers (pos. 4). Pay attention to the
correct installation of the control whip!
NOTE
The oblique millings (pos. 5) of the control whip
serve to guide the cables. The cable ends must
look away from the center of the control whip.
The Bowden cables can be attached to the control
whip in two different ways:
• Version 1:
Fasten Bowden cable to position 5 inside.
Feature: Shift travel longer, but less effort.
• Version 2
Fasten Bowden cable to position 5 outside.
Feature: Short shift, but higher effort.
Effectivity: 125 MAX DD2 evo
6
Page 9
Edition: September 01 2019

 Loading...


