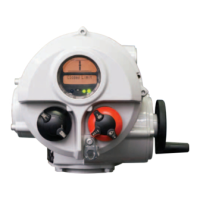
Having established that the Basic
Settings have been correctly set, the
Configuration Settings can now be
configured to suit site control and
indication requirements.
It is possible to move through the
various Configuration Settings as shown
in Fig. 9.1 using the
k
and m
keys.
The actuator wiring diagram will
indicate any options fitted.
Options Setting Tool Local Control
[Or] and Power Loss Inhibit [OS] are
standard features, their use being
optional.
In order to display the Configuration
Settings it is necessary to press the
m
key until [Cr] appears.
If you have chosen to enter
Configuration Settings in the checking
mode the display will be as Fig. 9.2.
If you have chosen to enter
Configuration Settings in the setting
mode the display will be as Fig. 9.3
(refer to Section 7).
Fig. 9.2 Fig. 9.3
PRESS THE k
KEY.
29
9.1
CONFIGURATION SETTINGS
page
9.1 Accessing the Configuration Settings 29
9.2 Indication Contacts S1, S2, S3 and S4 30
9.3 Control Mode Configuration 32
9.4 Option Extra Indication Contacts S5–S8 35
9.5 Option CPT (4-20mA Indication) 36
9.6 Option Folomatic (Analogue Position Control) 37
9.7 Remote Control Source 40
9.8 Bus System Option Pakscan 41
9.9 Bus System Option Modbus 44
9.10 Bus System Option Profibus DP 47
9.11 Bus System Option DeviceNet 50
9.12 Bus System Positioning Control Settings 53
9.13 Option Interrupter Timer 55
9.14 Setting Tool Local Control 57
9.15 Inhibit Operation After Power Loss 57
9.16 Indicator LEDs 58
9.17 Display Language 58
9.18 Default Options 59
9.19 Actuator Type Setting 61
10.3 IQT Battery Failsafe Commissioning Instructions 64
11.2 Help Screens 73
11.3 IrDA Diagnostics and Configuration 78
Accessing the
Configuration Settings
Basic Setup
Config Setup
Basic Setup
Config Setup

 Loading...