17
Installing the Wireless Bridge
Preparing for Installation
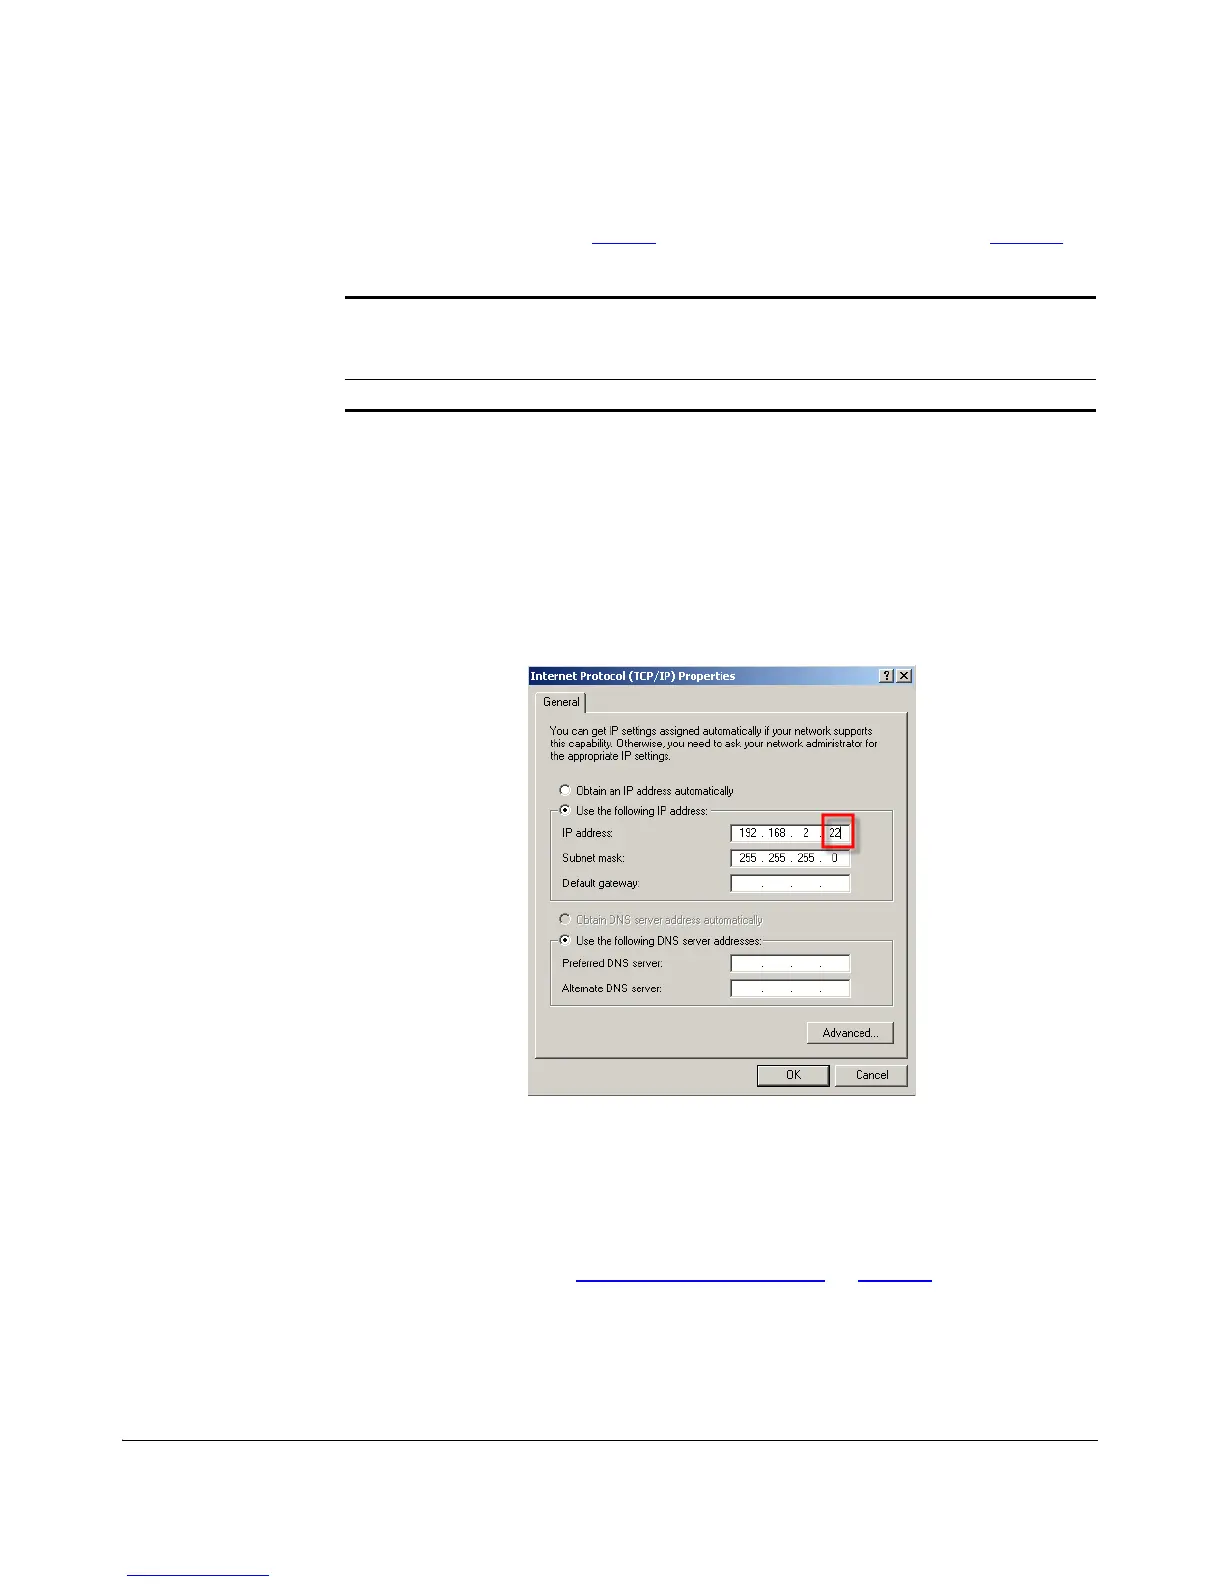
5. Click Use the following IP address, and then configure the IP address settings
with the values listed in Table 4
. For a sample configuration, refer to Figure 8.
You can leave the Default Gateway and DNS fields blank.
6. Click OK to save your changes and close the TCP/IP Properties dialog box.
7. Click OK again to close the Local Area Connection Properties dialog box.
Windows saves the IP address settings that you have configured. Your admin
computer is now ready for direct connection with the ZoneFlex 7731.
Figure 8. Sample configuration in the Internet Protocol (TCP/IP) Properties
dialog box
Step 4: Connect the Wireless Bridge to the Admin
Computer
If you have not already done so, connect the admin computer to the ZoneFlex 7731
using an Ethernet cable, or two Ethernet cables and a PoE injector if you are using
Power over Ethernet (see “Use Power Over Ethernet”
on page 14).
Table 4. Configure your computer’s IP address settings
IP address 192.168.2.22 (or any address in the 192.168.2.x
network—with the exception of 192.168.2.1 and
192.168.2.254 which will be used by the bridges)
Subnet mask 255.255.255.0
 Loading...