45
Installing the Wireless Bridge
Physical Installation
NOTE: Make sure the screw-washer assembly is in correct order. The split-lock washer
should be in the middle and the flat washer should touch the bracket.
4. Repeat Step 3 for the lower mounting hole on the other side.
5. Finger tighten the hex bolts.
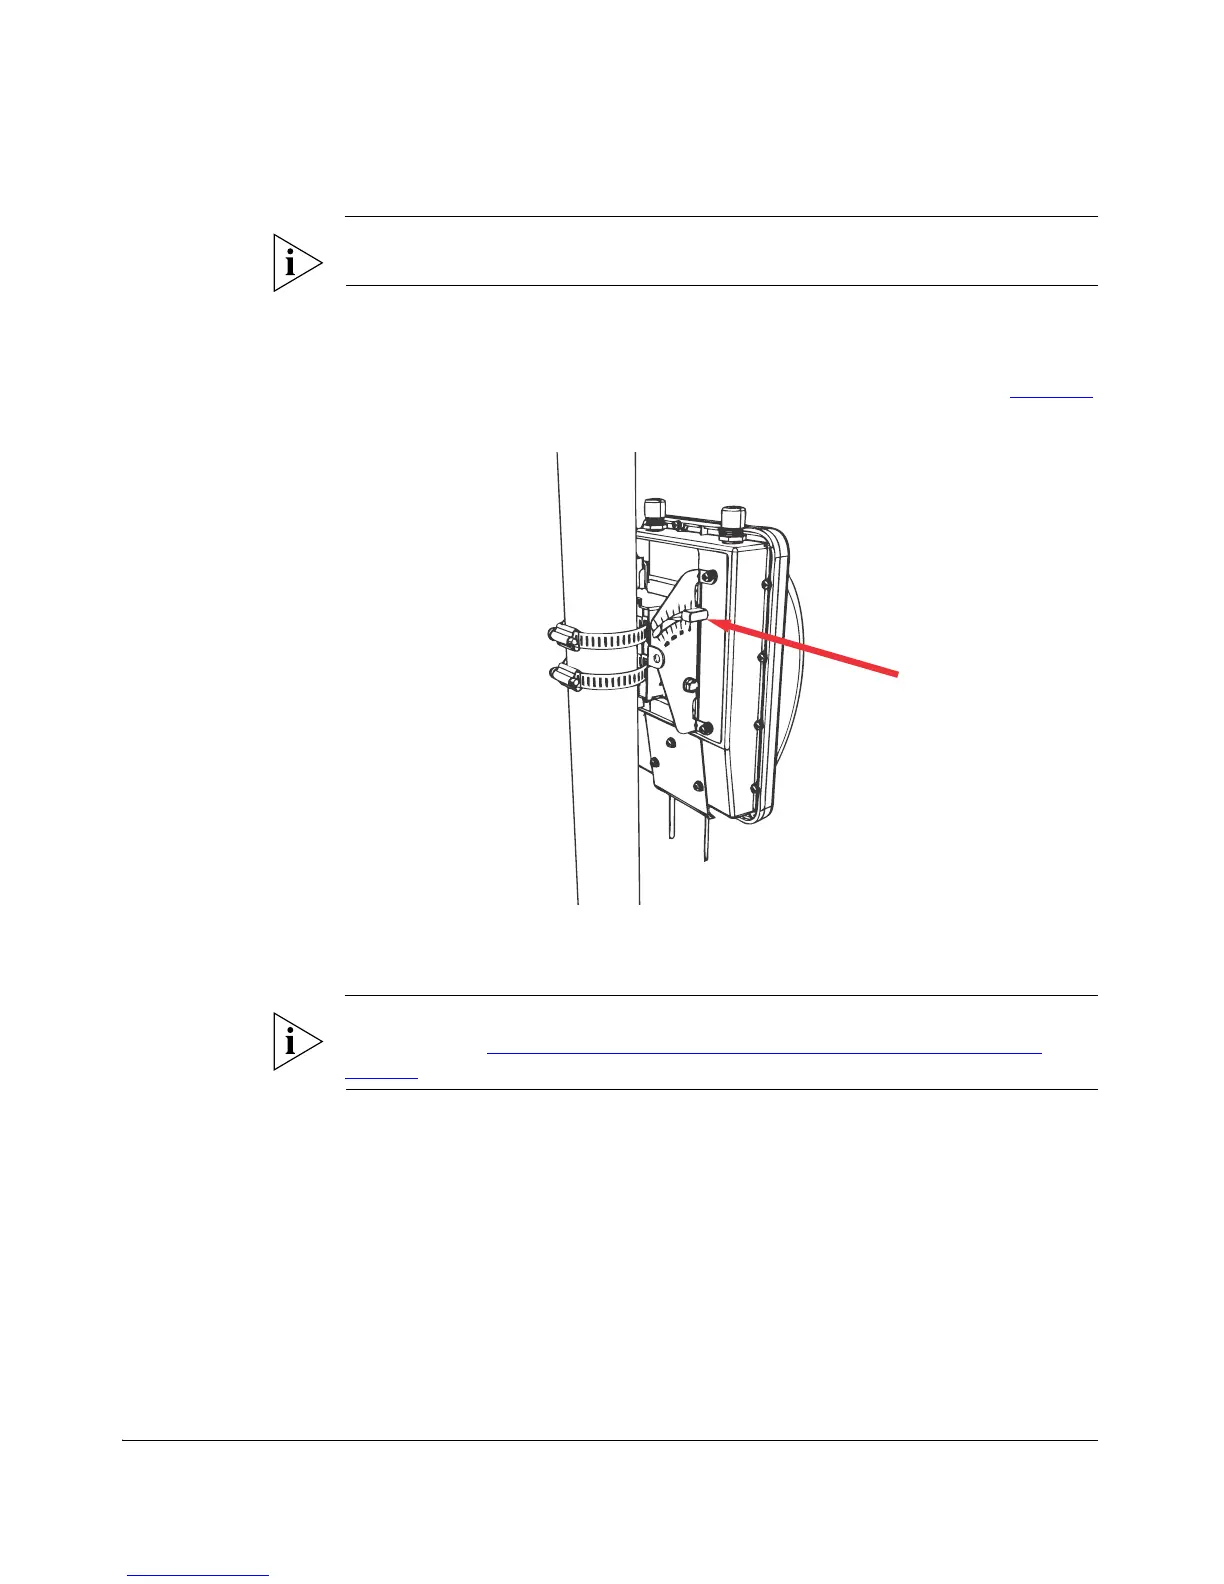
6. Insert the two thumb screws into the upper mounting holes as shown in Figure 42
.
Figure 42. Insert thumb screws into the upper mounting holes
7. Finger tighten the thumb screws.
8. Adjust the Wireless Bridge to your desired orientation.
NOTE: If you have not yet determined the optimal orientation for your Wireless
Bridge, refer to “Determine the Optimal Mounting Location and Orientation” on
page 25 for orientation guidelines.
9. Using a 10mm ratchet wrench, tighten the hex bolts to fix the Wireless Bridge’s
orientation. Screw torque value must be 0.7 N-m ± 0.1 N-m.
You have completed mounting the Root Bridge. Perform the same procedure for
mounting the Non-Root Bridge.