611
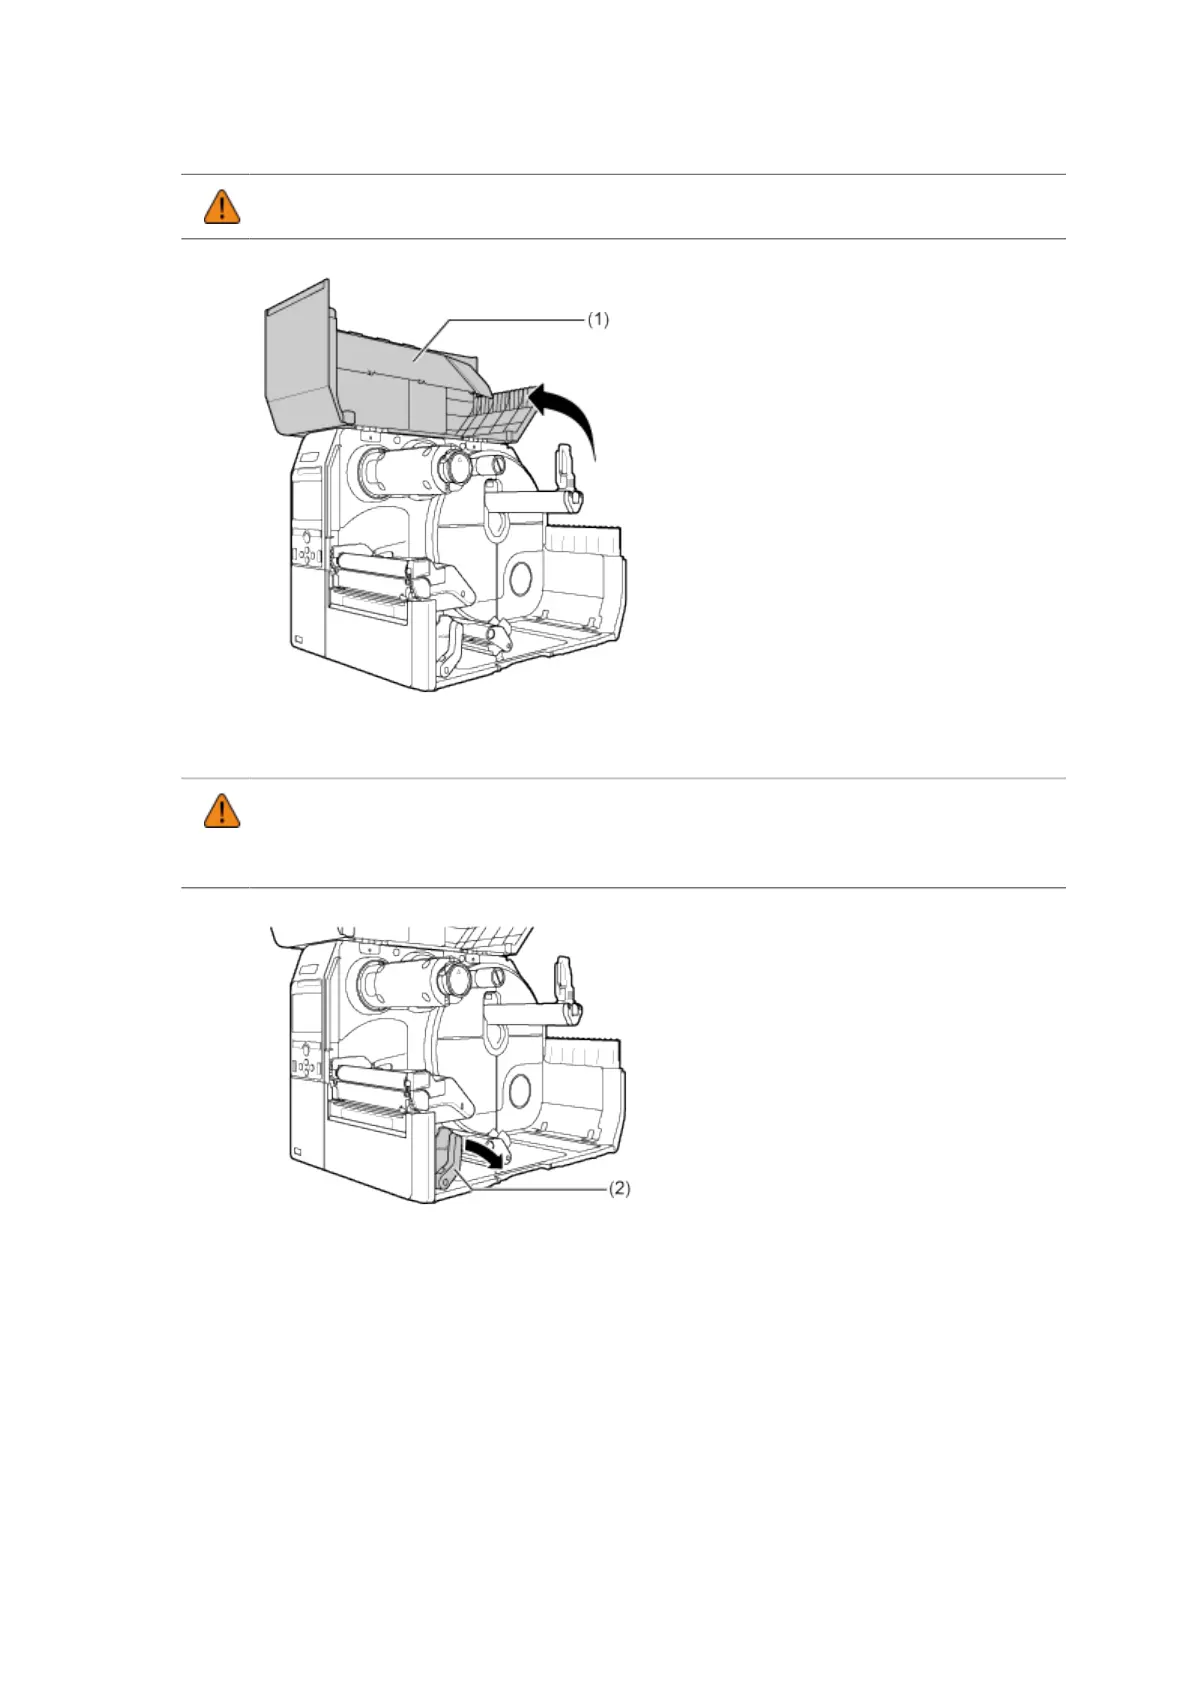
• Open the top cover fully to prevent accidental drop of the cover.
9. Push the head lock lever (2) towards the rear to unlock the print head.
• The print head and its surroundings are hot after printing. Be careful not to touch it, to
avoid being burned.
• Touching the edge of the print head with your bare hand could cause injury.
10. Adjust the position of the RFID antenna. Rotate the dial (3) to align the pointer ▼
(4) with the media being used.
When [Antenna Pitch] is set to [Standard] in the [Interface] > [RFID] menu, adjust the physical
position of the antenna according to the settings required for the specific media and inlay used.
Refer to the "Antenna Position" of the Inlay Placement & Configuration Table in the CL4NX Inlay
Configuration Guide.
To see the CL4NX Inlay Configuration Guide, access the following URL: