– 67 –
Scanreco – Service Manual G6 Radio Remote Control System
STEP 4: Replace the broken parts.
When the bottom section has been removed from the top section, the transmitter is ready for
maintenance work. Use the following recommended tools to replace the broken parts:
• Soldering pen
• Scalpel
• Wrench
• Screwdriver with a Philips PH2 bit for actuators,
display, radio module and main board.
WARNING!
• When replacing broken parts, only use original spare parts from Scanreco.
• Always replace broken parts with the same component that was installed from factory.
Do not modify the transmitter by installing other similar parts.
!
STEP 5: Visual inspection.
• Check the inside of the product for moisture, dust, or foreign objects.
• Make sure that no cables are pinched.
• Make sure that the gasket is not pinched.
• Make sure that all actuators are firmly secured and not loose.
8.2.4. Assembly
When the broken parts have been replaced the transmitter must be assembled. A general
step-by-step guide is presented below for best practices when assembling the transmitter.
Follow the steps to avoid parts and product damage.
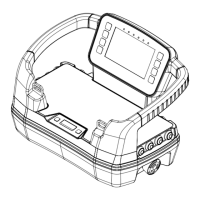
STEP 1: Place the top section upside down.
1. If the protective frame was removed from the top section during maintenance, you must
assemble the two parts.
a. Make sure that the transparent gasket that is attached to the display cable is fitted
tightly to the top section when you assemble the two parts. For systems without
LED or Color display make sure that the rectangular rubber gasket is tightly fitted.
2. Make sure that the top section is stable by placing it upside down. The protective frame
is still loose from when you disassembled the transmitter.
STEP 2: Connect the cables.
1. Connect all cables to the correct connection terminal. For more information on where to
connect the cables on the main board see chapter 4.3. Transmitter Main board.
2. Make sure that all cables are securely connected.
 Loading...