3 Initial Preparation
3.1 Start-up and Initial Preparation
Page 22
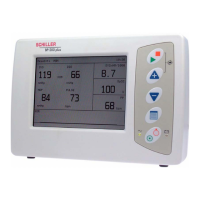
BP-200 plus
Art. no.: 2.510701 rev.: c
3 Initial Preparation
3.1 Start-up and Initial Preparation
3.1.1 Location
• Do not keep or operate the unit in a wet, moist, or dusty environment. Avoid expo-
sure to direct sunlight or heat from other sources.
• Do not allow the unit to come into contact with acidic vapours or liquids.
• The BP-200 plus should not be placed in the vicinity of X-ray or diathermy units,
large transformers or electric motors. It must also be positioned at least one metre
from the mains supply.
3.1.2 Mounting
An optional mounting kit is available if required. Attach the mounting frame to the back
of the unit with the supplied screws and mount the unit as desired.
3.1.3 Connection of Cable Assemblies and Ancillary Equipment
1. Connect the dc power cable from the transformer to the rear of the unit. Plug the
mains transform into the mains socket.
2. Connect air hose from the cuff to the air connection on the back panel. Connect
the microphone connector.
3. If a backup power supply is required, insert 4 AA batteries (we recommend
rechargable batteries because of the greater capacity) in the battery
compartment on the back of the unit.
4. If required, insert the head phone plug in the head phone connector.
5. For ECG / SpO2 model options:
– Connect the SpO2 sensor connector to the back panel.
– If running a stress test in standalone mode, connect the ECG cable to the side
connector
V Danger of electrical shock. Do not operate the unit if the transformer earth
connection is suspect or if the mains lead is damaged or suspected of being
damaged.
The BP-200 plus does not have an internal battery charger. It is therefore recommend
that the rechargeable batteries are kept in a charger unit until required by the BP-200
plus.