4 Blood Pressure Measurement
4.1 Applying the Cuff
Page 28
BP-200 plus
Art. no.: 2.510701 rev.: c
4.1 Applying the Cuff
1. Select the appropriate cuff size according to the patient's upper arm.
Three cuff sizes are available as follows:
Note: Cuffs S and L are available as optional accessories.
To fit arm size
Midpoint Arm Circumference (cm)
Cuff Designation
18 - 26 S (Small Adult, Child)
25 - 35 M (Adult)
35 - 45 L (Large Adult)
Note: Too small a cuff for the patient may give over measurement.
Similarly, too big a cuff may give under measurement.
2. Uncover the left upper arm of the patient. (The cuff is especially designed to fit
the left upper arm).
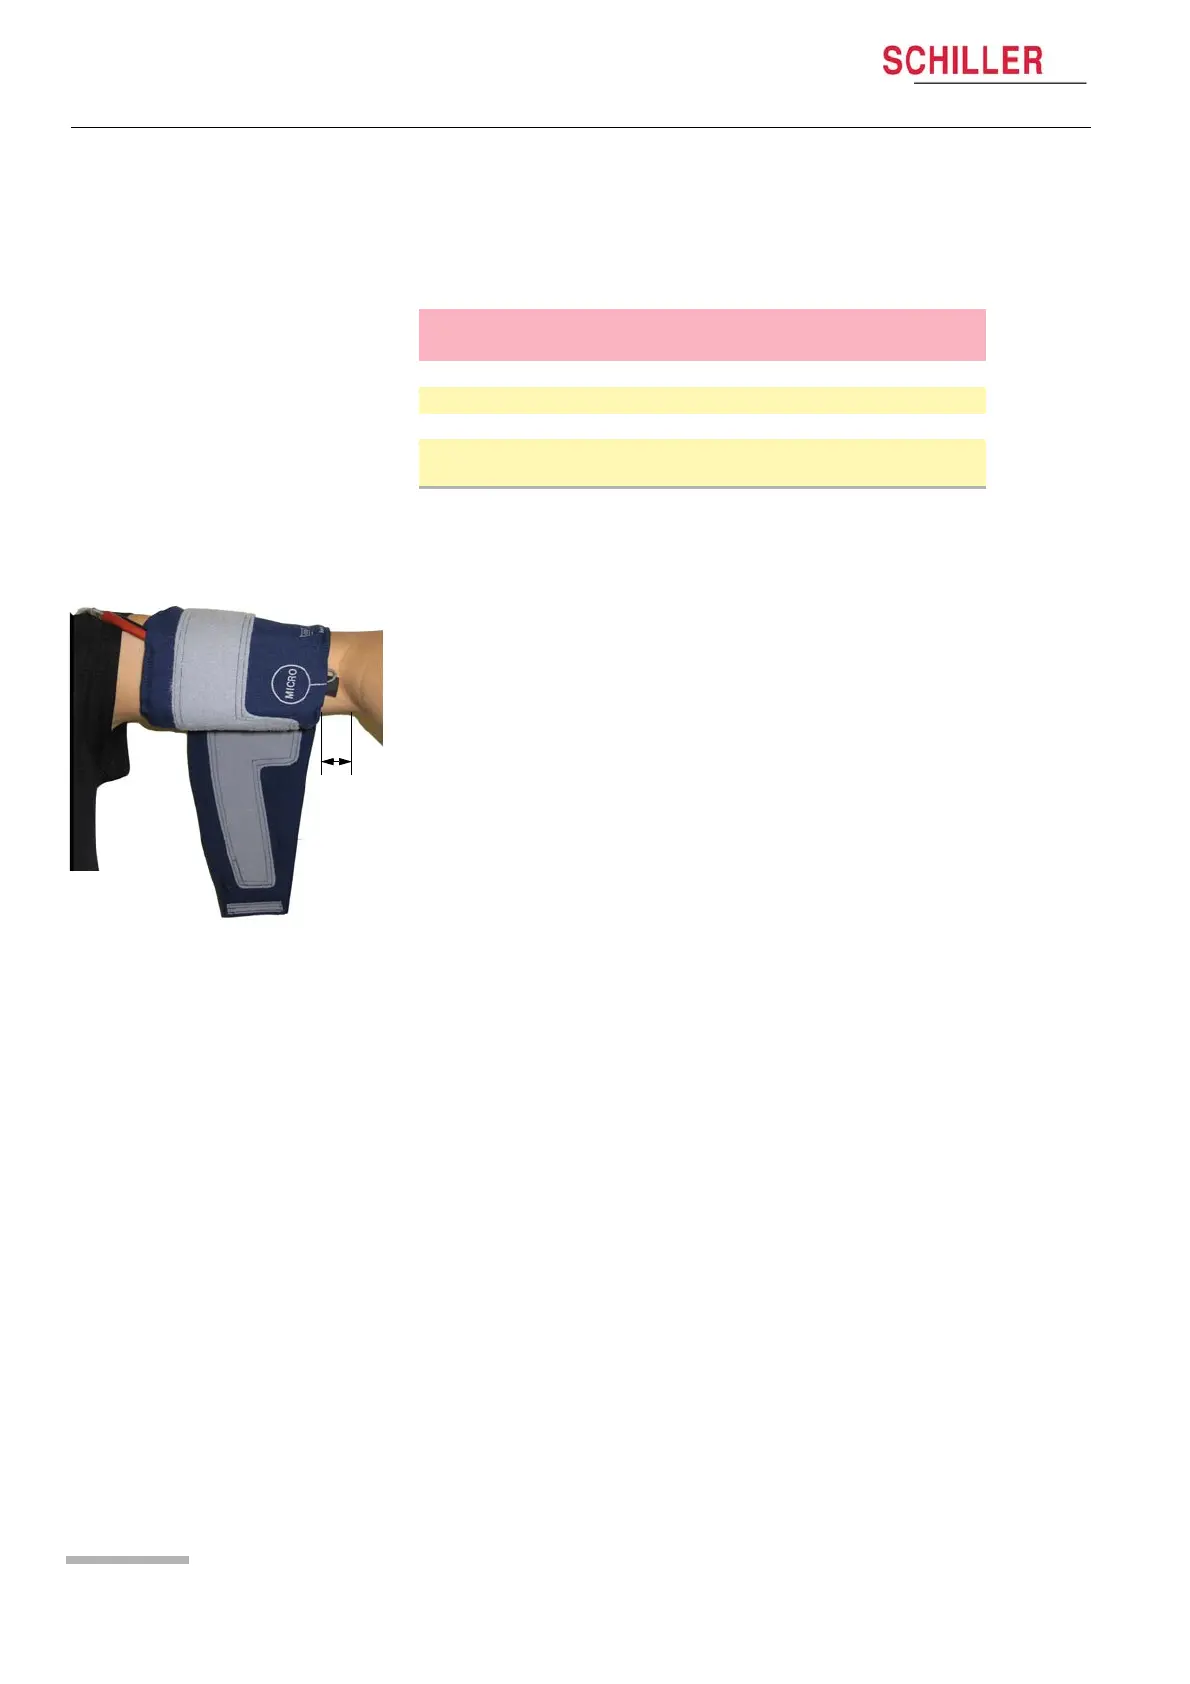
3. Locate the brachial artery above the elbow bend inside the upper arm.
4. Position the microphone (marked Micro) over the brachial artery and secure cuff.
– Wrap the cuff around the upper arm in such a way that the patient can still bend
arm (the bottom edge of the cuff should be 2 cm away from the elbow bend).
– Tighten the cuff and close it with the fixation wrap. The cuff must be tightened to
such an extent that it fits properly on the upper arm and is prevented from mov-
ing.
– To avoid a venous congestion don't tighten the cuff too firmly.
– The pressure hose and microphone cable must point to the patient's shoulder.
5. Place the pressure hose so that it is loosely positioned behind the patients neck.
6. If not connected, connect the pressure hose and microphone cable (if applicable)
to the recorder (see page 16).
7. Ensure that there is enough slack not to strain the hose when the patient moves.
Ensure that the patient is comfortable.