Maintenance
70 14.00 | SRU-plus 20 - 60 | Assembly and Operating Manual | en | 389443
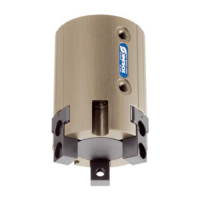
8.7.4 Dismantling and assembling rotary actuator (EDF)
1. Ventilate rotary actuator.
2. Remove all air connections, }5.2.2 [/29].
3. Remove all energy lines, }5.2.3 [/31].
4. Unscrew screws (13) and remove both stop covers (12).
5. Unscrew screw (7) on stops "C" and "D" (8) one turn.
6. Unscrew screw (6) of the limiting sleeve.
7. Unscrew stops C and D (8) and in doing so retighten screw (7)
until the centering housing (5) can be removed.
ð Unscrew both stops (8) evenly in order to prevent the
centering housing (5) from tilting.
8. Mark the installation position of the pinion (15) and the
pistons (4).
9. Unscrew screws (9) and remove flange (10).
10. Unscrew screws (1) and remove distributor plate (2) and
sensor bracket (3).
11. Remove safety ring (11) on pinion (15).
12. Push the pinion (15) out of the housing (14).
13. Take both pistons (4) out of the housing (14).
14. Assemble rotary actuator in the reverse order.
ð Unless otherwise specified, secure all screws and nuts
with Loctite no. 243 and tighten with the appropriate
tightening torque.
ð IMPORTANT!For the variant with electrical feed-through
(EDF), a seal must be placed between pinion and cam
disk and between cam disk and distributor plate.