Date Code 20011026 Communications 3-39
SEL-321/321-1 Instruction Manual
Diagnostic Messages
The first line of the front-panel display may contain a diagnostics message; the second line will
then show the former first line.
Password Access
Press OTHER. A three-command OTHER MENU is displayed: 2AC, BRE, and QUI. QUI
returns the front panel to Access Level 1. With BRE or 2AC displayed, press SELECT and enter
your password for Breaker Access Level or Access Level 2 by scrolling through the set of valid
password characters displayed with the (↑) and (↓) buttons. Use the (←) and (→) buttons to
move the cursor between characters. Use the SELECT button to deposit the selected character in
the password position and advance the active password character. Press EXIT to complete the
password entry and validate the password. If you press CANCEL before the password is
completely entered, the cursor moves to the active password position and you must use the arrow
buttons and the SELECT button to select a new active password character position.
Setting Changes via Front Panel
To make settings from the front panel, you first enter Access Level 2 using the OTHER command
(see Password Access). There are three settings options: SET GROUP (group settings, Table
3.18), SET G (global settings, Table 3.19), and SET P (port settings, Table 3.20). When you
select the setting dialogue, the relay comes up in SET GROUP. Push the Left or Right (← →)
buttons to scroll the change settings options. The following example begins after Level 2 is
accessed.
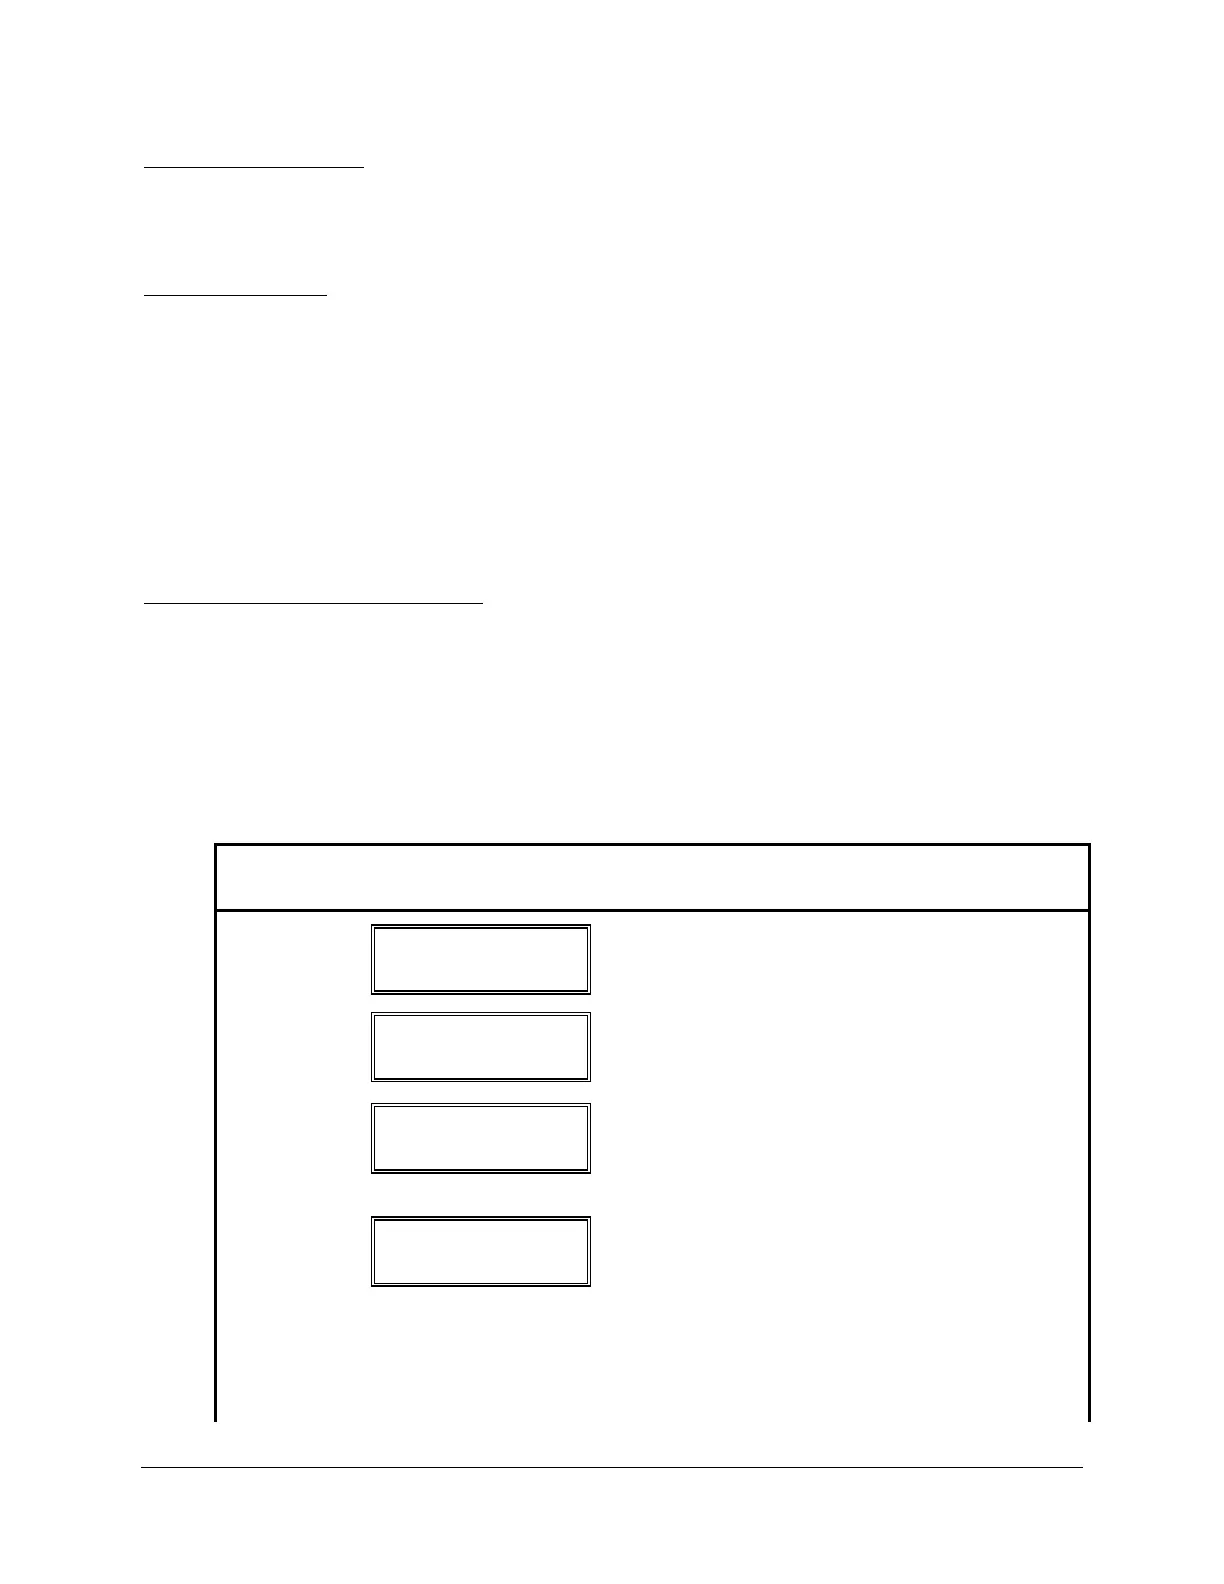
Table 3.18: Set Group Command Description
Button
Pushed
Results Displayed
Comment
SET
SET GROUP
SELECT ↑ ↓ ← →
Pressing SET causes the display to come up in
SET GROUP. Press SELECT to enter the editing
mode for GROUP settings.
SELECT
SET GROUP 1
SELECT ↑ ↓ ← →
The active setting group is shown. Press the (↑)
button to move to higher setting group, or the (↓)
button to go to lower setting group.
↑
SET GROUP 2
SELECT ↑ ↓ ← →
Setting group next higher in order is selected.
When the desired choice is in the display, press
SELECT. See Section 5: Applications for a
complete list of Group Settings.
SELECT
Line Terminal
SELECT ↑ ↓ ← →
Use the (→) or (↓) buttons to move down the list
of settings categories and (←) or (↑) to move back
up the list. Use the SELECT button to select a
settings category. The setting categories appear in
the order listed below.
Line Terminal
Dist Zone Enable
Zones/Levels Dir