User Manual
Chapter 2. Installation
Page 2-10 P/N 2349-72784-00
2.6. Initialization And Configuration
Prior to powering up the IRD-2600 or IRD-2800 Integrated Receiver Decoder, ensure that all
cabling is correctly connected as explained in Section 2.4. Ensure that the unit is connected
to the mains power supply and grounded according to instructions.
2.6.1. Powering Up
Upon power up, you will hear the internal fan commence operation and see the front panel
LCD display activated.
2.6.2. Initialization Sequence
Once the IRD is powered, the unit commences an initialization phase.
IRD Initialization of the IRD includes loading of the embedded system parameters.
The IRD supports QPSK, QAM, G.703, ASI, RS-422, DVB-PDH and DVB-SPI (optional)
inputs. Depending on the selected input, initialization sequences will differ. The initialization
sequence may be monitored via the Front Panel LCD. Status Messages are detailed in the
IRD Operation Guide.
The initialization sequence is detailed in Table 2-6. Prior to initialization, review the IRD
Operation Guide for instructions on how to use and navigate the system menus, and for
explanation of configuration parameters.
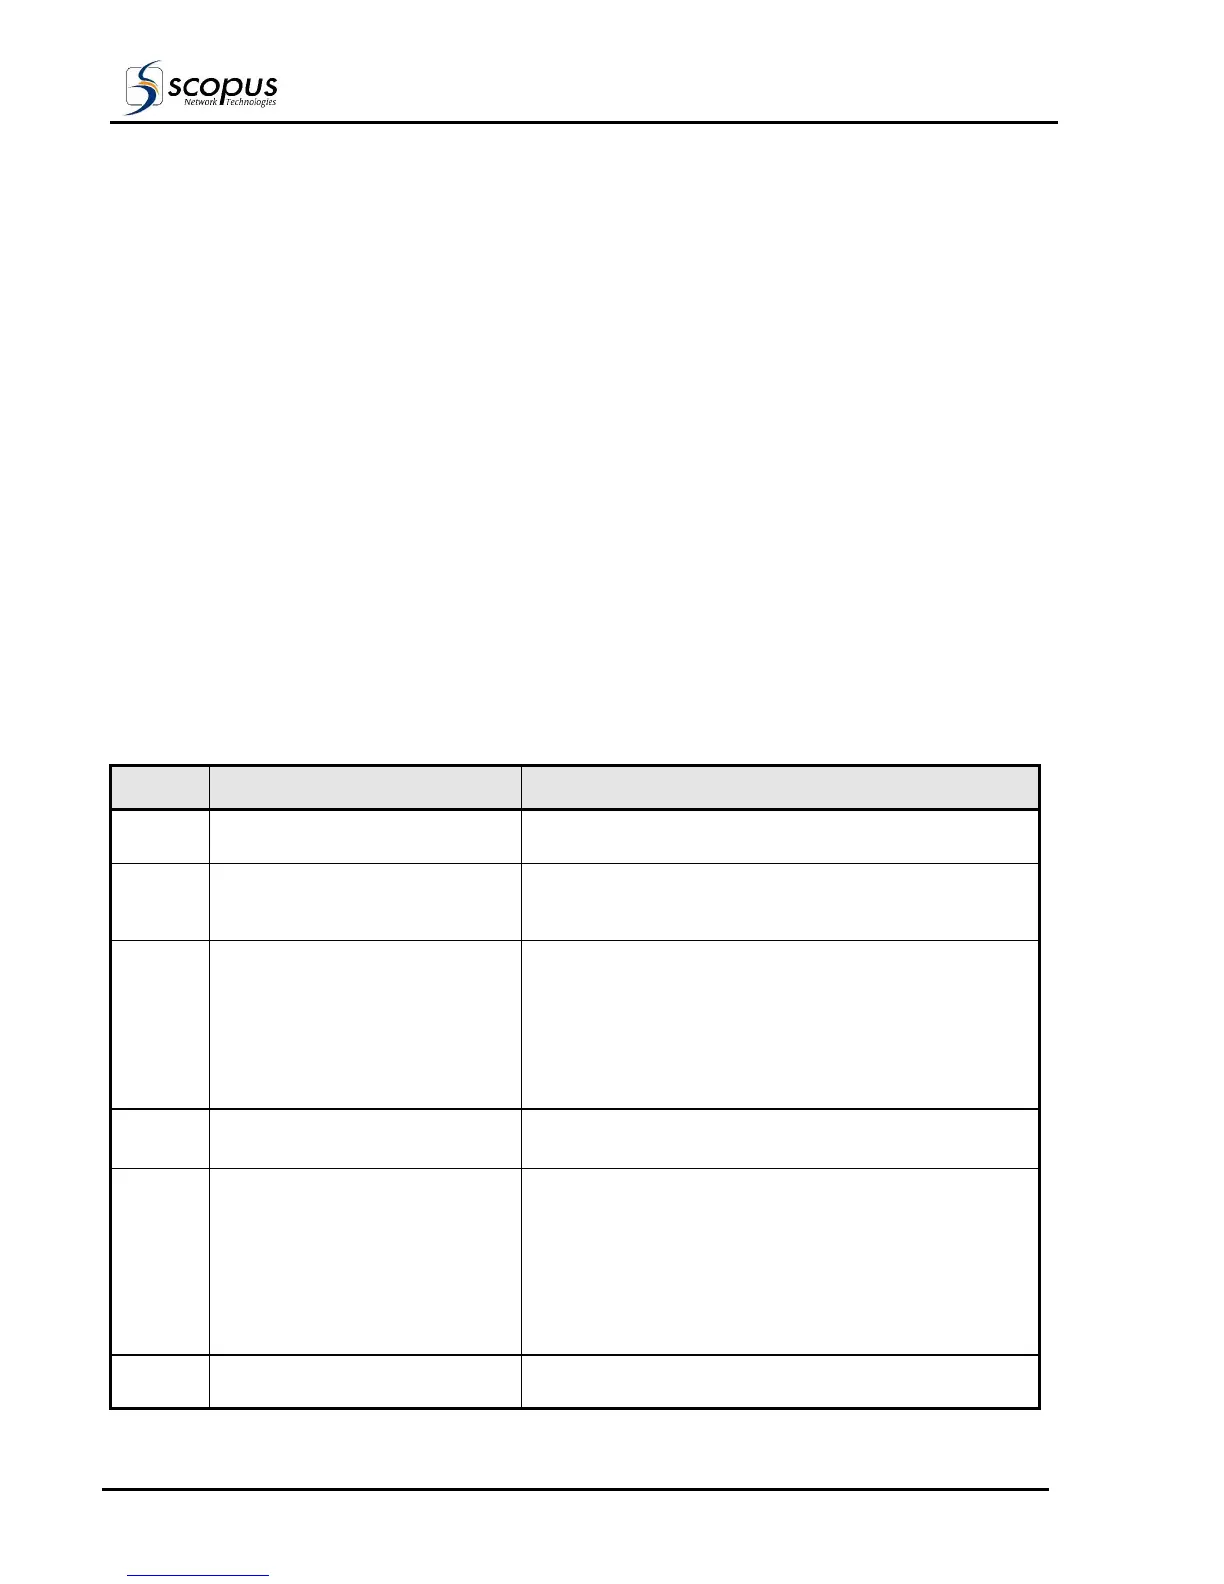
Table 2-6: IRD-2600 / IRD-2800 Initialization Sequence
SEQ. # OPERATION DESCRIPTION
a. MPEG-DVB IRD –
Initializing Please Wait
On initialization, the LCD displays the initialization
message.
b. PASSWORD If a password is defined for system access the enter
password prompt is displayed. If a password is not set
the system will proceed directly to point three.
c. WARNING!
<Warning or Status Message>
WARNING! is displayed, with a message. This message
is normal on first time initialization. See IRD Operation
Guide “Status Messages” for list and definition of
messages.
If the word FAULT! appears, a hardware malfunction is
indicated. Contact the manufacturer for further
instructions.
d. CONFIG STATUS TEST RUN Go to System Menu.
Select the TEST option.
e. TEST
ALL O.K.!
SERVICE: INTERNAL TEST
For instructions on performing tests, refer to
Section 2.6.3 Serviceability.
A successful test result is displayed on the LCD as ALL
O.K.!
Return the Test mode to NONE position to ensure that
the IRD returns to normal operation.
Return to the root menu.
f. CONFIG STATUS TEST RUN Select the CONFIG option. To proceed with
configuration as required.