B-20
© 2014 SeaStar Solutions Optimus 360 Installation Supplement, Rev. B
Before configuring the EST gateway you should have already configured
the PCM (section B.2) and cycled power to the system. If you haven’t
done so, do this now. Note: when cycling the power it is important
that you switch it off for at least ten seconds.
Connect to the CAN2 network with Datalink. If you don’t see the
Main EST Gateway in the Interfaces list, double-click on Optimus
CAN2 under Protocols. Then double-click on Main EST Gateway to
open the interface.
If this is a dual station boat you will see two instances of Main EST
Gateway. Expand the items (click on the plus sign to the left) and
compare the listed serial number with the gateway you are configuring.
It is suggested that you open the interface of the gateway that does
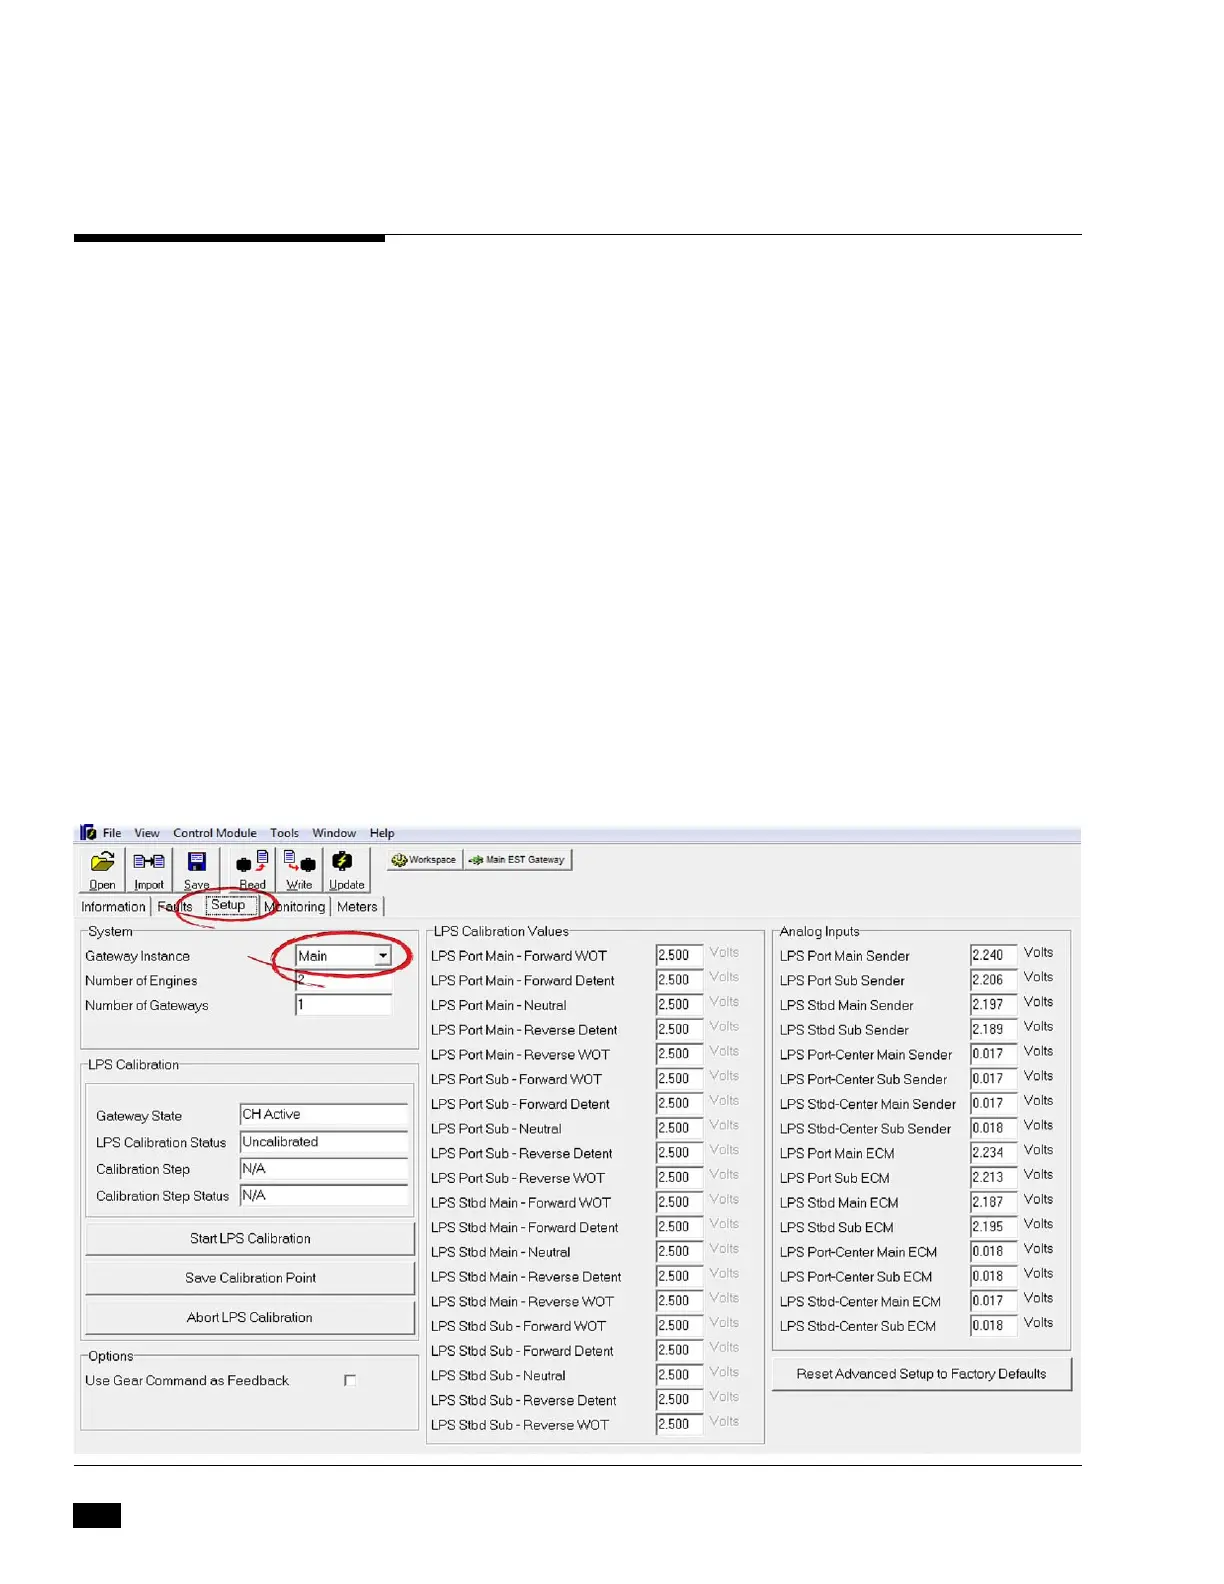
not match, go to the Setup tab, and change the Gateway Instance
(see figure B-19) to Second. Click Write and close the interface.
Now you will see a Main EST Gateway and a Second EST Gateway
in the Interfaces list. This will reduce any possible confusion during
the gateway setup.
Once you are connected to the Main EST Gateway, proceed to Step 1
(section B.6.1).
B.6
Yamaha EST Gateway Setup
Figure B-19. EST gateway Setup tab, showing default values.
 Loading...

