38 •
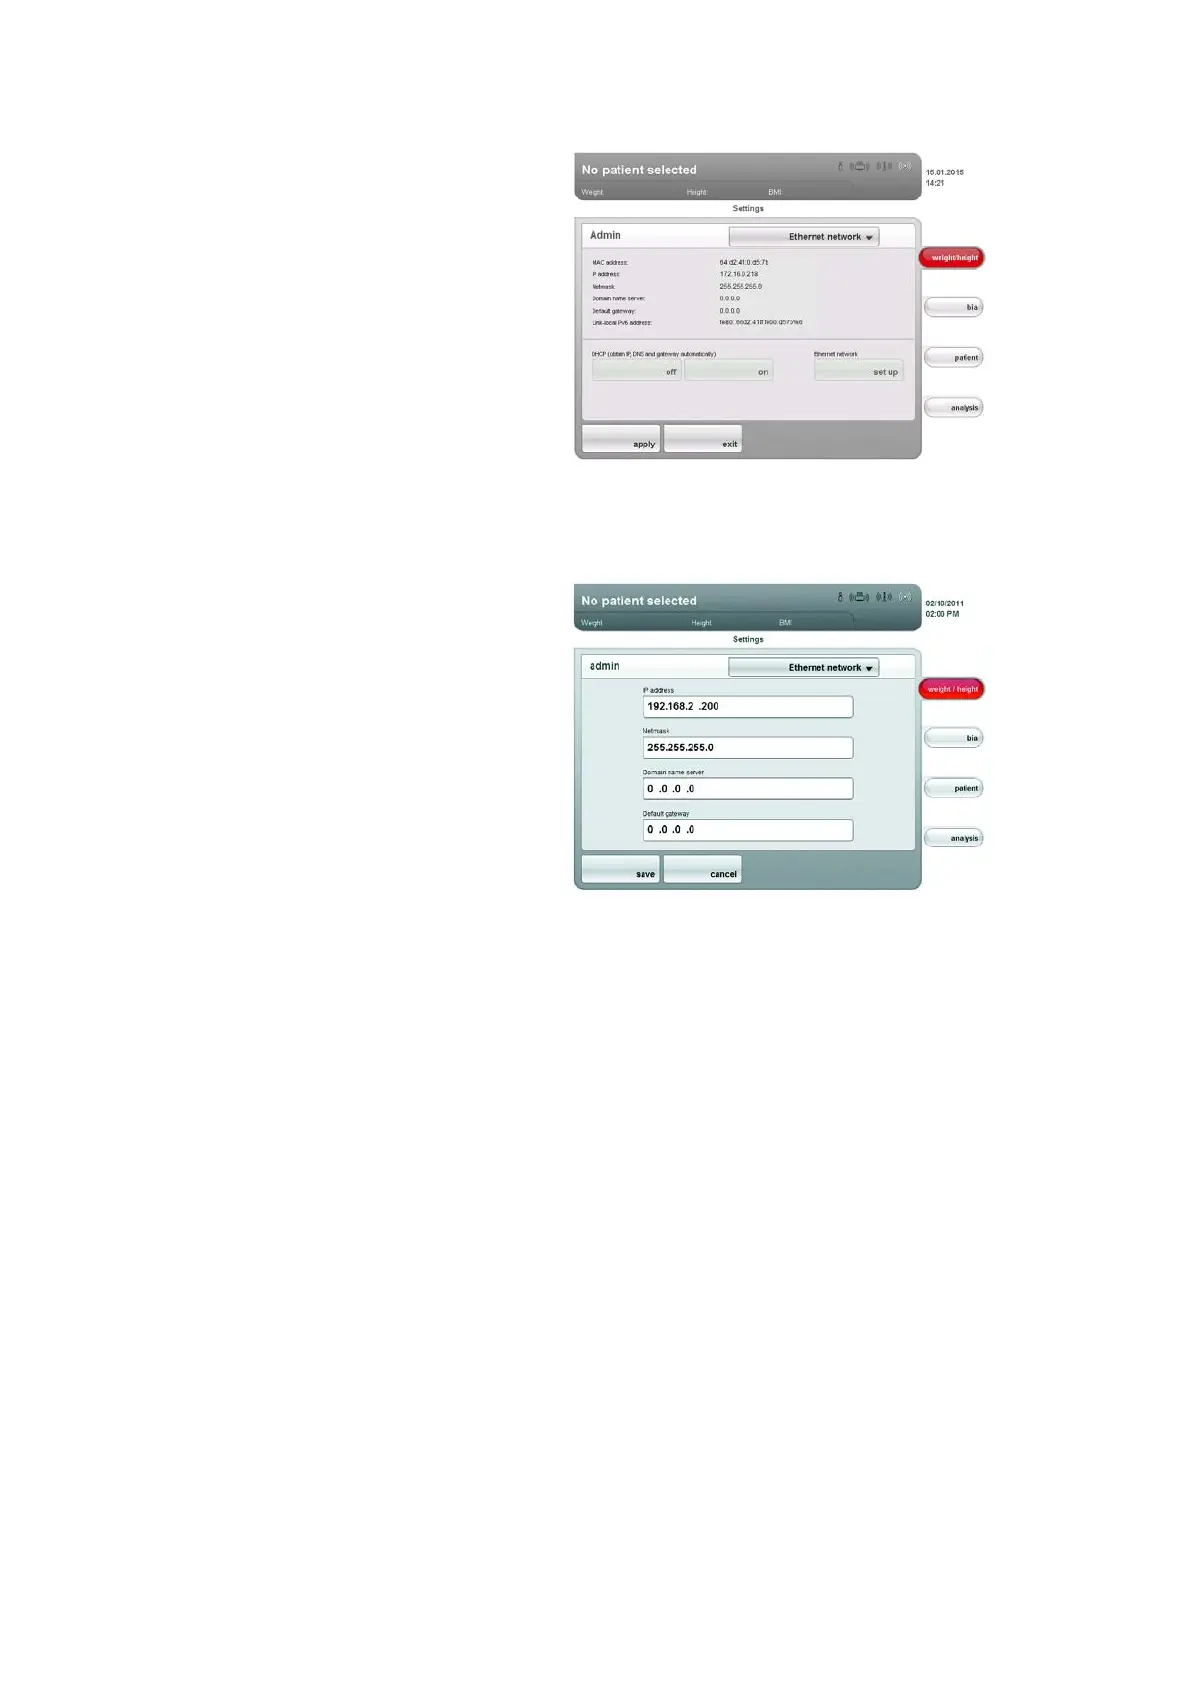
4. In the DHCP line, press the setting to suit your network.
– No DHCP server in the network: off, proceed with step 5.
– DHCP server in the network: on, proceed with step 7.
5. Press the
set up button.
The dialog window for setting up the Ethernet network appears.
6. Make the applicable settings for your network.
7. Press the save button.
The new settings are active.
Setting up seca CLS network (via
Ethernet only)
To enable communication between the device and the seca 115 PC software
via Ethernet, you must link the device to the CLS server and the seca media-
tor service. CLS server and seca mediator service are communication mod-
ules of the
seca 115 PC software.
Once the link to the two communication modules has been set up, the
following functions can be used directly from the device:
• accessing the seca patient database of the
seca 115 PC software
• printing out a detailed results report directly from the device on a PC printer
(the printer is selected in the
seca 115 PC software)
The
seca 115 PC software does not need to be started for this. Only the PC
on which the two communication modules and the seca patient database are
installed must be switched on.