A01350693 Rev:P ECO: 7476 Date: 04/14/08 24
Flush Mount Enclosure (ID Nurse Station Console, A02040901 LED Nurse Station Annunciator)
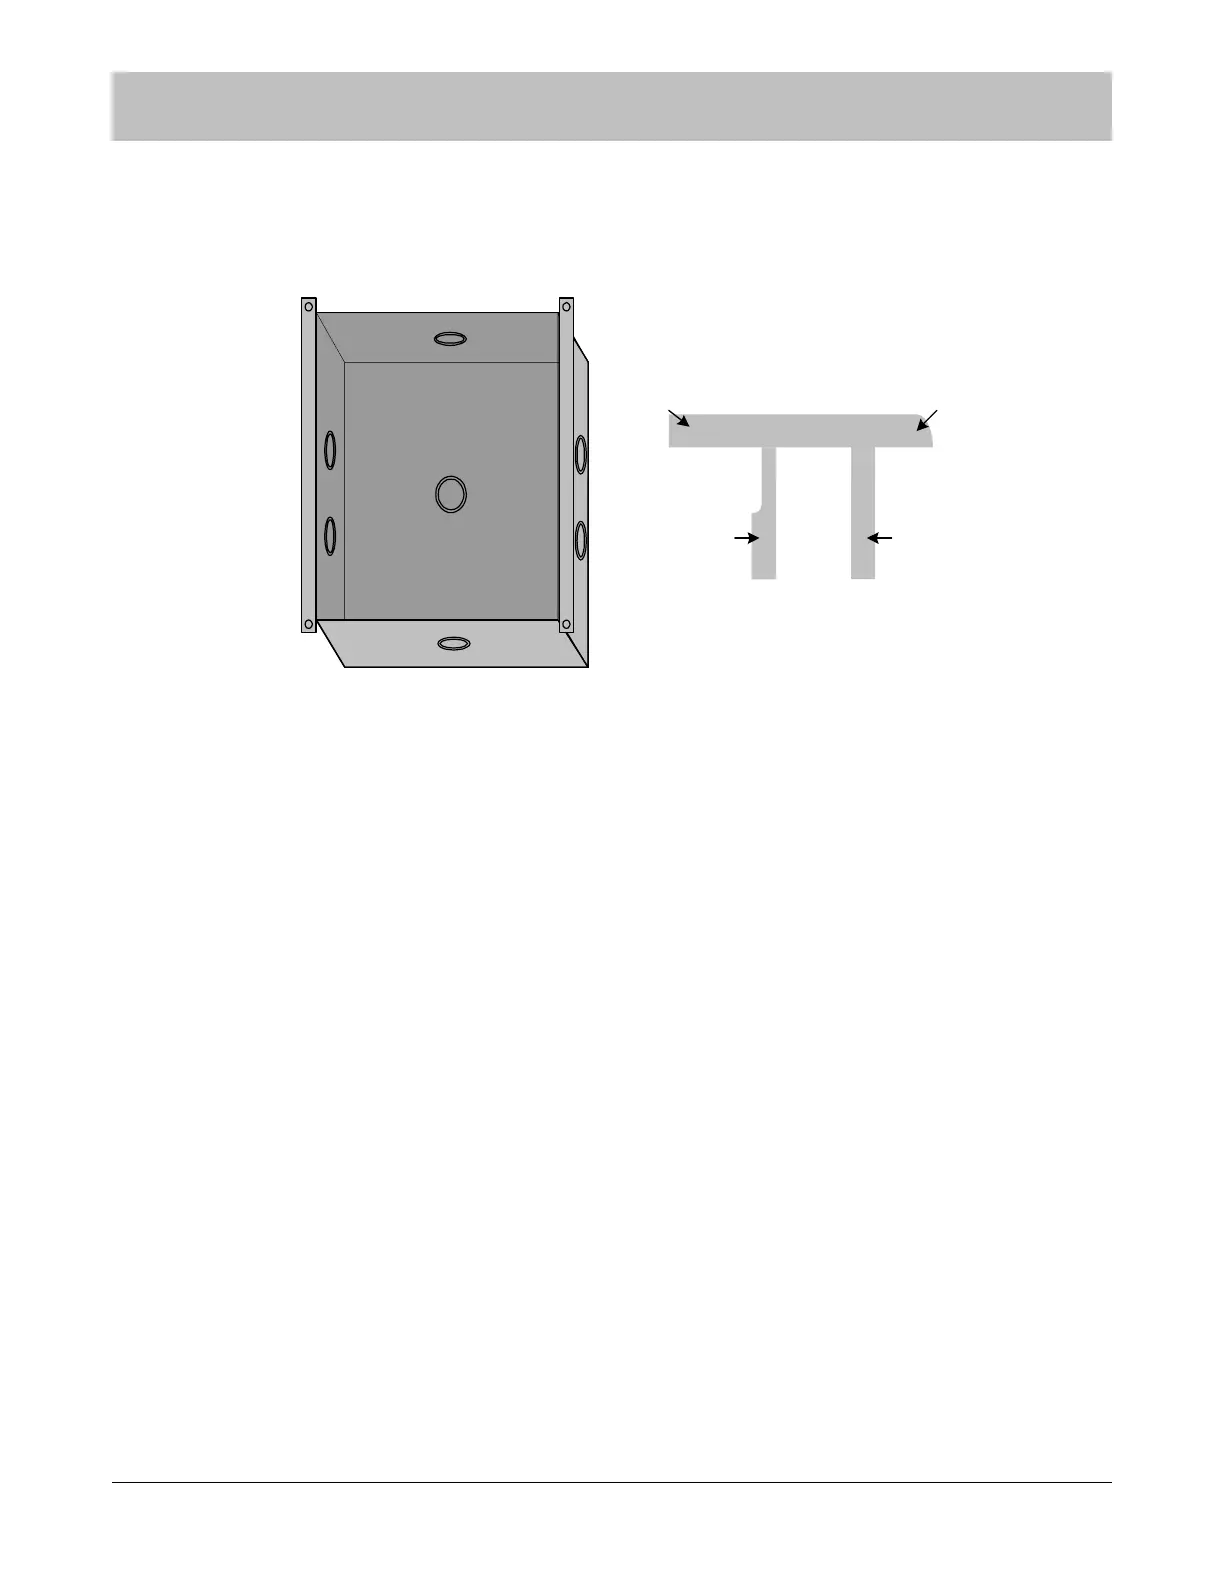
This flush mount enclosure should be mounted in a convenient location for monitoring by facility staff. It mounts easily using the
Madison clips provided. Knockouts for wire entry are available in all four sides and back of the enclosure. Use the strain relief
cable clamp provided for wire entry.
Figure 9-3 Flush Mount Enclosure for Nurse Stations
Use the enclosure as a template and cut a hole in the wallboard for inserting the enclosure. Pull the wires through the cable clamp
and install the enclosure in the wall. A maximum of six wires may be pulled through each ½” cable clamp. Tighten the strain relief
connector around the wires. The wires should withstand 35 pounds of pull force without slipping through the connector. Use the
two Madison clips on the top and bottom to secure the enclosure as follows. Bend end two up at a 45° angle. Insert side one into
the gap (keeping end two up) between the wallboard and the enclosure top. Slide end one of the Madison clip left or right until clip
meets the far extent of enclosure hole. Keeping outward pressure on the Madison clip, bend tab one and tab two 180° into the
enclosure and flatten with pliers. Follow the same procedure on the bottom of the enclosure with the second Madison clip, but slide
the clip to the opposite side of the enclosure hole and keep end two down.
NOTE: Strain relief of routed cables is required to retain UL product listing. If above
instructions are not followed, product listing is subject to removal.
SECTION 9 INSTALLATION AND CONNECTIONS
End Two
End One
Side One
Tab One
Tab Two
Madison Clip