Portable X-ray Units
Service Manual
SM-1076R2
25
3.2.4 AUTOCALIBRATION
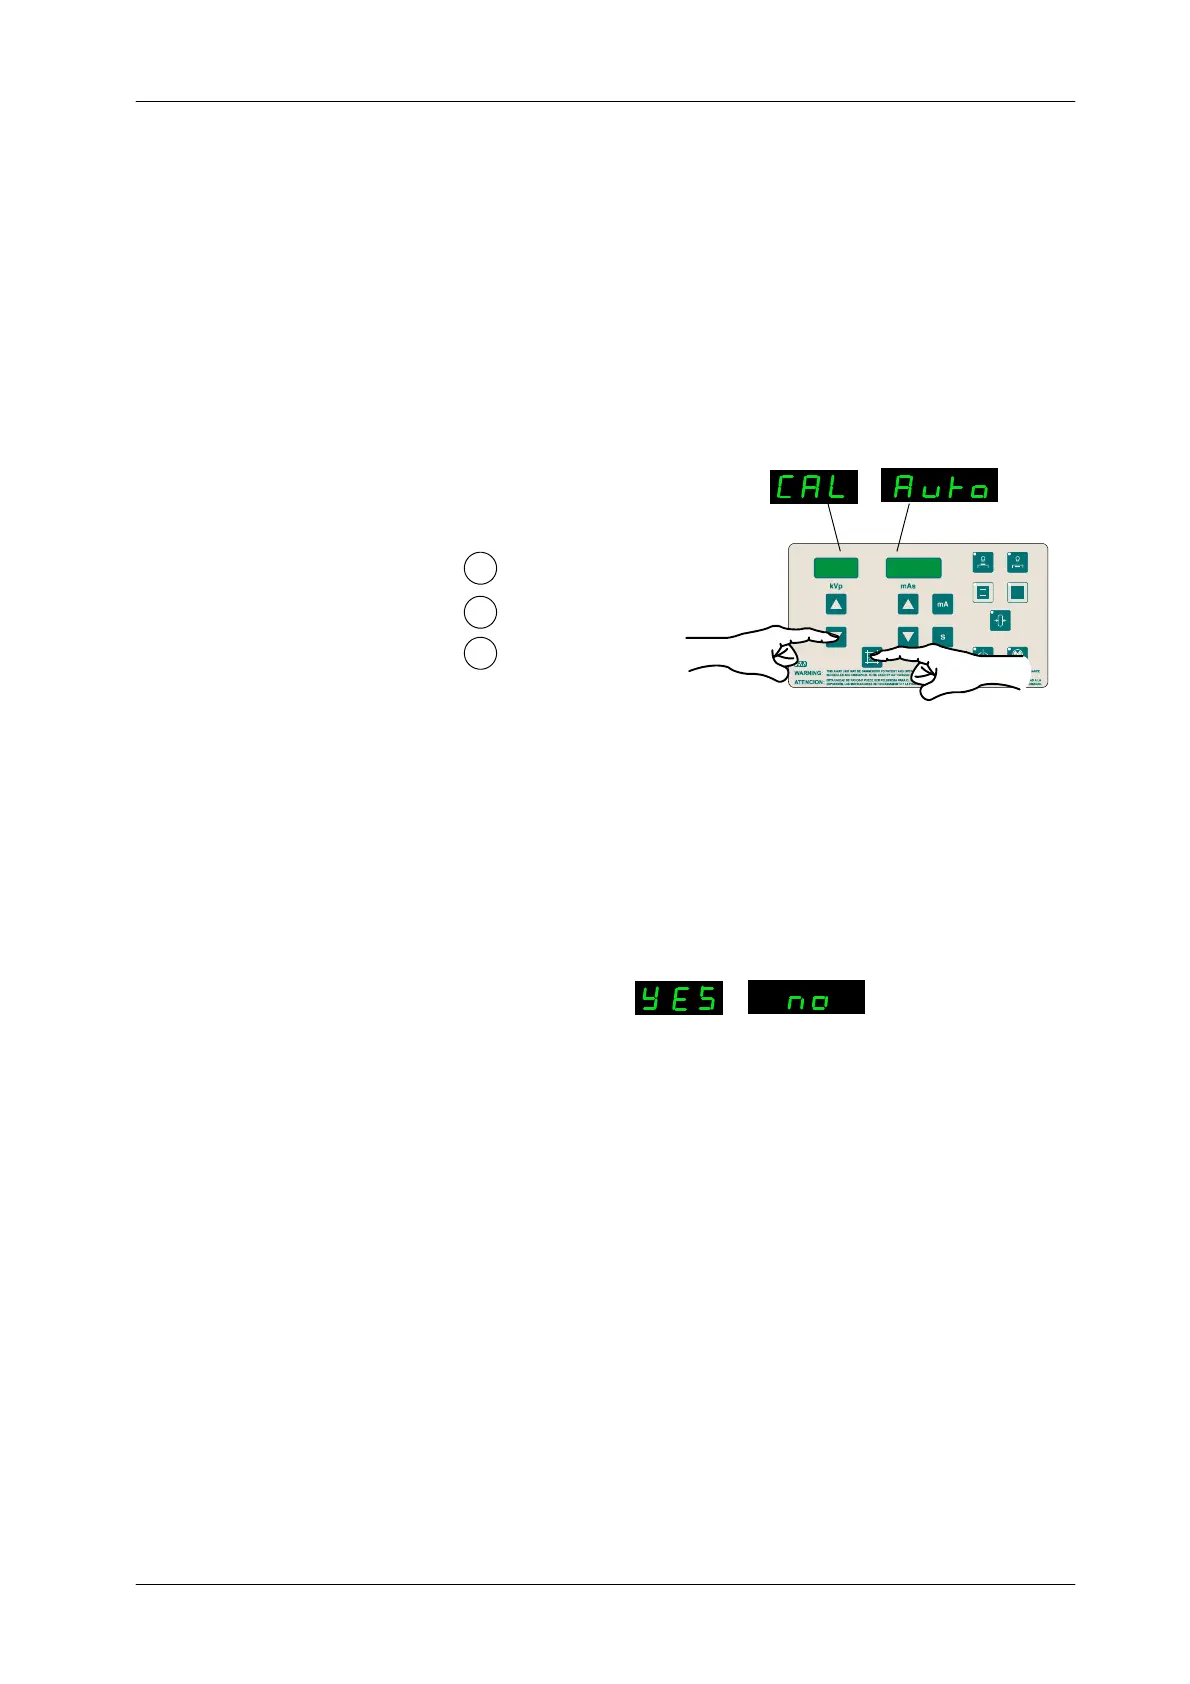
1. Select Large Focal Spot.
2. To enter Autocalibration, press and hold “Collimator Light” push-button
and then press and release “kVp Decrease” push-button (two beeps
sound). The text (CAL Auto) appears on the displays while “Collimator
Light” is pressed. Then release “Collimator Light” push-button.
kVp
mAs
1
2
Press and hold Collimator Light
Press and release k Vp Decrease
Release Collimator Light
3
3. Double check that the Large Focal Spot Led is On. The Displays show
(YES no). Press “kVp Increase” push-button to select “YES” (to select
“no” and exit Autocalibration process, press “mAs Increase”
push-button).
kVp
mAs
Double check the selected Focus
4. To start the Autocalibration process, press “Prep” and then press and
hold “Exposure” with the Handswitch (or the corresponding push-buttons
on the Control Console).
Be prepared to write down the Autocalibration data in Table 3-3.
The Unit starts a series of exposures, a maximum of 20 in order to start the
process and a maximum of 10 in order to find each mA Station. The kVp Display
shows ( n20) in a countdown sequence (a.e. n19, n18, n17...), or (n10) in a
countdown sequence (a.e. n9, n8, n7...) until the Unit finds all the mA Stations
for that Focal Spot. It may not be needed to perform all the exposures.
Once a Station is found, a long bip sounds and kVp display shows the
Calibration value for that mA Station. Then the process goes on with the
following mA Station, until all mA Stations are Autocalibrated. The Displays
show (End Auto).
 Loading...