DVR Setup
700-1014 R002 2–7
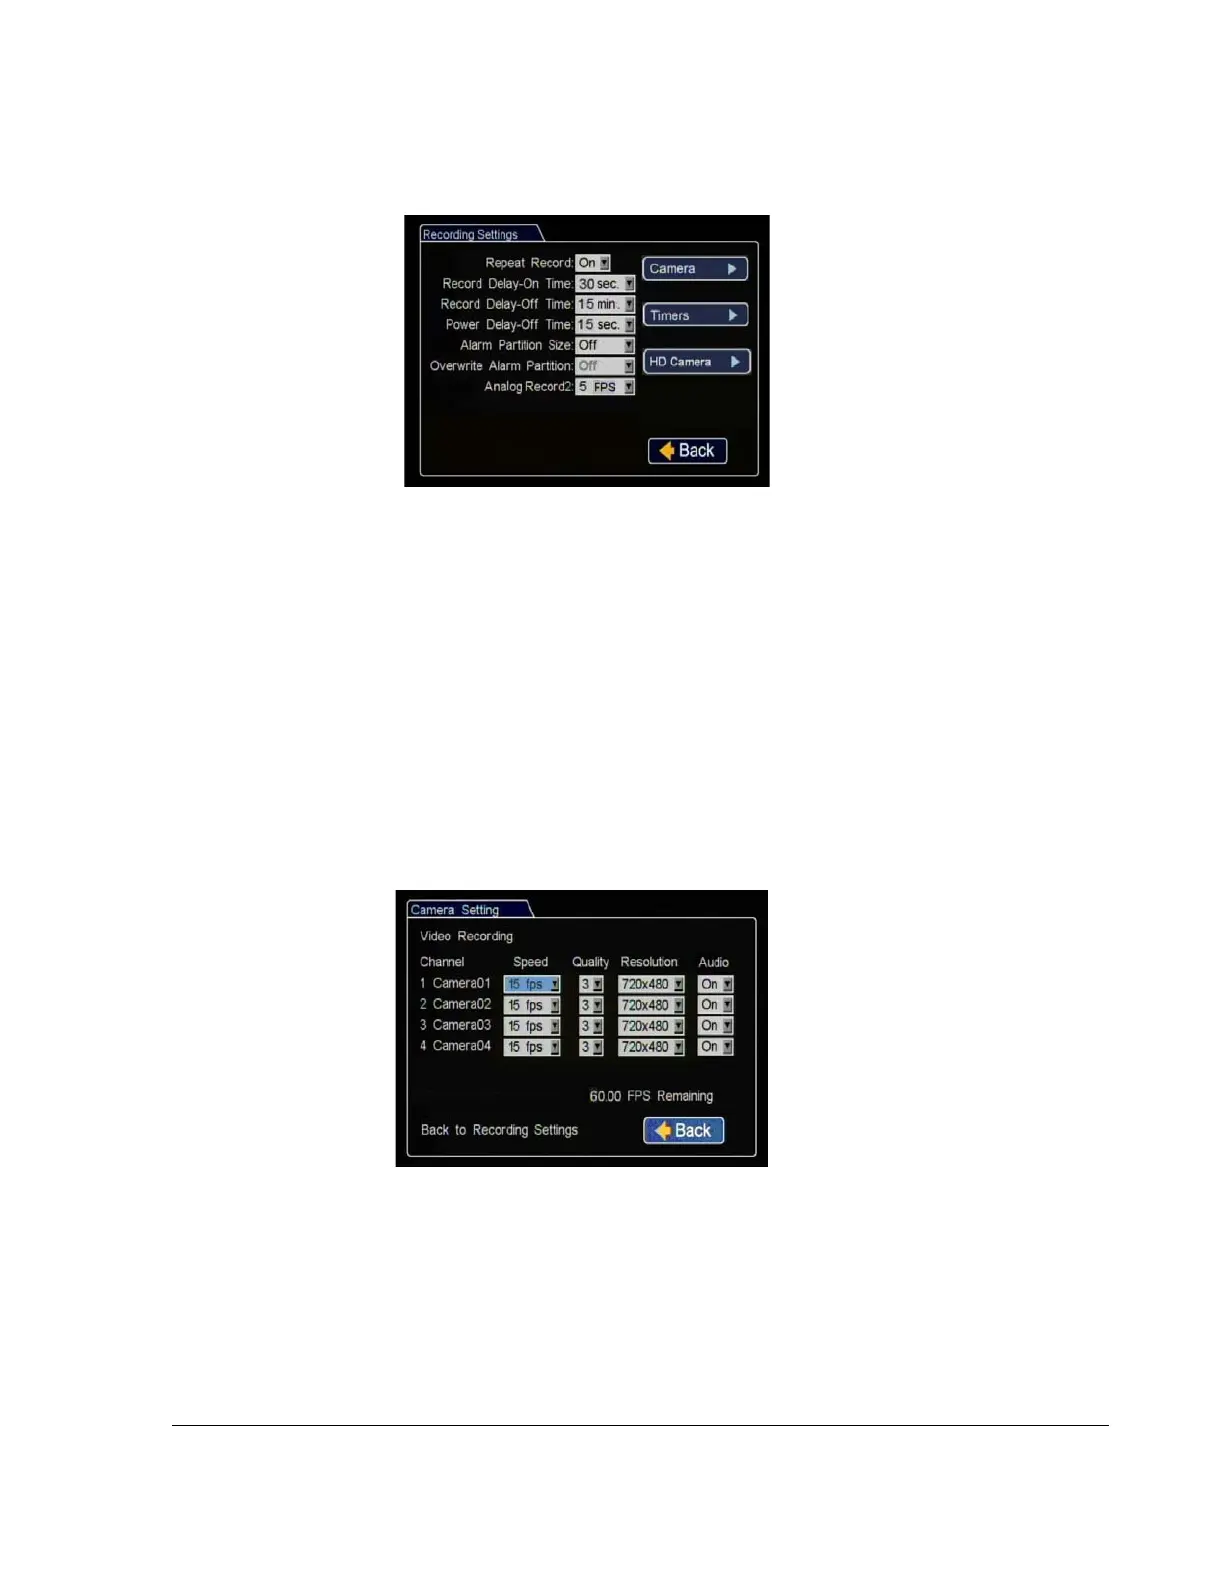
11. In the Record menu, set up record and power delay timers.
12. In the Recording Settings menu, click Camera. Set the recording parameters for
each camera here.
Repeat Record
:
Leave at default for
the hard drive to loop and record
over the first recordings when it is
full.
Record Delay On Time
: This sets
the time period from when ignition is
turned on until the DVR starts.
Leave
at default to let the bus voltage settle
after the bus starts up to prevent
voltage drops affecting the DVR.
Record Delay Off Time
:
Set to 10-20 minutes to keep the DVR and cameras on
after the ignition turns off to record the bus post-trip check.
Power Delay Off Time
:
This delay begins after Record Delay Off time ends.
This sets the time delay from the record delay till power is shut off. During this
time the cameras are turned off and recording is stopped. If Wi-Fi is used, set to
2 hours or more. If no Wi-Fi, leave at default.
Alarm Partition Size: Leave Off unless instructed otherwise.
Click Back to save the menu settings.
Figure 2-10
Recording Settings Menu
New titles will display here as well
as in the play view overlays.
Speed
: Leave the channel speed at
default settings unless you have
special requirements. Set any unused
cameras’ speed to Off, so the DVR
will not generate video loss events.
Resolution
: Leave the channel
resolution at default settings unless
you have special requirements.
Quality
: Leave the channel quality at default settings unless you have special
requirements
.
Audio: Leave audio settings On unless the camera is mounted on the exterior of
the vehicle or if you have special requirements.
Click Back to save the menu settings.
Figure 2-11
Camera Settings Menu
 Loading...


