Setting
the
clock
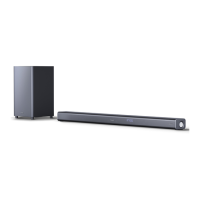
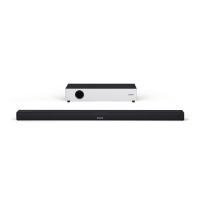
SD-AT50
DX-AT50
Note:
You can set the clock even when the system is
in
the stand-by mode.
To
confirm
the
time
display:
Press the DISPLAY button.
The time display will appear for about 5 seconds.
\ I /
".",
,,',
II
-,.
--'L'
-
r-"
I
, I ,
\ I / \ I /
-
".,-=t,,-
""11-
--'·L,L'
r-"
I
, , , ,
l
4 Press
the
A
or
~
button
to
adjust
the
minutes
and then
press
the
ENTER l
button.
'--------r-------t-~-------/
3 Press
the
A
or
~
button
to
adjust
the
"AM 12:00" is 12 o·clock midnight.
hour
and then
press
the
ENTER
but-
"PM 12:00" is 12 o'clock noon.
ton.
• Press the A or
~
button once to advance the time by 1 hour. Hold it down to
advance continuously.
• The 12-hour display will appear.
• "AM" will change to "PM" automatically.
• Press the
A or
~
button once to advance the time by 1 minute. Hold it down
to advance continuously.
• The hour will not advance even if minutes advance from "59" to "00".
• The clock starts from "0" second. (Seconds are not displayed.)
• The display returns to normal after approx. 2 seconds.
Caution:
Unplugging the DVD player and the subwoofer/amplifier unit or a power failure will
clear the clock setting.
Readjust the clock.
To readjust
the
clock:
Perform "S
e
tting the clock" from the beginning.
•
In
step
1,
the time will be displayed.
• Follow steps 2 -
4.
',TI
II
II-T
r-,~,
_ILl
--, ,
\ \ I I I I /
l
~
--...+-'--+,._'
-+l1--+,---+-,t
__
,---+,,"_I,/~_1
_ -
Ir-
·LILI
.J
, I I I I \ ,
DISPLAY
~
..........
_~--,
2
Within
5 seconds,
press
the
ENTER
button.
1 Press
the
DISPLAY
button.
In
this example, the clock is set for 9:30 AM.
[Front]
By setting the AV control unit
on
time, you can use it not only as a clock but also for
timer playback.
E-24