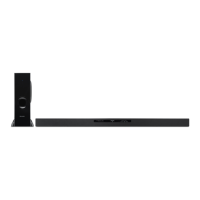
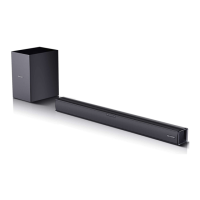
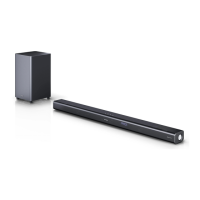
• Label side
• Cote etiquette
• Lado de etiqueta
tray
.Tiroir
• Bandeja de discos
• Slide the disc into the hooks. (A 3
11
(8
cm) disc cannot be played.)
•
Mettre
Ie
disque
dans
les
crochets.
(Un
disque
de
8
cm
ne
peut
pas
etre
lu.)
•
Deslice
el
disco
hacia
los
ganchos.
(No
se
puede
reproducir
un
disco
de
8
em.)
1 Press the FUNCTION button
to set the input
to
"OVO".
Select
IIDVD
II
when playing
an
audio
CD.
2 Press the
....
button
to
open
the
disc
tray.
Place the disc on the disc tray,
label side up.
3 Press the
....
button
to
close
the disc tray.
If the disc you are using supports
auto start, it starts playing
automatically (even if you do not
press the
~
button), as soon as
you close the disc
tray.
4 If you cannot start playback
in step
3,
press the
~
button.
1 Appuyer
sur
la touche
FUNCTION pour regler
I'entree
sur
"OVO".
Selectionner
IIDVD
II
pour reproduire
un CD audio.
2 Appuyer
sur
la touche
....
pour ouvrir
Ie
tiroir.
Placer
Ie
disque sur
Ie
tiroir en
tournant la face etiquetee vers
Ie
haut.
3 Refermer Ie tiroir en
appuyant
sur
la touche .....
S'il slagit
d1un
disque supportant
Ie
demarrage automatique, la lecture
se
declenche des la fermeture
du
tiroir (inutile
de
presser la touche
~
).
4 Si on n'arrive pas a
declencher la lecture a
Iletape
3,
appuyer
sur
la
touche~.
1 Pulse
el
boton FUNCTION
para ajustar la entrada a
"DVD".
Seleccione "DVD" para reproducir
un CD de audio.
2 Pulse
el
boton
....
para
abrir
la bandeja de discos.
Ponga
el
disco sobre
la
bandeja de
discos, con
la
cara de
la
etiqueta
arriba.
3 Pulse
el
boton
....
para
cerrar la bandeja de discos.
Si
el
disco que esta empleando es
compatible con
el
inicio automatico,
empezara a reproducirse
automaticamente (aunque no pulse
el
boton
~),
asf
que cierre
la
bandeja de discos.
4
Si
no puede iniciar la
reproduccion
en
el
paso
3,
pulse
el
boton~.
• Slide the cover until it clicks.
• Glisser
Ie
couvercle jusqu'a un declic.
•
Deslice
la
cubierta
hasta
ofr
un
sonido
seco
de
confirmacion.
How
to
open the sliding cover: Comment glisser
Ie
couvercle:
This remote control has buttons on its Cette telecommande porte des touches
front and back. sur les deux faces.
To
use the buttons on the back, open the Pour utiliser les touches au dos, glisser
sliding cover.
Ie
couvercle.
Notes:
• When operating the buttons on the
back
of
the remote control, be
careful not
to
press the buttons on
the front side. The system may
malfunction.
• Close the sliding cover on the back
while using the buttons on the front
side.
Notes:
• Pour agir
sur
les touches situees
sur
Ie
dos
de la telecommande,
veiller
it ne pas toucher les touches
de I'autre cote.
Le
systeme peut mal
fonctionner.
• Fermer
Ie
couvercle sur
Ie
dos pour
utiliser les touches de la face.
- 7 -
Forma
de
abrir
la
cubierta deslizante:
Este controlador remoto tienen botones
en
la
parte frontal y en la posterior.
Para emplear los botones de la parte
posterior, abra
la
cubierta deslizante.
Notas:
• Cuando opere los botones de la
parte
posterior
del controlador
remoto, tenga cuidado para
no
pulsar
los botones
dellado
frontal.
EI sistema podria funcionar mal.
• Cierre la cubierta deslizante de la
parte posteriormientras emplee los
botones
dellado
frontal.