Setup
-17
Projection (PRJ) Mode
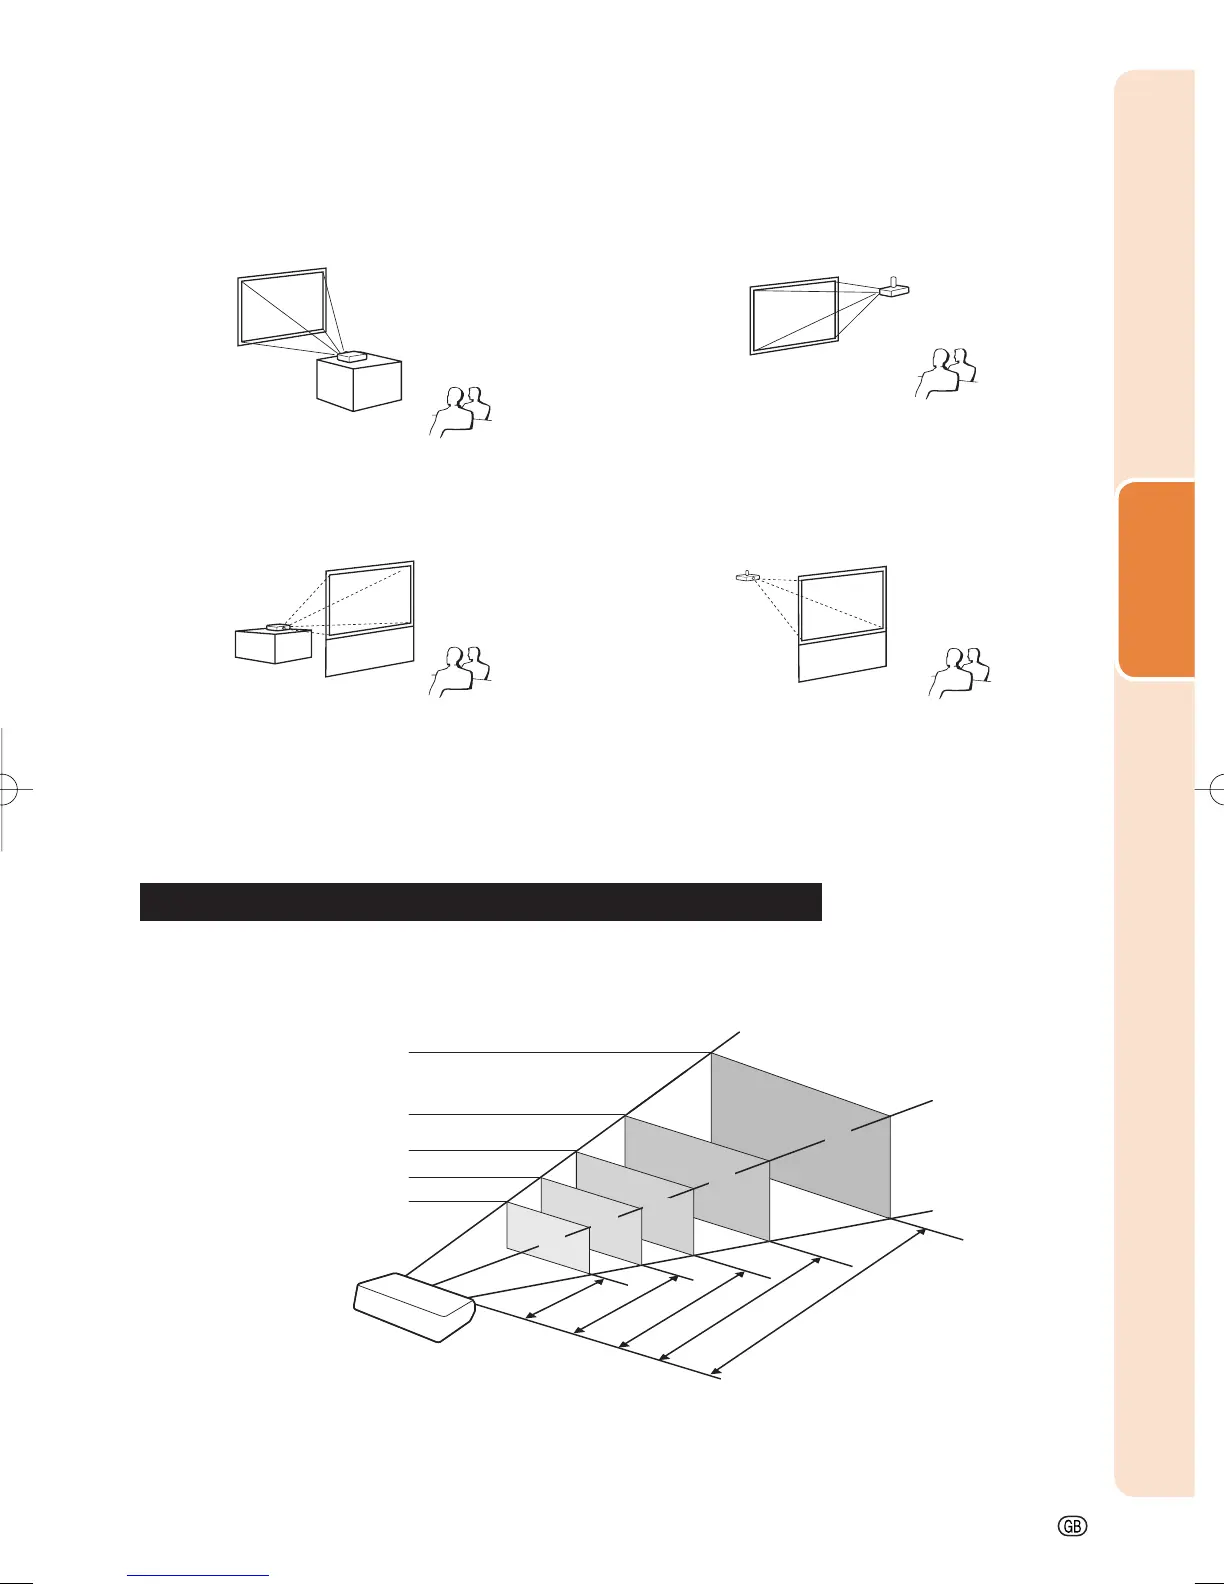
The projector can use any of the 4 projection modes, shown in the diagram below. Select the mode most ap-
propriate for the projection setting in use. (You can set the PRJ Mode in “SCR-ADJ” menu. See page 45.)
Table mounted, front projection
Ceiling mounted, front projection
Menu item “Front”
Table mounted, rear projection
(with a translucent screen)
Menu item “Rear”
Menu item “Ceiling + Front”
Ceiling mounted, rear projection
(with a translucent screen)
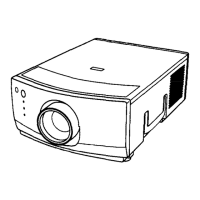
For details, refer to “Screen Size and Projection Distance” on page 18.
Example : When using a wide screen (16:9)
Indication of the Projection Image Size and Projection Distance
4'1" ~ 4'9"
(1.3 m ~ 1.4 m)
8'3" ~ 9'6"
(2.5 m ~ 2.9 m)
10'4" ~ 11'11"
(3.1 m ~ 3.6 m)
20'7" ~ 23'9"
(6.3 m ~ 7.2 m)
51'6"
(15.7 m)
500" (1270 cm)
200" (508 cm)
100" (254 cm)
80" (203 cm)
40" (102 cm)
35"×20"
(89 c
m × 50 cm)
70"×39"
(177 cm × 100 cm)
87"×49"
(221 cm × 125 cm)
174"×98"
(443 cm
×
249 cm)
436
"
×245
"
(1107 cm
×
623
cm )
Picture Size
Projection
Distance
Ceiling-mount Setup
It is recommended that you use the optional Sharp ceiling-mount adaptor and unit for this installation. Before
mounting the projector, contact your nearest Sharp Authorized Projector Dealer or Service Center to obtain
the recommended ceiling-mount adaptor and unit (sold separately).
Menu item “Ceiling + Rear”
XV-Z17000EUS.indb17XV-Z17000EUS.indb17 2010/12/1711:16:162010/12/1711:16:16