DANGER
H
azard due to lack of effectiveness of the protective device
The integrated laser alignment aid switches the OSSDs to the OFF state.
►
Make sure that the outputs of the safety light curtain do not have any effect on the
machine when the integrated laser alignment aid is activated.
►
Only use the integrated laser alignment aid to align the safety light curtain.
DANGER
H
azard due to lack of effectiveness of the protective device
The integrated laser alignment aid may influence the receiver of a safety light curtain
in close proximity. In such cases, the neighboring safety light curtain may not detect
persons or parts of the body that require protection.
►
Perform an alignment or take other measures to ensure that the laser beam only
hits the front screen of the relevant receiver. The laser beam must not hit any
external receiver should the integrated laser alignment aid be switched on by
mistake or due to a fault. An external receiver is a receiver that is not part of the
same safety light curtain.
►
During alignment in particular, make sure that the laser beam does not hit any
external receiver.
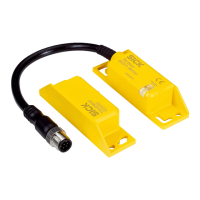
Prerequisites
•
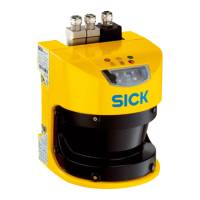
S
ender and receiver have been mounted correctly
•
The protective field is free of objects. Neither objects nor body parts (e.g. hand,
tool, optional AR60 laser alignment aid) are in the protective field. Otherwise, at
most diagnostic LEDs 1 and 2 light up during alignment.
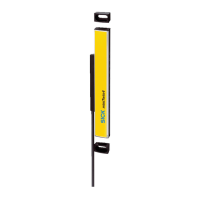
Approach
1.
Switch on the voltage supply for the safety light curtain.
2. Roughly align the sender with the receiver: Rotate the sender so that it points
toward the receiver.
►
If a pushbutton or switch has been connected for the integrated laser align‐
ment aid, activate the integrated laser alignment aid. Turn the sender so that
the beam of the integrated laser alignment aid hits the area of diagnostic
LEDs 1, 2, 3 and 4 on the longitudinal axis of the receiver.
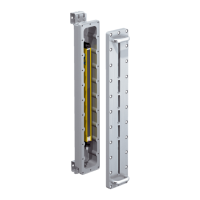
3. Align the receiver to the sender: Turn the receiver and pay attention to theindica‐
tion of the alignment quality and the synchronization status of the topmost and
bottommost beams.
►
If a hand or a tool is in the protective field during the alignment, but diagnos‐
tic LEDs 5, 6, 7 and 8 are already lit up, remove the object and continue with
step 6.
4. Align the sender to the receiver with more precision as needed and pay attention
to the indication of the alignment quality and the synchronization status of the
topmost and bottommost beams.
5. Align the receiver to the sender with more precision as needed and pay attention
to the indication of the alignment quality and the synchronization status of the
topmost and bottommost beams.
6. If at least 3 (better: 4) of diagnostic LEDs 1, 2, 3 and 4 and diagnostic LEDs 5, 6,
7 and 8 light up blue, fix the components in place in the brackets. Torque: 2.5Nm
to 3Nm.
7. Switch thevoltage supply off and then on again.
8. Check diagnostic LEDs 1to4 for the alignment quality and diagnostic LEDs 5to8
for the synchronization of the topmost and bottommost beams in order to ensure
that the components are still aligned with each other correctly.
COMMISSIONING 8
8028570/2023-07-27 | SICK O P E R A T I N G I N S T R U C T I O N S | deTec4 C4P-EAxxx3SC05
63
Subject to change without notice

 Loading...