Installation
6.2 Installing the mounting rail
Automation system
System Manual, 01/2023, A5E03461182-AK
127
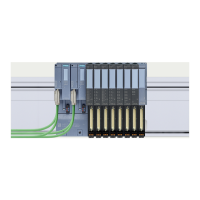
Installation rules
• The installation starts on the left with a CPU/interface module or a system power
supply/load current supply.
• You connect the modules to each other with U connectors.
• Note that no U connector protrudes from the first and last module.
Only remove and insert modules when the power to the system is switched off.
Protection from conductive contamination
Protect the devices against conductive contamination. At the same time, note the ambient
conditions.
Protection from conductive contamination can, for example, be achieved by installing the
devices in a control cabinet with the appropriate degree of protection.
6.2 Installing the mounting rail
Lengths and drill holes
The mounting rails are delivered in six lengths:
• 160 mm
• 245 mm
• 482.6 mm (19 inches)
• 530 mm
• 830 mm
• 2000 mm
You can find the article numbers in the appendix Accessories/spare parts (Page 363).
The mounting rails (from 160 to 830 mm) come with two drill holes for fixing screws. A set of
screws for grounding the mounting rail is provided.
The 2000 mm mounting rail is designed for assemblies with special lengths and does not
have holes for fixing screws. No set of screws for grounding is enclosed with the mounting
rail (can be ordered as Accessories/spare parts (Page 363)).
The specifications of the maximum offsets between two drill holes can be found in the table,
"Dimensions for the drill holes".

 Loading...