6. Install the analyzer modules again if necessary and fasten all previously removed plates using
a suitable tool.
Fasten the analyzer module to the base of the enclosure with a torque of 0.8 Nm to the rear
wall with 2.5Nm. Fasten the plates with a torque of 0.8Nm.
If no analyzer module has been installed at the mounting location, connect the blind plate
to the equipotential bonding.
7. Close the door using six screws.
11.6 Replacing the basic device
Requirement
You have ensured that
• the basic device is fully congured,
• the serial number and factory data are saved,
• all user-specic parameters are saved externally, for example with SIMATIC PDM.
Removing the device
1. Shut o all gas lines to the device.
2. Ensure that no hazardous gases escape when removing the gas lines to the device.
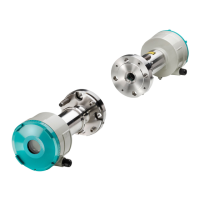
3. Remove the analyzer module, as described in the section "Removing analyzer modules,
standard version (Page76)".
4. Remove the option modules, see section "Installing option modules (Page 81)", reverse order
5. Remove the fastening screws and remove the basic device
Mounting the device
1. Mount the new basic device.
2. Install the previously used analyzer modules (AM) into the new basic device and connect
these.
Proceed as described in sections "Installing analyzer modules, standard version (Page68)"
and "Connecting analyzer modules (Page73)".
– Subsequent to switching on the device, the AM is recognized as new.
– Each AM retains its parameter assignment.
Also observe the information in the section "Plug & measure permitted activities
(Page53)".
3. Install the option modules again, follow the procedure described in the sections "Installing
option modules (Page81)" and "Wiring option modules (Page88)"
Maintenance and servicing
11.6Replacing the basic device
Wall-mounted device
148 Operating Instructions, 07/2023, A5E31930403-AB
 Loading...