Laboratory Centrifuge Sigma 3-16L
Laboratory Centrifuge Sigma 3-16L IVD
Version 03/2014, Rev. 2.22 of 24/10/2023 • sb
Original operating manual, part no. 0700902
Pos: 116 /100 Sigm a/100 BA Ze ntrifugen Sigma ( Standardmo dule)/060 Betrieb _Spincontrol L+S/060-002 0-0020-0022 Einsetzen eines Wi nkelrotors mit H ermetikdeck el 7,5 Nm @ 57 \mod_1527 574701238_68. docx @ 57031 8 @ 4 @ 1
→
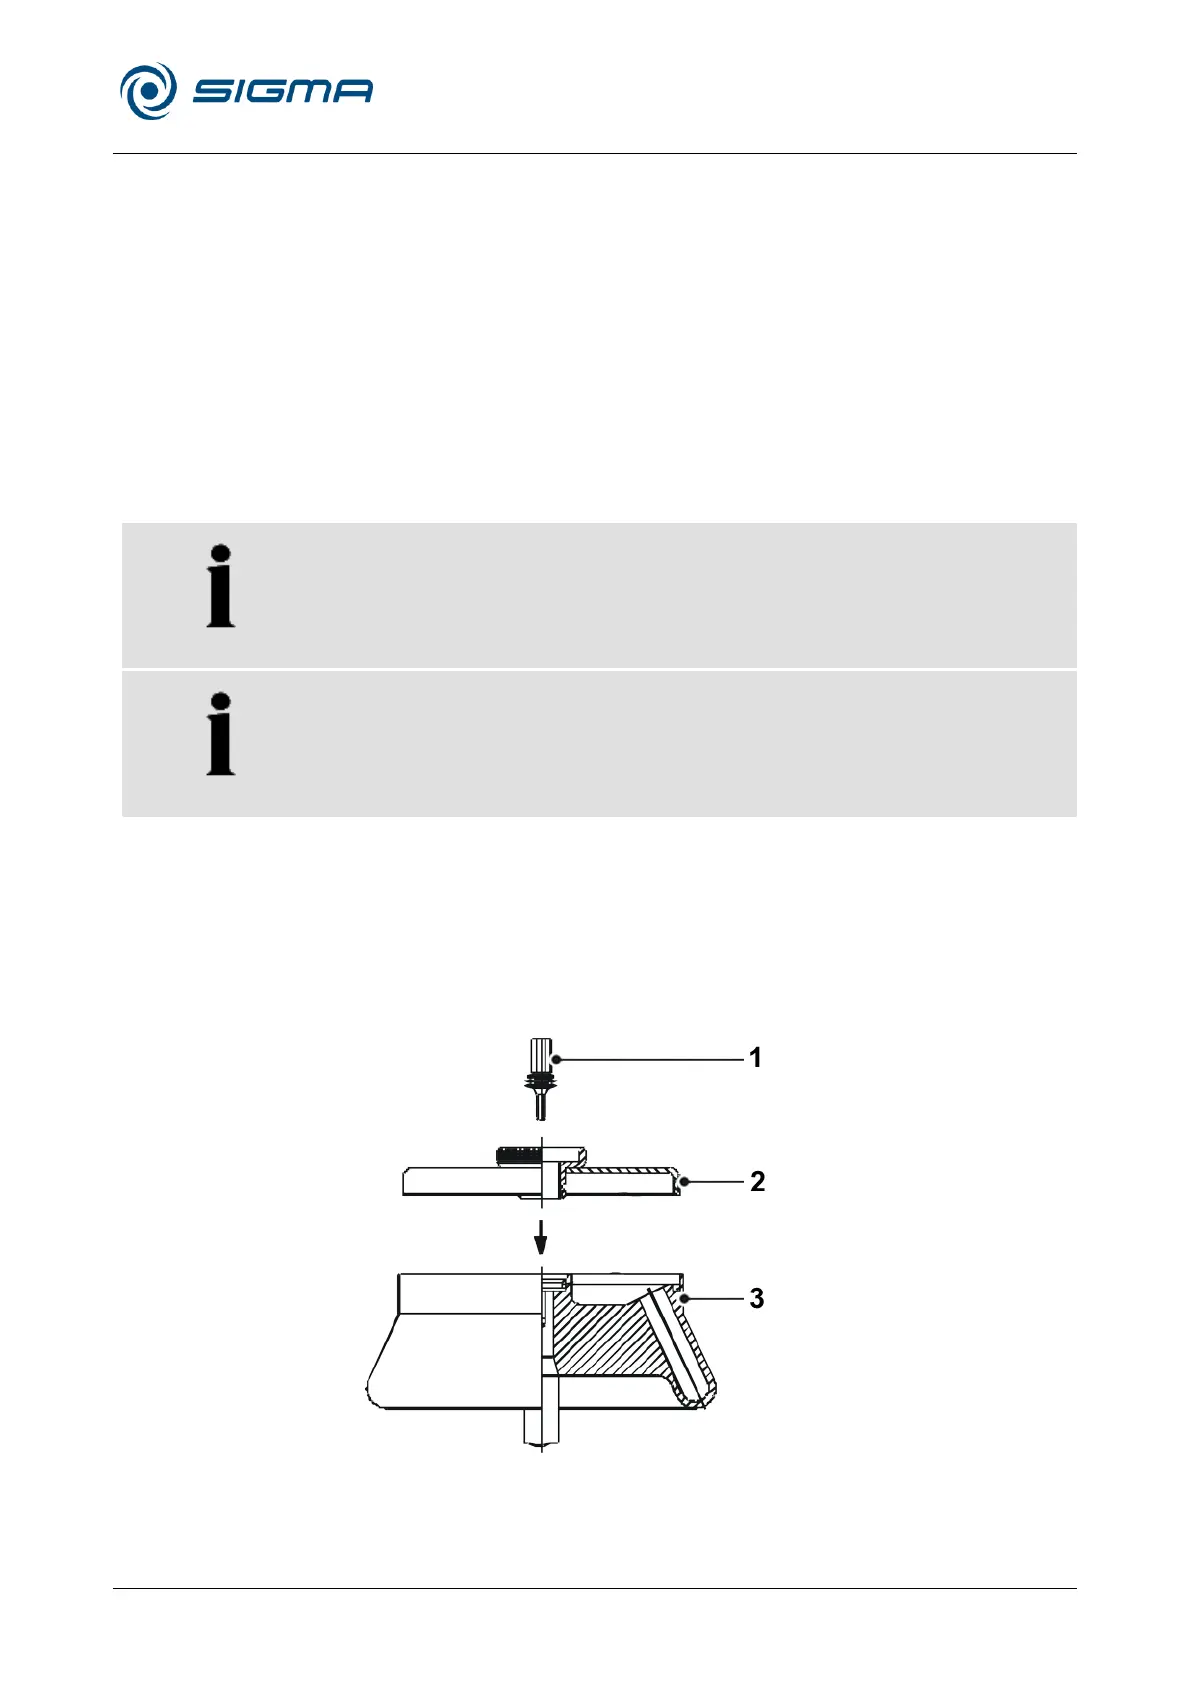
6.2.2.2 Installation of an angle rotor with a hermetic lid
• Open the centrifuge lid by pressing the lid key.
• Unscrew the rotor tie-down screw from the motor shaft (counter-
clockwise).
• Screw the rotor lid onto the rotor and tighten it.
• Lower the rotor with the lid with its central bore straight down onto the
motor shaft.
• Insert the rotor tie-down screw into the motor shaft. Tighten the rotor tie-
down screw clockwise with the supplied rotor wrench with 7.5 Nm. In
doing so, hold the rotor at its outer rim.
• Follow the safety instructions and hazard warnings (see chapter 3 -
"Safety")!
The rotor can also be used without a cover.
The lid screw serves for the fastening of the lid onto the rotor only, not for
the fastening of the rotor onto the motor shaft.
Removing a rotor
• Unscrew the rotor tie-down screw (counter-clockwise) and remove the
rotor with the lid.
• Open the lid by turning it counter-clockwise and remove the lid.
1 Rotor tie down screw
2 Lid
3 Rotor
Fig. 10: Angle rotor with a hermetic lid
Pos: 117 /010 Univ ersalmodule/ Seitenwechs el @ 0\mo d_120211624 4312_0.docx @ 105 @ @ 1