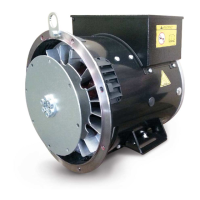
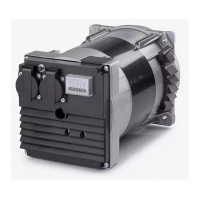
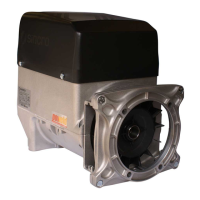
7.2 Removal and replacement of components
and component assemblies
The screws tightening torques for all reassembling
procedures are reported in the table of paragraph
6.2.4.
7.2.1 Replacing the bearings
Removal of the NDE bearing
• Unscrewthe4nutsthatfastenthebackshield
tothehousing.
• Disconnect the blackand redwires from theAVR
board.
• Hammertheshieldevenlyuntilitcomesaway
fromtherotor.
• Removethesnapring.
• Removethebearingusingastandardextractor.
• Takethenewbearingandheatitsoitsdiameterdilates
beforeslidingitintopositionontheshaft.
• Replacethesnapring.
• Positiontheshieldrememberingto insert the snap
ringandtthescrewsleavingthemloose.
• Hammertheshieldevenlyuntilthebearingandsection
ofhousingareinplace.
• Tightenthenutsontheshield.
Removal of the DE bearing
• Removethesnapring.
• Removethebearingorbearingsusingastandard
extractor.
• Takethenewbearingorbearingsandheatthem(max.
100÷110°C)sotheirdiameterdilatesbeforesliding
themintopositionontheshaft.
• Replacethesnapring.
• Inserttherotor.
Reassembly of bearings
Reassemblyofthebearingshouldbemadeinreverse
order of the operation described above taking in the
accountthefollowingcautions:
• Beforetting the bearing,ensure thatthe coupling
surfacesbothonthebearingandshafthasnosigns
ofwear;
• Heatthebearingtoapproximately80°Cbeforetting
itontotheshaft.
7.2.2 Removal of the main rotor
• Turntherotorinpositionthatthepolescenterlineis
inverticalposition;
• Dismount the shields(NDE andDE) from the
generatorsaspreviouslydescribed;
• Usingappropriatelysizedbelt,supporttheDEside
withitandcarefullystartwithtrackingtherotorout
ofthestator.Asrotorcomeoutofthestator,change
the position ofthe belt tillthe moment whenit’s
approximatelyonthegravitycenteroftherotor.During
thisprocess,it’snecessarytosupporttheNDEendof
therotortoguidetherotorpreciselyoutofthestatorto
avoidanydamagesofthestatorortherotorwinding.
Reassembly
Reassembly of the rotor should be made in reverse
order of the operation described above taking in the
accountthefollowingcautions:
• incasethattheanypartoftherotorischanged,the
completerotormustbere-balanced;
• in case ofsingle bearing alternators,check if the
couplingdiscsaredamaged.
7.2.3 Replacing the rotating diode bridge
• RemovetheshieldNDE,as7.2.1
• Onthe IB alternator, the replacementofthe diode
bridgecanalsobemadewithoutdisassemblingthe
NDEbearing,dismantlingthebearinghowevermakes
theoperationeasier.
• OntheHBalternator,itisnotnecessarytoremove
thebearing
• ForHB:disconnectthe3wiresoftheexciterrotorand
thetwowiresofthemainrotor,markingtheposition
ontheterminalboard
• ForIB: removethe3-way connectorand the two
fast-on.
• Loosenthelockscrewandremovethediodebridge
Toreplacethediodebridge,proceedbackwards:
• Fixthebridgewiththelockingscrewandthreadlock
• Restoretheoriginallinks,respectingthepolarity
• Replacethebearingshieldandprotectivegrid
7.2.4 Replacing the fan
• Uncouplethealternatorfromthedrivemotor
• RemovetheshieldDEside(inthecaseofmounting
IMB34)
• Thefanislockedontheshaftthroughakey(1).Loose
thescrew(2),withoutremovingit,andthenhitthe
screwheadwithahammer.Thiswillallowthetongue
tomoveinsidetheangleseat,freeingthefan.
• Before removing thefan, mark thelocation of the
washers(mountedonthefanitself)usedforbalancing
• Thenremovethescrewandremovethefan
Toreplacethefanproceedbackwards:
• Placetheshaftkey(1)inthekeyseat
• Insertthefan(byhand,orwiththehelpofarubber
hammer)
• Insertthescrew(2),screwitintothetab(withthread
lock)andtightenitfollowingthetorquevaluesshown
inparagraph6.2.4
• Replacethe balancingwashersin their original
position(makesurethattheyarelocked)
7.2.5 Changing rotor exciter
• RemovetheshieldNDE,as7.2.1
• RemovethebearingNDE
• Disconnectandremove the rotatingdiode bridge
(see7.2.3)
• Theexciterrotorislockedtotheshaftthroughakey
(1).Loosethelockscrew(2),withoutremovingit,
andthenhitthescrewheadwithahammer.Thiswill
allowthekeytomoveinsidethekeyseat,inorder
tofreetheexciterrotor.
• Removethescrewandremovetheexciterrotor.
Toreplacetheexciterrotorworkbackwards:
• -Placethekey(1)initsseat
Incaseofregreasablebearing,followthe
procedure as described above, taking
into account to place back additional
mechanical parts used for bearing
lubrication in thesame position likethey
were prior to dismounting. Apply the
quantityandtypeof grease as indicated
onthegeneratornameplate.
IMPORTANT!
26