INTEGRATION WITH SKF @PTITUDE OBSERVER
Hierarchy view – adding sensors and measurements
SKF Enlight Collect IMx-1 System
User Manual
Revision F
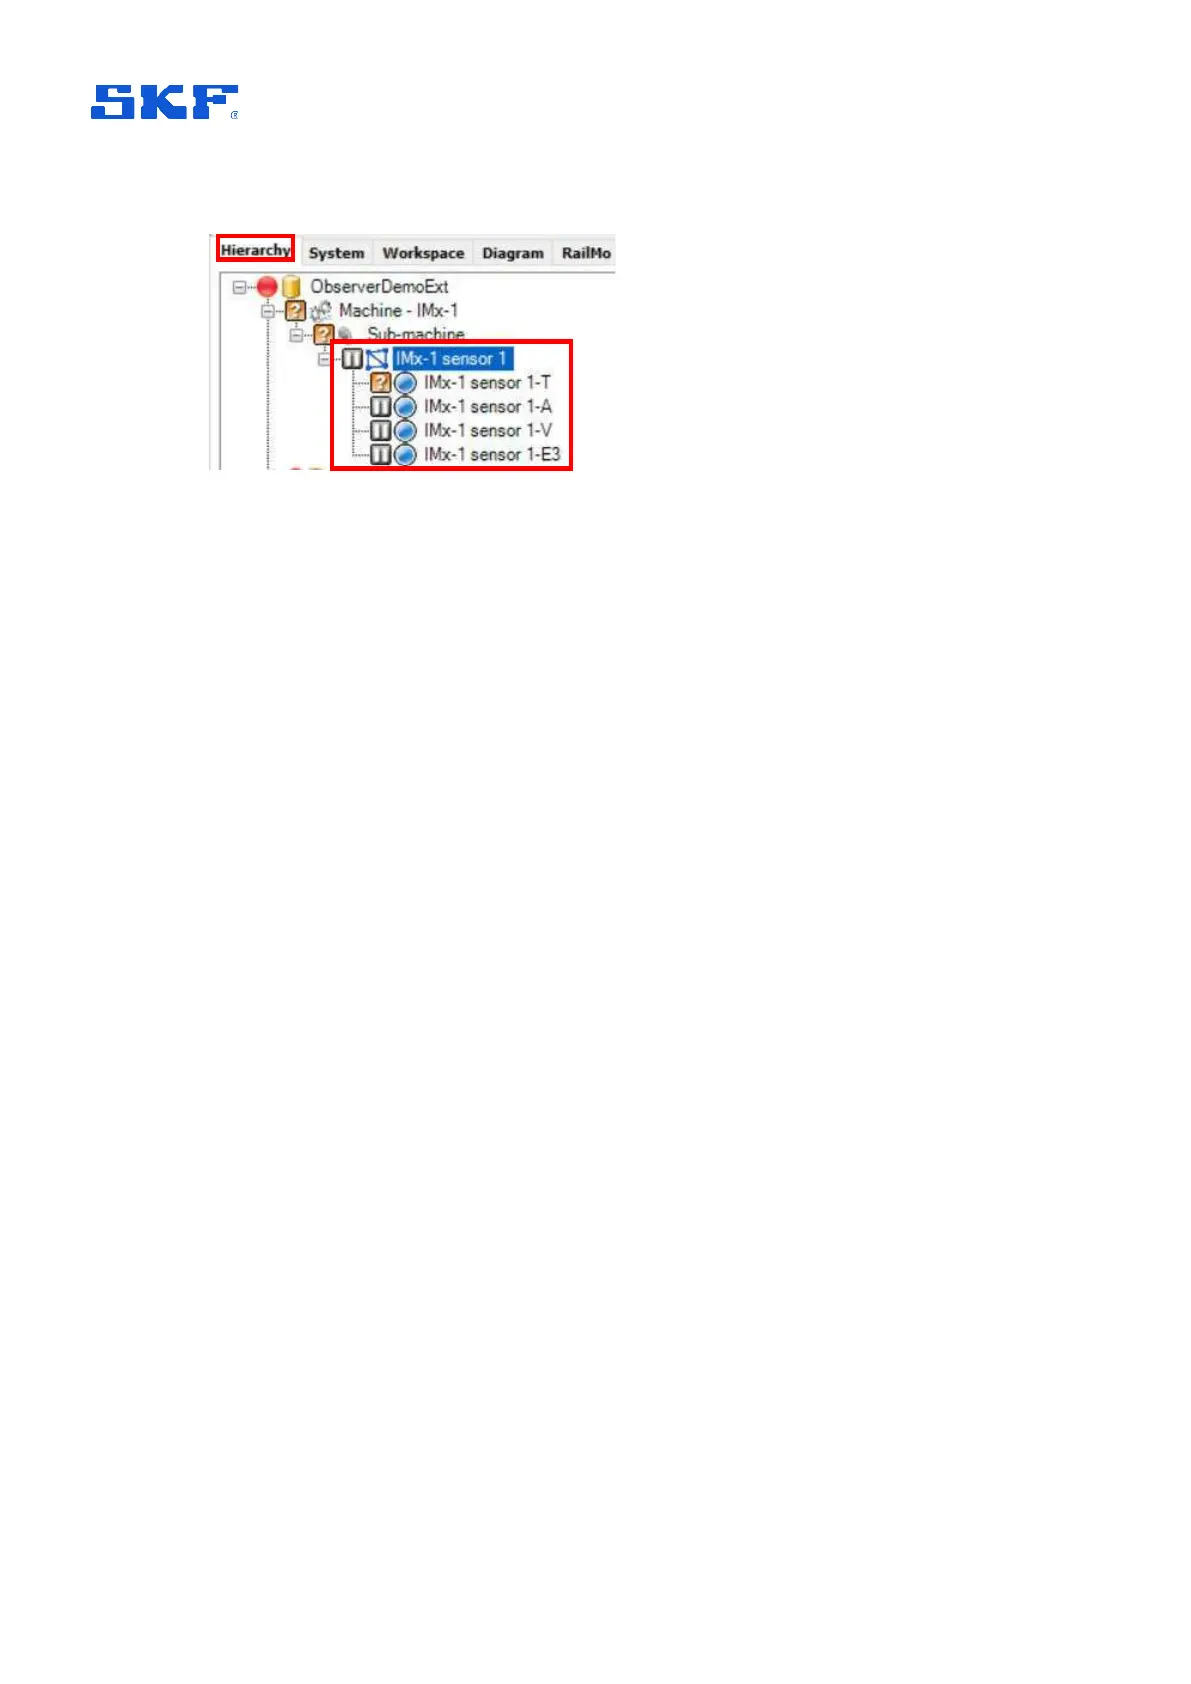
Figure 10 Hierarchy: IMx-1 sensor example
As shown above, the automatic measurement point naming takes the user chosen
sensor name, adds a dash/hyphen and then 1 or 2 characters to identify the
measurement type. Measurement naming is automatically updated if the sensor
name is subsequently changed.
Most @ptitude Observer hierarchical status indications, like Not measured, are
supported or applicable to an IMx-1 sensor and measurements except the following:
Not active, Outside measurement range, Transient, Outside active range and
Outside active range unstable.
In addition the Sensor fault icon is, for the IMx-1, used to indicate that a sensor is
unreachable, ‘Sensor not available’. For further information on the priority of IMx-1
status indications in an @ptitude Observer hierarchy, refer to the SKF @ptitude
Observer user manual or help file.
Notes on hierarchy operations:
IMx-1 sensor nodes can only be added to a sub-machine.
The user can copy and paste IMx-1 sensors.
To copy one sensor:
1. Right click on the sensor in the hierarchy and select Copy
2. Right click on a submachine and select Paste
3. In the prompt window, enter a value between 1 and 100 and click OK.
The entered number of sensors will be created under the submachine.
To copy multiple sensors:
1. Select multiple sensors under the same sub machine
2. Right click on any of them and select Copy
3. Select Paste.
Users can drag and drop an IMx-1 sensor node but only within the asset and on
the same hierarchy level.
Users can only drag and drop an IMx-1 measurement point within its sensor
node.