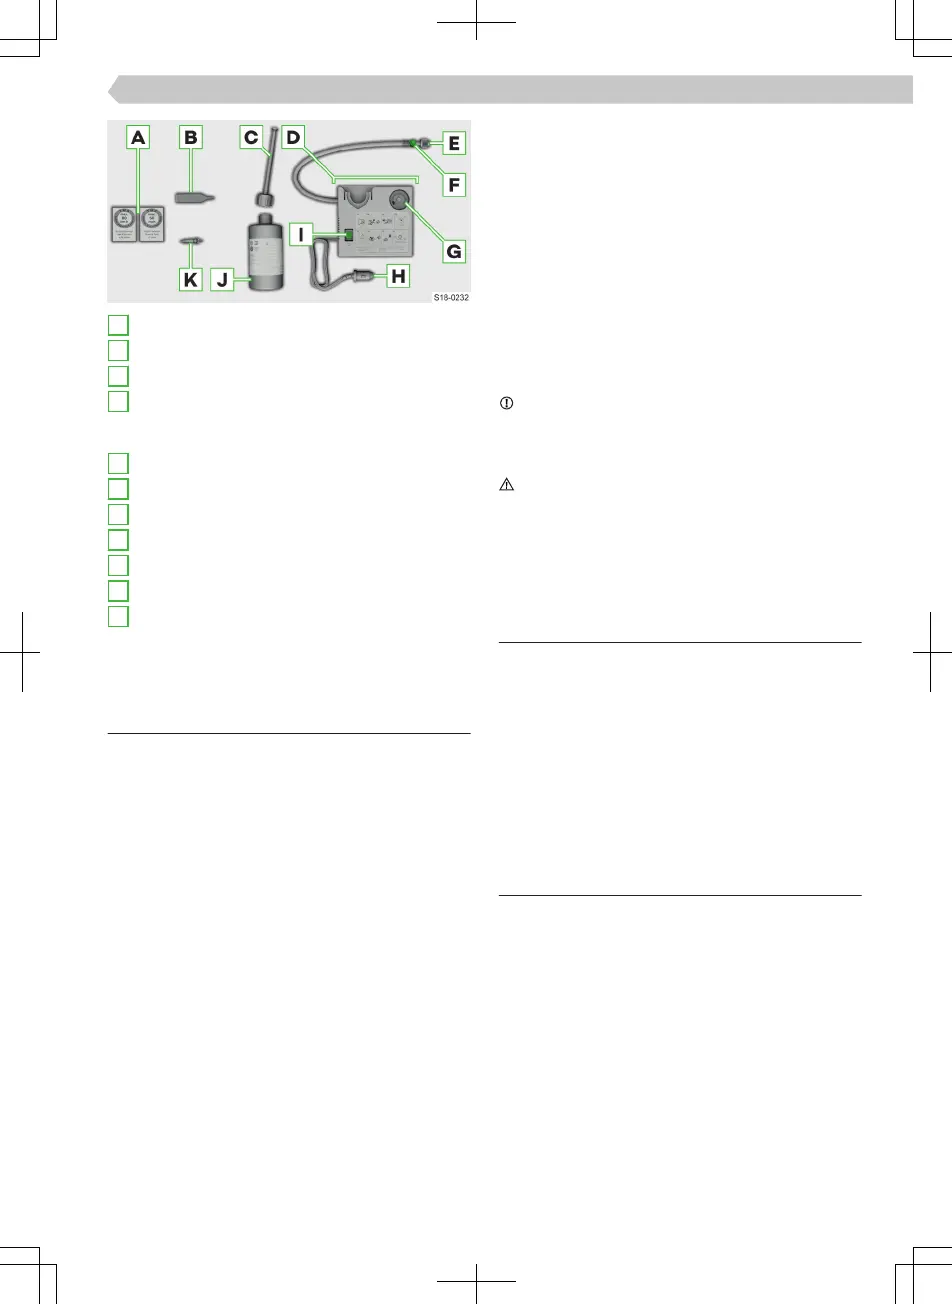
A
Sticker with speed indication
B
Valve remover
C
Ination hose with plug
D
Air compressor (the layout of the controls may
be dierent depending on the type of air com-
pressor)
E
Tyre ination hose
F
Button for pressure reduction
G
Pressure indicator
H
12 volt cable connector
I
ON and OFF switch
J
Tyre ination bottle
K
Replacement valve core
The declaration of conformity is included with the air
compressor or the log folder.
Usage conditions
Performing a repair with the breakdown kit not at all
intended to replace a permanent repair on the tyre.
The purpose of the repair is to get you to the nearest
specialist garage.
Change the tyre repaired by the breakdown kit as
soon as possible.
Before using the kit
›
Park the vehicle securely and secure it from rolling
away.
›
Turn o the engine.
›
Let all of the occupants get out. During the wheel
repair they should not stand on the road, e.g. be-
hind the crash barriers.
›
Close all doors as well as the bonnet and boot lid.
›
Uncouple any trailers.
After using the kit
If a tyre pressure of 2.0 bar cannot be achieved, the
tyre is too damaged and cannot be sealed with the
puncture set.
›
Stop driving. Seek the help of a specialist garage.
Once a tyre pressure of 2.0–2.5 bar is achieved, con-
tinue the journey at a maximum speed of 80 km/h
(50 mph).
›
Avoid full accelerations, strong braking and fast
cornering.
Information for driving with repaired tyres
›
The pressure of the repaired tyre must be checked
after driving for 10 minutes.
›
If the tyre pressure is 1.3 bar and less, do not con-
tinue! Seek the help of a specialist garage.
›
If the tyre pressure is higher than 1.3 bar, correct
the pressure to the correct value of at least 2 bar
and continue driving.
NOTICE
Danger of damage to the compressor!
▶
After the maximum running time of the air com-
pressor, allow it to cool for a few minutes.
WARNING
Risk of burns!
The tyre ination hose and the air compressor may
become hot when inated.
▶
Allow the air compressor and hose to cool for a
few minutes.
Usage restrictions
Do not use the kit in the following cases:
▶
The rim is damaged.
▶
The outdoor temperature is below the minimum
temperature indicated in the manual of the tyre ll-
ing bottle.
▶
Tyre punctures are greater than 4 mm.
▶
There is damage to the tyre wall.
▶
The expiry date stated on the tyre ination bottle
has expired.
Self-help
Seal the tyres
›
Unscrew the valve cap from the damaged tyre.
›
Unscrew the valve core with the valve insert and
place it on a clean surface.
›
Shake the tyre ination bottle back and forth with
sealant.
›
Screw the ination hose onto the tyre inater bot-
tle. The lm on the closure is pierced automatically.
›
Remove the plug from the ination hose and push
it fully onto the tyre valve.
›
Hold the bottle with the bottom facing upwards
and ll all of the sealing agent into the tyre.
›
Remove the ller plug from the valve.
›
Screw in the valve insert.
167
Wheels › Breakdown kit

 Loading...