18
EN
ATySpM - 542935E - SOCOMEC
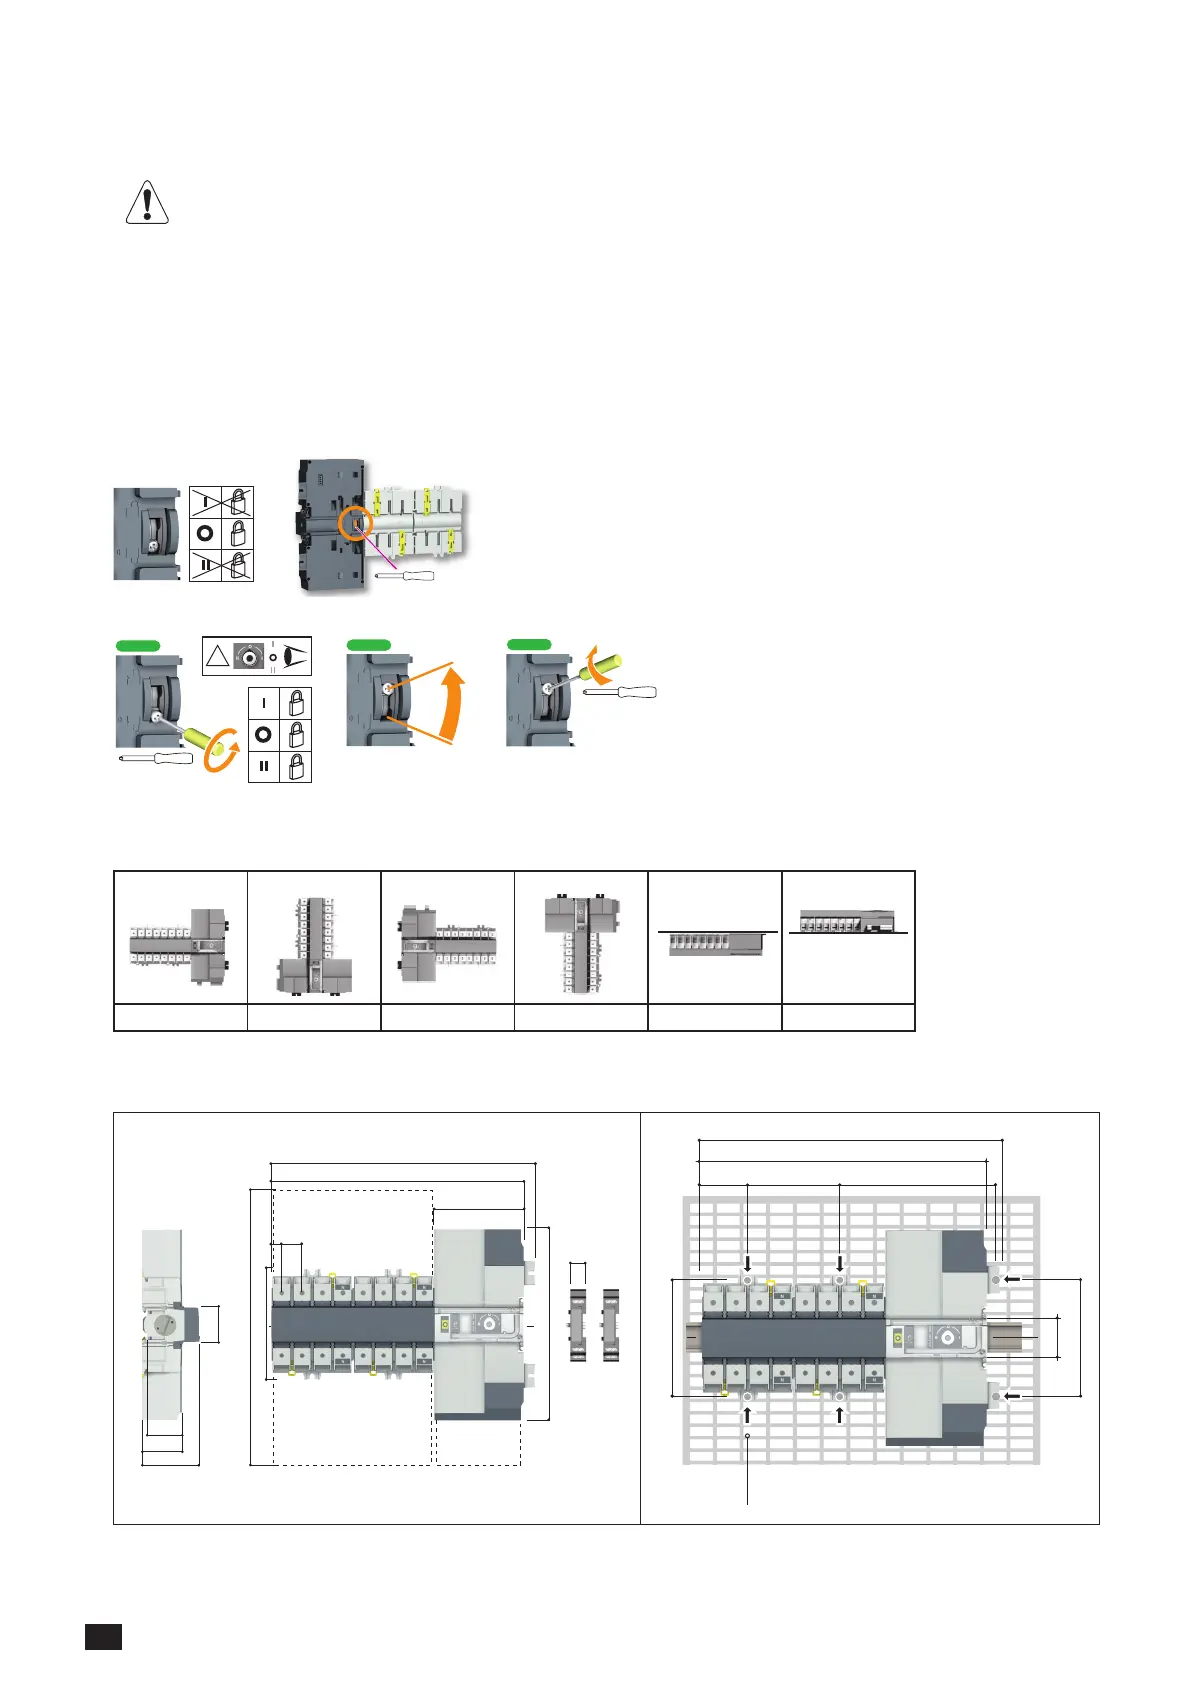
8. PRODUCT INSTALLATION
Prior to installation of the product ensure that the padlocking setting screw (located at the back of
the product) is congured as per your requirements.
For locking in Positions I, II and 0, refer to the following procedure
8.1. Changing the padlocking conguration
To congure the locking in the 3 positions:
STEP1: loosen the screw at the back of the product as shown below.
STEP2: slide the screw upwards.
STEP3: tighten the screw in the top position as shown.
Posidriv PZ2
OK
OK !
!
STEP 1
STEP 2
STEP 3
STEP 4
Posidriv PZ2
Posidriv PZ2
2,2 lb-in 0,25 Nm
2 X
Posidriv PZ2
OK
OK !
!
STEP 1
STEP 2
STEP 3
STEP 4
Posidriv PZ2
Posidriv PZ2
2,2 lb-in 0,25 Nm
2 X
Posidriv PZ2
OK
OK !
!
STEP 1
STEP 2
STEP 3
STEP 4
Posidriv PZ2
Posidriv PZ2
2,2 lb-in 0,25 Nm
2 X
Posidriv PZ2
OK
OK !
!
STEP 1
STEP 2
STEP 3
Posidriv PZ2
2,2 lb-in 0,25 Nm
Posidriv PZ2
OK
OK !
!
STEP 1
STEP 2
STEP 3
STEP 4
Posidriv PZ2
Posidriv PZ2
2,2 lb-in 0,25 Nm
2 X
Posidriv PZ2
OK
OK !
!
STEP 1
STEP 2
STEP 3
STEP 4
Posidriv PZ2
Posidriv PZ2
2,2 lb-in 0,25 Nm
2 X
2x
2x
8.2. Recommanded orientation
Recommended Ok Ok Ok Ok Ok
8.3. Dimensions 8.4. Back plate mounted
53
46
73,5
45
MAX : 2
26
116
245
143
18
13
324
326
131,5
52 104 176
47
6 mounting brackets
6x M6 screw - 2,5 Nm
!
 Loading...