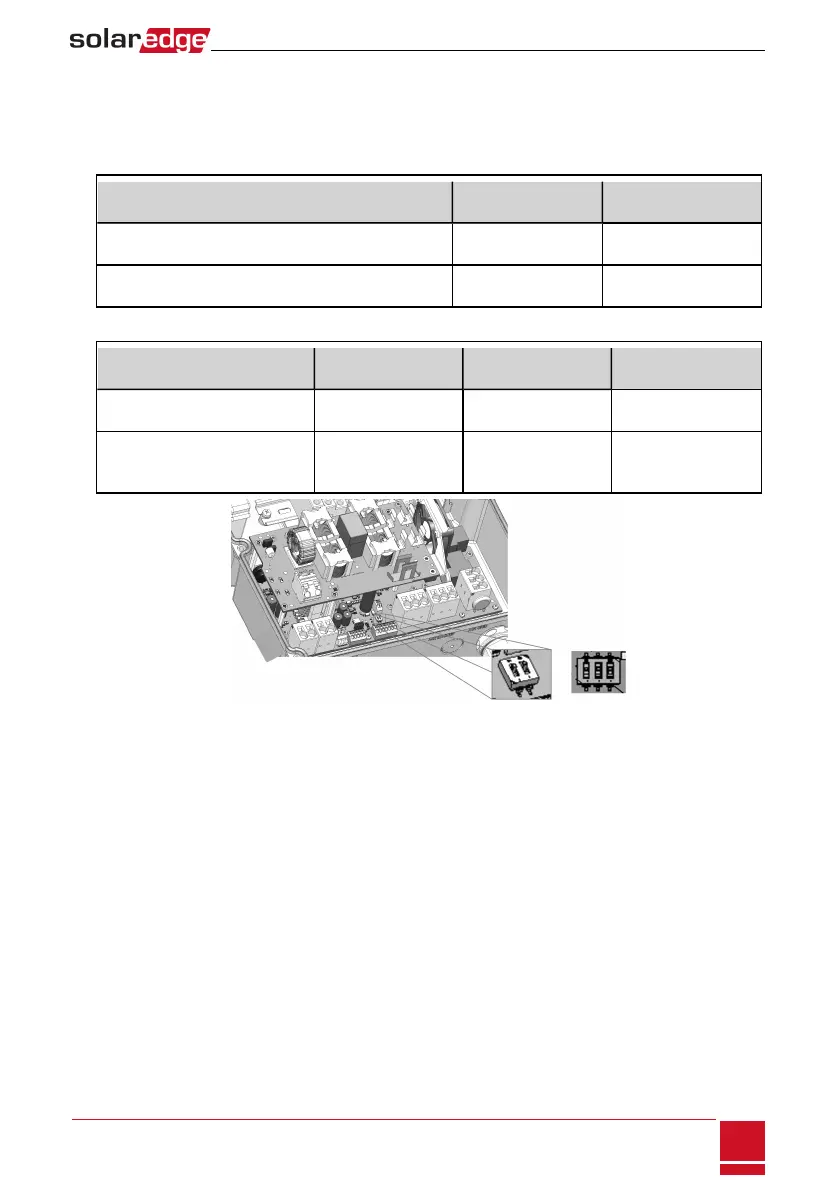
DIPSwitch Setup in the StorEdge Connection Unit
VerifythattheDIPswitchesontheStorEdgeConnectionUnitaresetasdescribedinthefollowingtable,
accordingtothecomponentsusedinthesystem(seeFigure23):
l InStorEdgeConnectionUnitwithtwoDIPswitches:
Hardware configuration
Left DIP switch
(SW1) setup
Right DIP switch
(SW2) setup
Auto-transformer with connected over-temperature
sensor
ON ( up ) - default OFF (down) - default
No auto-transformer, or auto-transformer with over-
temperature sensor not connected
ON ( up ) - default ON ( up )
l InStorEdgeConnectionUnitwiththreeDIPswitches:
Hardware configuration
DIP switch 1
(leftmost) setup
DIP switch 2
(center) setup
DIP switch 3
(rightmost) setup
Auto-transformer with connected
over-temperature sensor
ON ( up ) - default ON ( up ) - default OFF (down) - default
No auto-transformer, or auto-
transformer with over-temperature
sensor not connected
ON ( up ) - default ON ( up ) - default ON ( up )
Figure 23: StorEdge Connection Unit DIP switches
Chapter 5: StorEdge Inverter Connections
SolarEdge-StorEdge Installation Guide MAN-01-00262-1.2
39