49
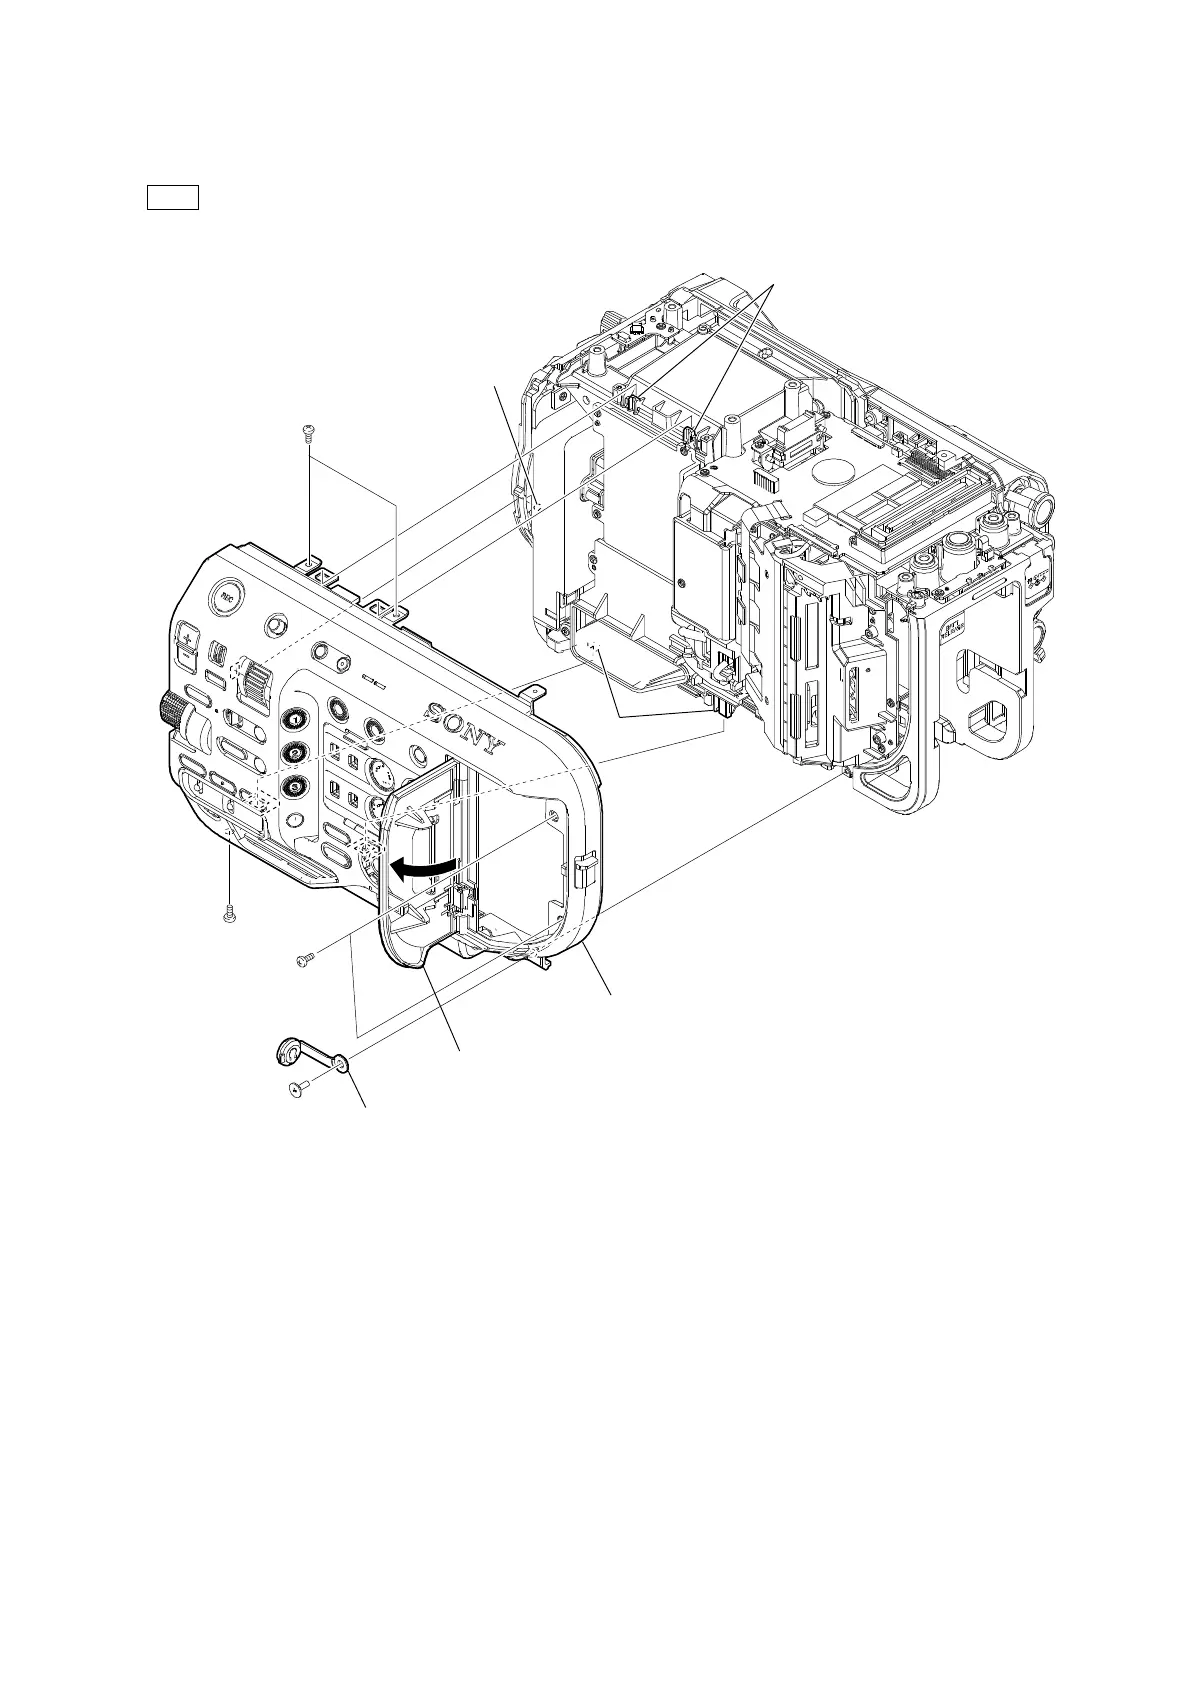
4. Remove the shoulder screw (M2 x 3.5), and then remove the HP lid.
5. Open the media cover assembly, and then remove the five precision screws (P2 x 4).
6. Remove the four hooks and the boss, and then remove the inside panel assembly.
Tip
Remove in the following sequence: two hooks (a), boss, two hooks (b).
7. Install the removed parts by reversing the steps of removal.
Precision screws
(P2 x 4)
Shoulder screw
(M2 x 3.5)
Precision screw
(P2 x 4)
Precision screws
(P2 x 4)
Media cover assembly
Inside panel assembly
Hooks (a)
HP lid
Hooks (b)
Boss