56
2-4-5. KSW-72 Board
Preparation
1. Remove the bottom harness guard. (Refer to “2-2. Bottom Harness Guard”.)
2. Remove the outside panel assembly. (Refer to “2-3. Outside Panel Assembly”.)
3. Remove the inside panel assembly. (Refer to “2-4. Inside Panel Assembly”.)
4. Remove the lithium battery. (Refer to “2-4-1. Lithium Battery”.)
5. Remove the SS-108 board. (Refer to “2-4-2. SS-108 Board”.)
6. Remove the TG, SEC board assembly. (Refer to “2-4-3. TG, SEC Board Assembly”.)
7. Remove the VSW-82 board. (Refer to “2-4-4. VSW-82 Board”.)
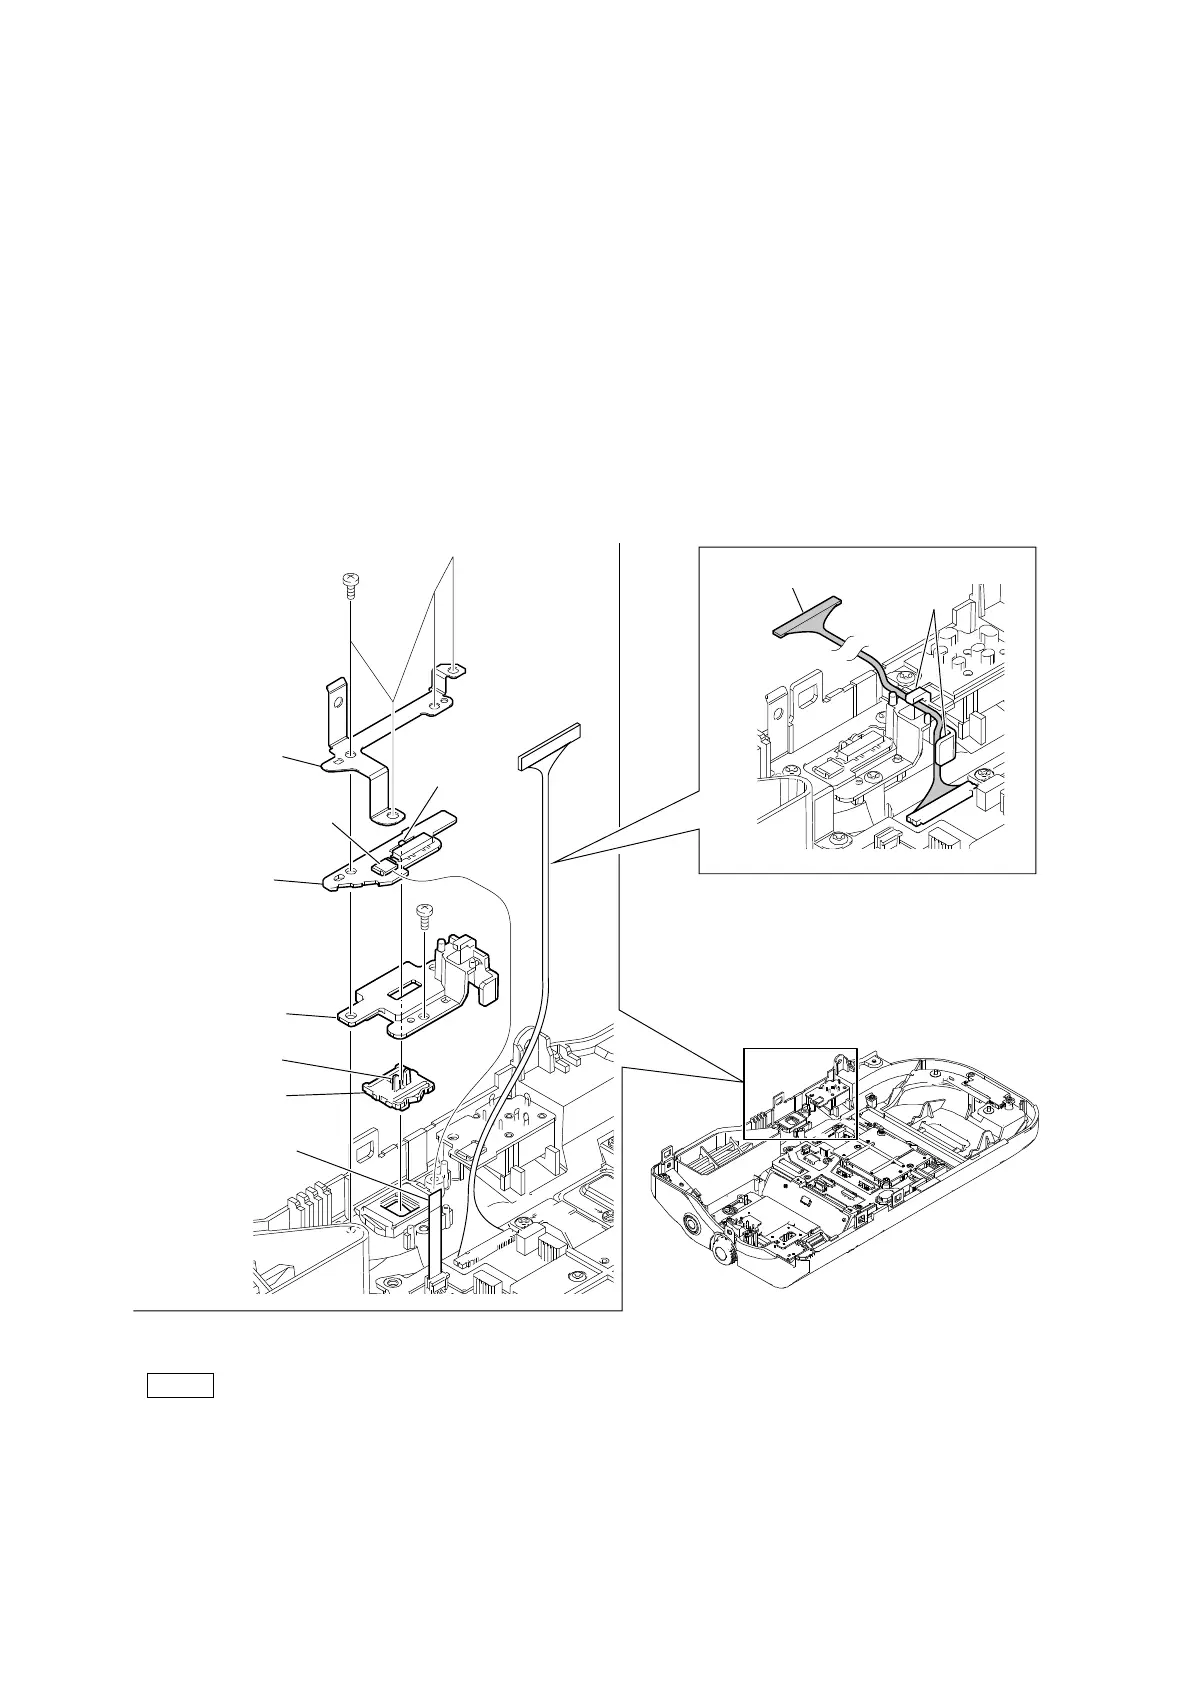
Procedure
1. Release the fine-wire coaxial cable from the two hooks.
2. Disconnect the flexible flat cable from the connector (CN001) on the PM-28 board.
3. Remove the five screws, and then remove the power plate.
4. Remove the PM-28 board, the power slide lever holder, and the power slide lever.
Note
• At the time of the installation, tighten the screws in the following sequence: (a), (b), (c), others.
• At the time of the installation, align the switch with the lever.
Fine-wire coaxial cable
PTP2 x 5
(a)
(b)
(c)
PTP2 x 5
Hooks
Power plate
Power slide lever holder
Power slide lever
Flexible flat cable
PM-28 board
CN001
Switch
Lever