75
2-11. IF-1377 Board, DIF-278 Board
Preparation
1. Remove the bottom harness guard. (Refer to “2-2. Bottom Harness Guard”.)
2. Remove the outside panel assembly. (Refer to “2-3. Outside Panel Assembly”.)
3. Remove the inside panel assembly. (Refer to “2-4. Inside Panel Assembly”.)
4. Remove the terminal assembly. (Refer to “2-5. Terminal Assembly”.)
5. Remove the front assembly. (Refer to “2-6. Front Assembly”.)
6. Remove the DPR-394 board. (Refer to “2-7. DPR-394 Board”.)
7. Remove the DC fan. (Refer to “2-8. DC Fan”.)
8. Remove the media assembly. (Refer to “2-9. Media Assembly”.)
9. Remove the rear assembly. (Refer to “2-10. Rear Assembly”.)
Procedure
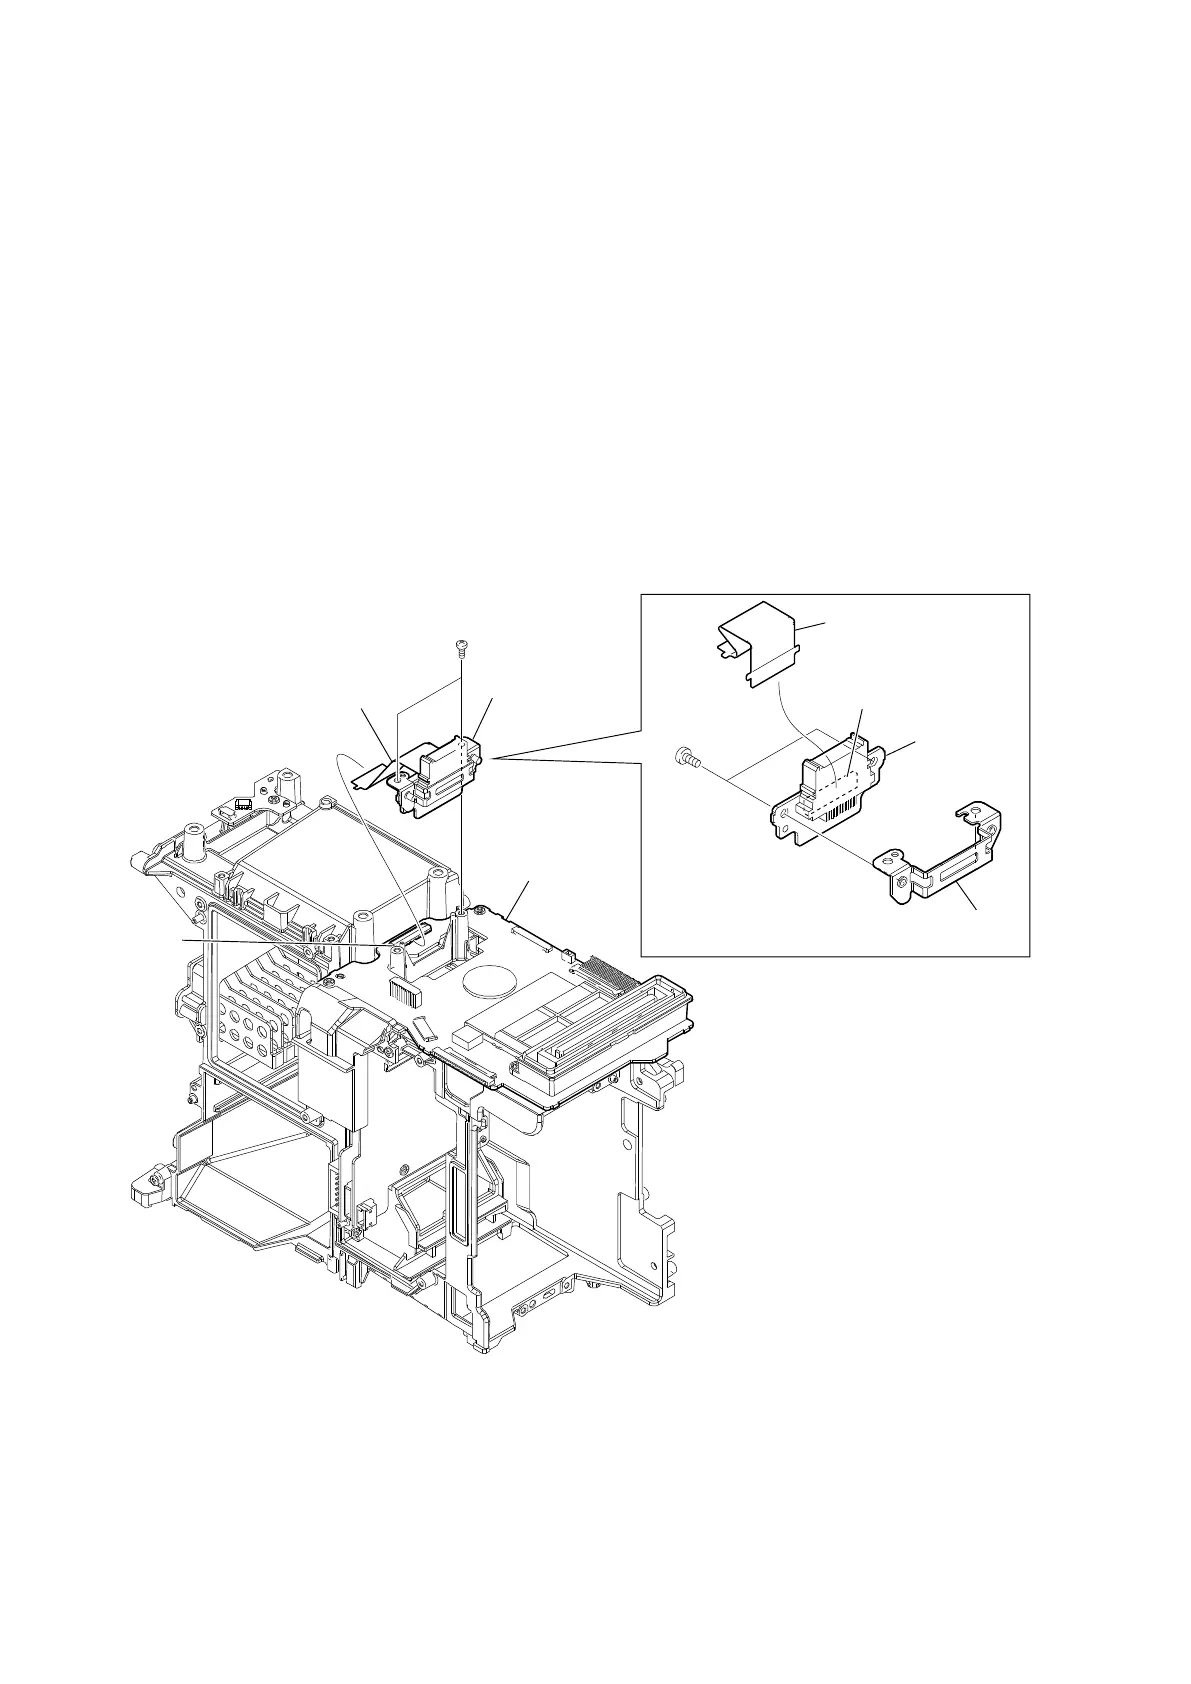
1. Remove the two precision screws.
2. Lift the IF-1377 board assembly, and then disconnect the flexible board from the connector (CN0151) on the DIF-278 board.
3. Disconnect the flexible board from the connector on the IF-1377 board.
4. Remove the two precision screws, and then remove the IF-1377 board from the connector top plate.
Precision screws
(P2 x 4)
Precision screws
(P2 x 4)
Flexible board
Flexible board
DIF-278 board
CN0151
IF-1377 board assembly
IF-1377 board
Connector
Connector top plate