42
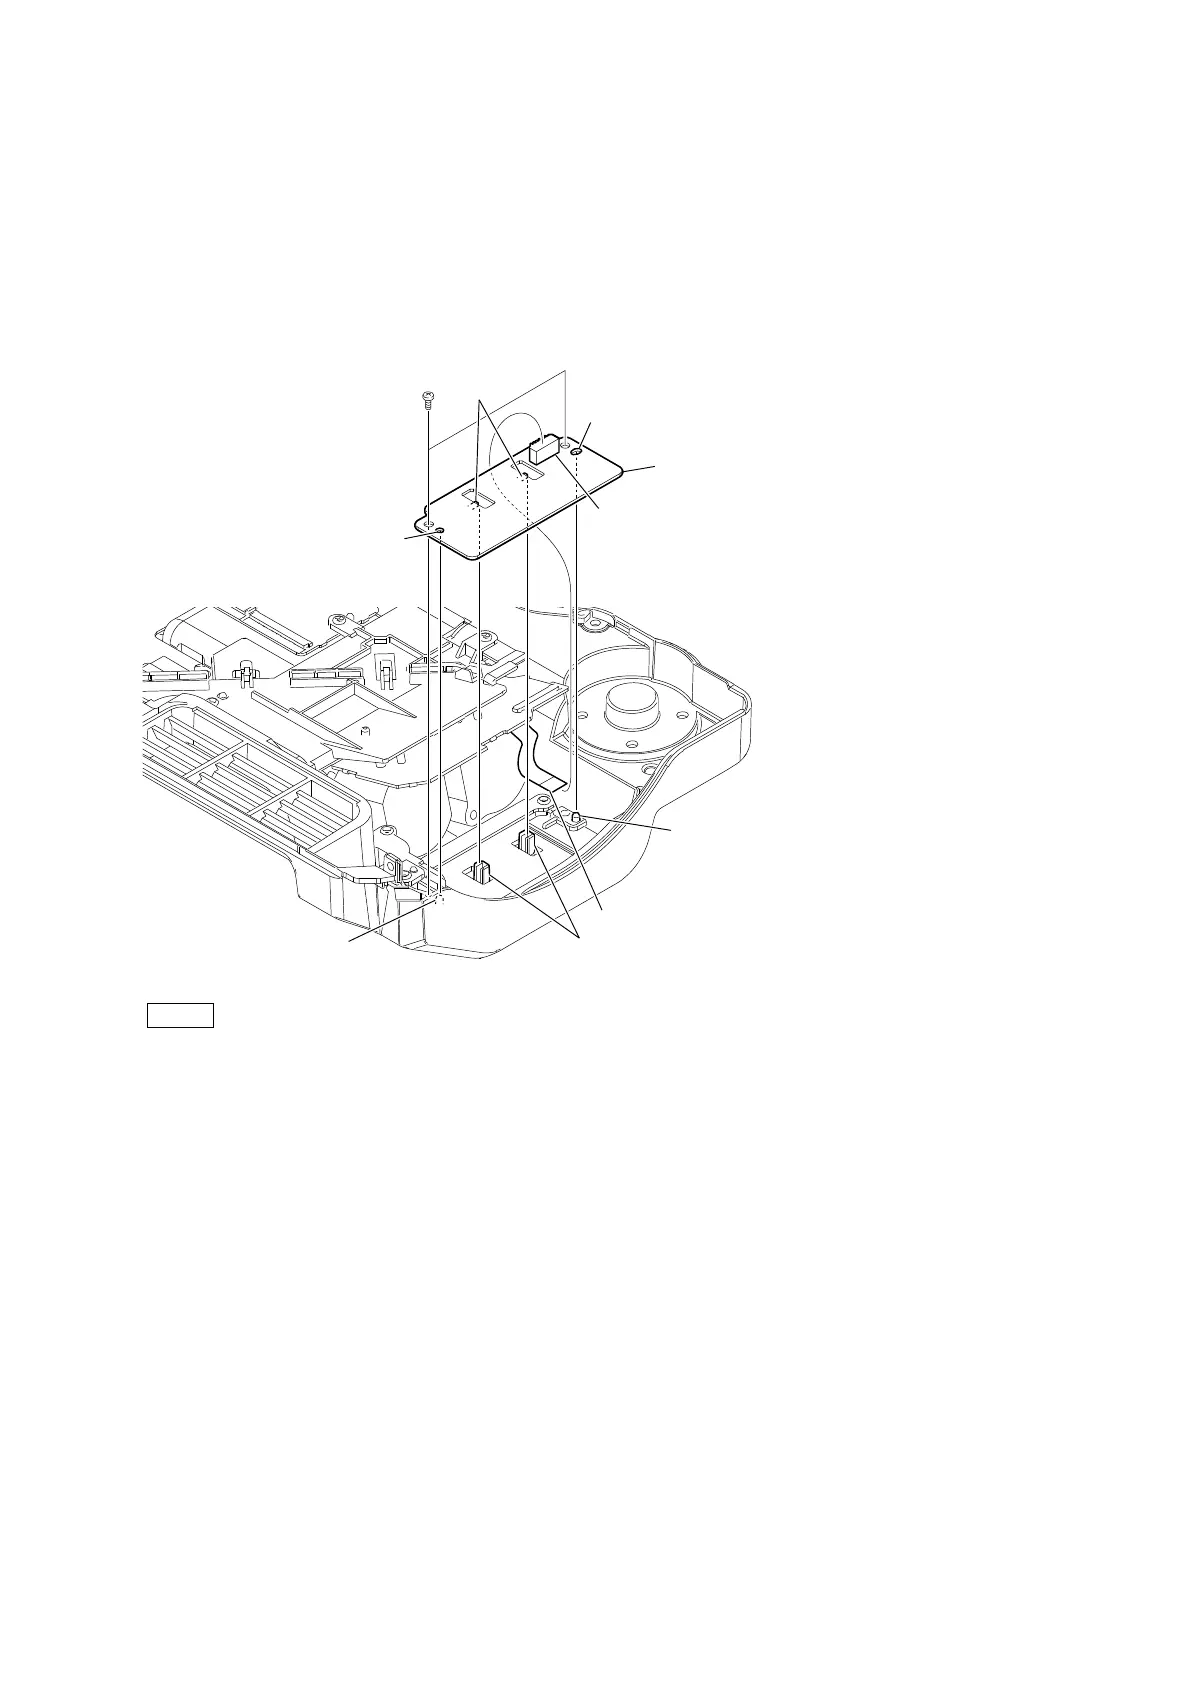
2-3-1. ASW-69 Board
Preparation
1. Remove the bottom harness guard. (Refer to “2-2. Bottom Harness Guard”.)
2. Remove the outside panel assembly. (Refer to “2-3. Outside Panel Assembly”.)
Procedure
1. Disconnect the flexible flat cable from the connector (CN1002) on the ASW-69 board.
2. Remove the two precision screws, and then remove the ASW-69 board.
Note
When installing the ASW-69 board, align the two switches with the two levers.
3. Install the removed parts by reversing the steps of removal.
Hole
CN1002
Switches
Hole
ASW-69 board
Boss
Flexible flat cable
Levers
Boss
Precision screws
(P2 x 4)