62
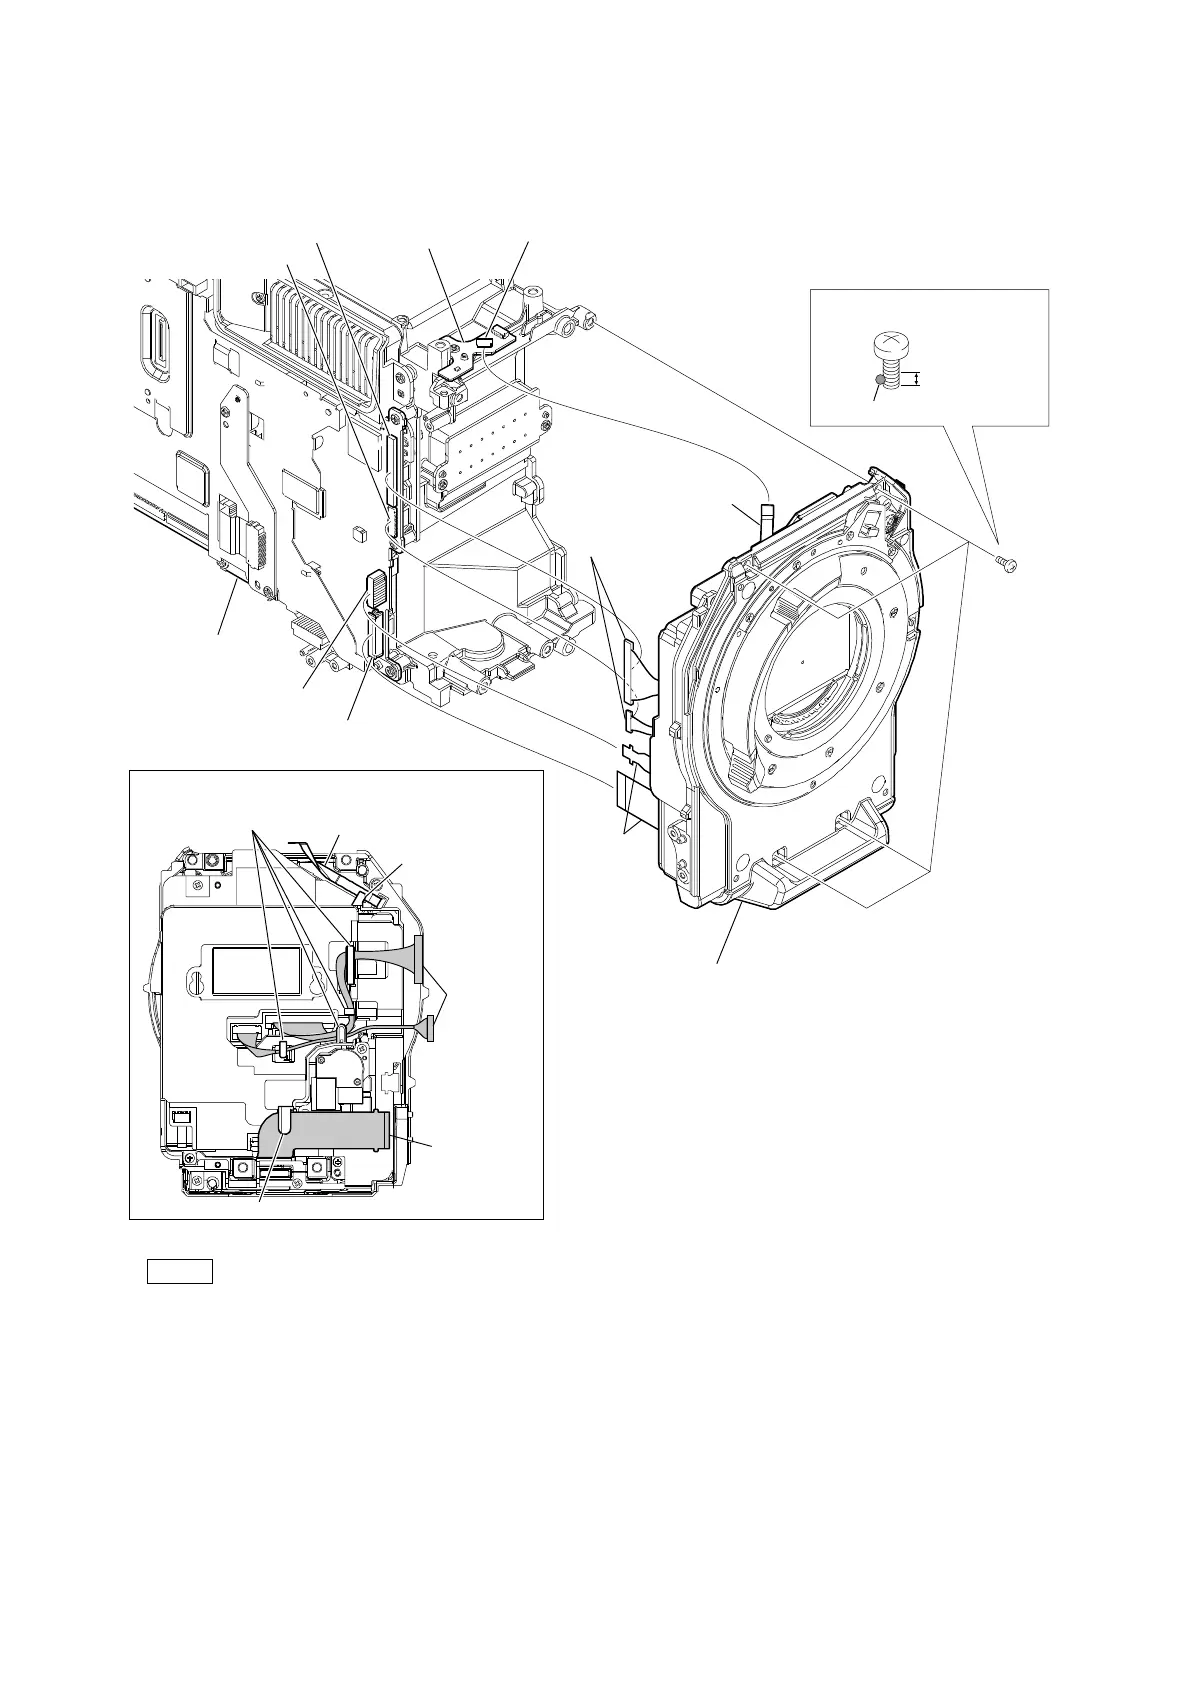
5. Disconnect the fine-wire coaxial cables from the two connectors (CN201, CN202) on the DPR-394 board.
6. Disconnect the flexible boards from the two connectors (CN101, CN9202) on the DPR-394 board.
7. Disconnect the flexible flat cable from the connector (CN5402) on the LED-549 board.
8. Remove the four screws, and then remove the front assembly.
Note
• Before installing the front assembly, make sure that the cables are arranged as shown in the figure.
• Apply Loctite 243 before fixing the screws.
• When installing the front assembly, tighten the screws in the following sequence: (a), (b), (c), (d).
9. Install the removed parts by reversing the steps of removal.
P2.6 x 5
(a)
(b)
(d)
(c)
Fine-wire coaxial cables
Flexible flat cable
Front assembly
Flexible boards
DPR-394 board
LED-549 board
CN101
CN9202
CN202 CN5402
CN201
Loctite 243
Applying position of Loctite
More than
three threads
Fine-wire
coaxial cables
Flexible flat cable
Arrangement of cables
Hook
Hooks
Hook
Flexible boards