29
Setting the Clock
Chapter 2 Preparations
While the initial setting display is shown,
no other operation except turning the power
off is permitted until you finish the setting
for this display.
When the initial setting display is not
shown or the initial settings are completed,
the LCD display state varies as follows.
With no SxS memory card loaded: The
video selected with the VIDEO INPUT
switch is shown. If the selected video is
not input, a blue or black screen
appears.
With an accessible SxS memory card
loaded: Index frame images of the
clips recorded on the memory card are
shown as thumbnails (thumbnail
screen).
To turn the power off
Press the power button again.
The power indicator on the front panel
lights in red. (The unit enters the standby
state.) To exit the standby state, disconnect
the AC power source (see page 28).
Setting the Clock
When the initial setting display appears on
the LCD display, Set the date and time of
the built-in clock, using this display.
Time Zone
The value shows the time difference from
UTC (Coordinated Universal Time).
Change the setting if needed (see page 28).
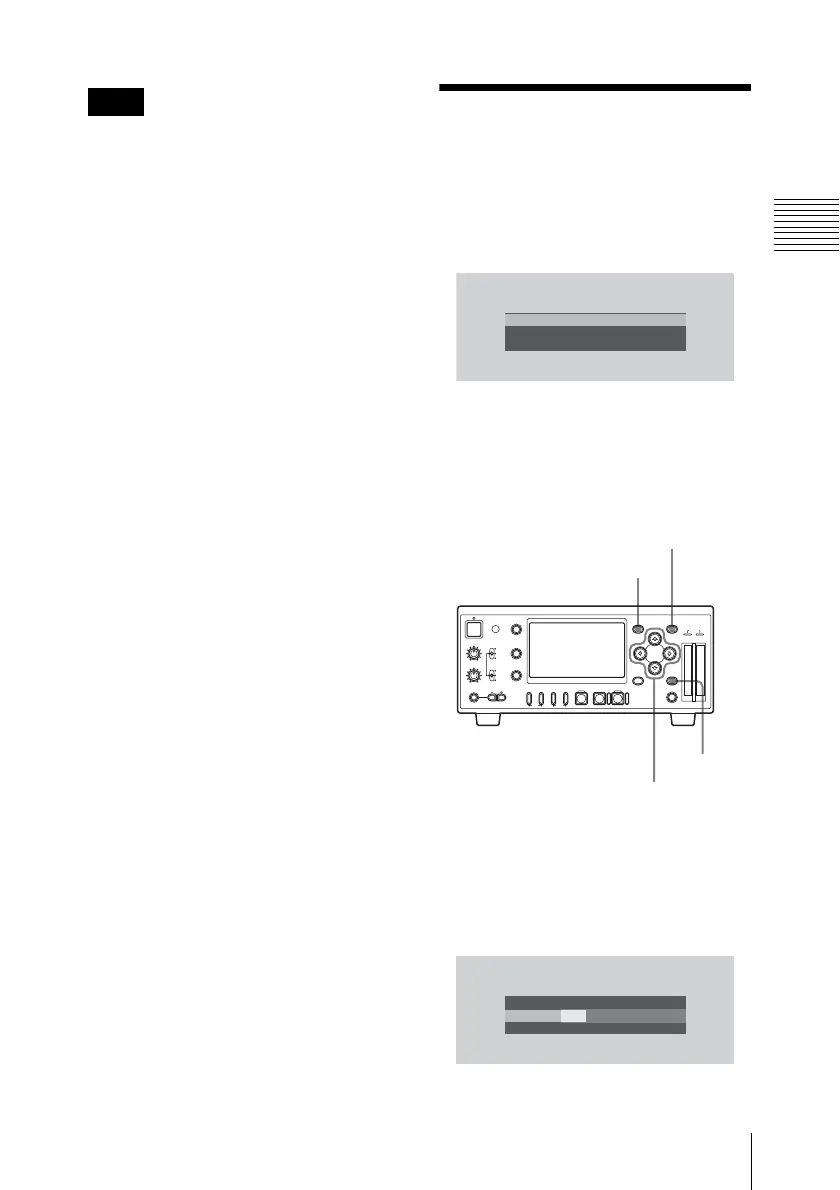
To set the time and date
1 Press the M or m button to set the
cursor to “Date/Time” then press the
SET button.
The cursor moves to the year-setting
column.
Note
INITIAL
SETT
I
NG
Ti
m
e
Z
one:
UTC
+09:00
TOKYO
D
ate/Ti
m
e:
2008/01/01
00:00:00
Finish
REC LEVEL
CH-1
VIDEO INPUT
PHONES
DISPLAY
MENU
TC/UB
STATUS
F REV PLAY/PAUSE
m
u
SLOT
SELECT
CH-2
iLINK
HD SDI
SG
AUDIO INPUT
PHONE LEVEL
PREV
.
NEXT
>
F FWD
M
SET
AB
THUMBNAIL CANCEL
ANALOG
HD SDI
CH-1/2
HD SDI
CH-3/4
ACCESS
1
STOP
x
REC
z
TOP END
SET button
MENU button
CANCEL
button
<, ,, M, m buttons
Ti
m
e
Z
one:
UTC
+09:00
TOKYO
D
ate/Ti
m
e:
2007/01/01
00:00:00
SET
Finish
INITIAL
SETT
I
NG
2008/01/01
00:00:00
SET