16
Names and Functions of Parts
Chapter 1 Overview
a Power button and indicator (1)
When this unit is connected to an AC power
source via the supplied MPA-AC1 AC
Adaptor (see page 28), the indicator lights
in red. (The unit is in the standby state.)
Pressing the power button with the indicator
lit in red starts the unit. The indicator lights
in green.
Pressing the power button again after the
start-up completes brings the unit into the
standby state (with the indicator lit in red).
To exit the standby state, remove the AC
power source.
b Infrared sensor
This receives signals from the supplied IR
remote commander.
c DISPLAY button
While recording, E-E, or playback picture is
displayed, pressing this button provides the
LCD display and the external monitor
screen with superimposed text information
including timecode, menu settings, and
alarm messages. Press the button again to
cancel the superimposition.
d MENU button
Press this button to display the menu on the
LCD display and the external monitor
screen. Press it again to exit the menu
display.
On how to use the menu, see Chapter 8 “Menu
Configuration and Detailed Settings” (page 83).
REC LEVEL
CH-1
VIDEO INPUT
PHONES
DISPLAY
MENU
TC/UB
STATUS
F REV PLAY/PAUSE
m
u
SLOT
SELECT
CH-2
iLINK
HD SDI
SG
AUDIO INPUT
PHONE LEVEL
PREV
.
NEXT
>
F FWD
M
SET
AB
THUMBNAIL CANCEL
ANALOG
HD SDI
CH-1/2
HD SDI
CH-3/4
ACCESS
1
STOP
x
REC
z
TOP END
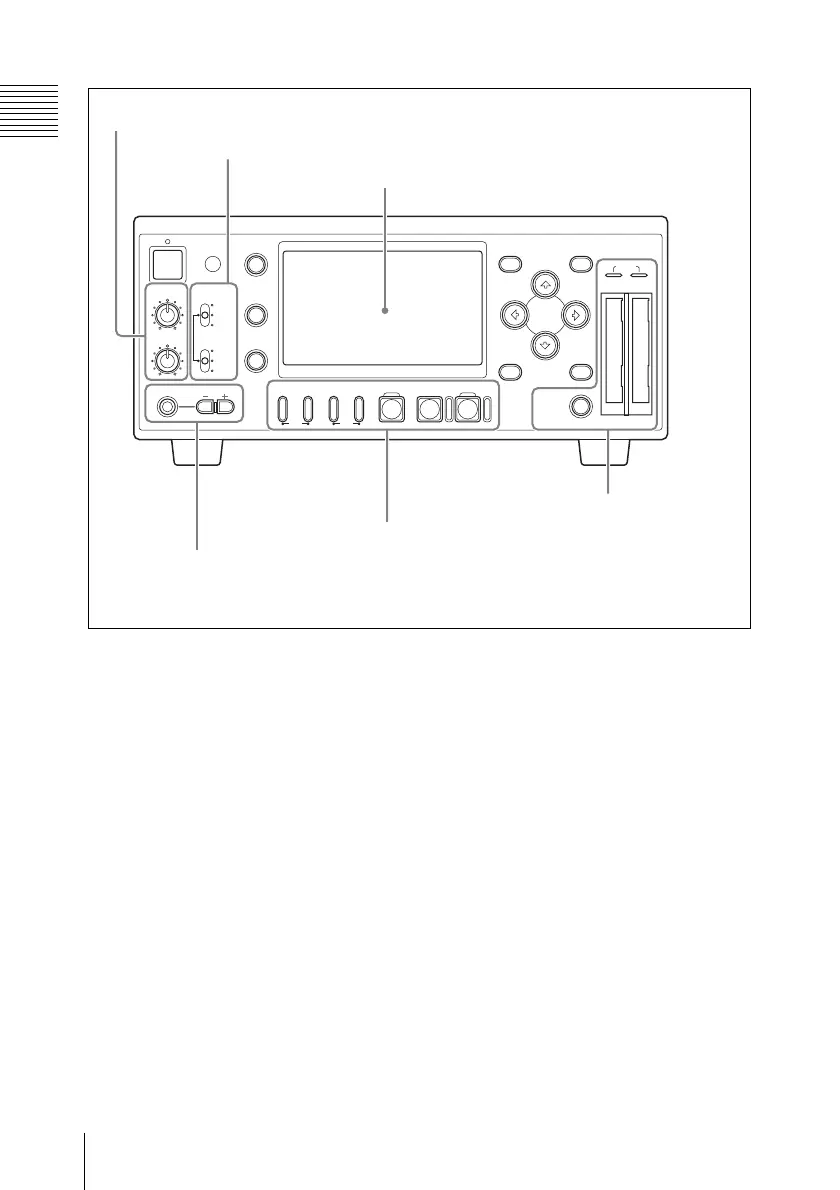
1 Audio input level control section (see page 17)
2 Video/audio input selection section (see page 18)
3 LCD display (see page 18)
4 Headphones
connection section
(see page 21)
5 Recording/playback
control section (see
page 21)
6 Card slot section
(see page 22)