TV/
Televiseur
Super
Audio
CD
player/
Lecteur Super
Audio
CD
DVD
player,
Blu-ray
Disc
Player/
Lecteur
DVD,
lecteur
Blu-ray
Disc
HDMI
cable (not supplied)/
Cable
HDMI
(non
fourni)
Audio
cord (not supplied)/
Cordon audio
(non
fourni)
HDMI
cable (not supplied)/
Cable
HDMI
(non
fourni)
Video
components/
Appareils
video
Super
Audio
CD
player/
lecteur
Super
Audio
CD
Audio
cord (not supplied)/
Cordon audio (non
fourni)
Speaker cord (not supplied)/
Cordon d'enceinte (non
fourni)
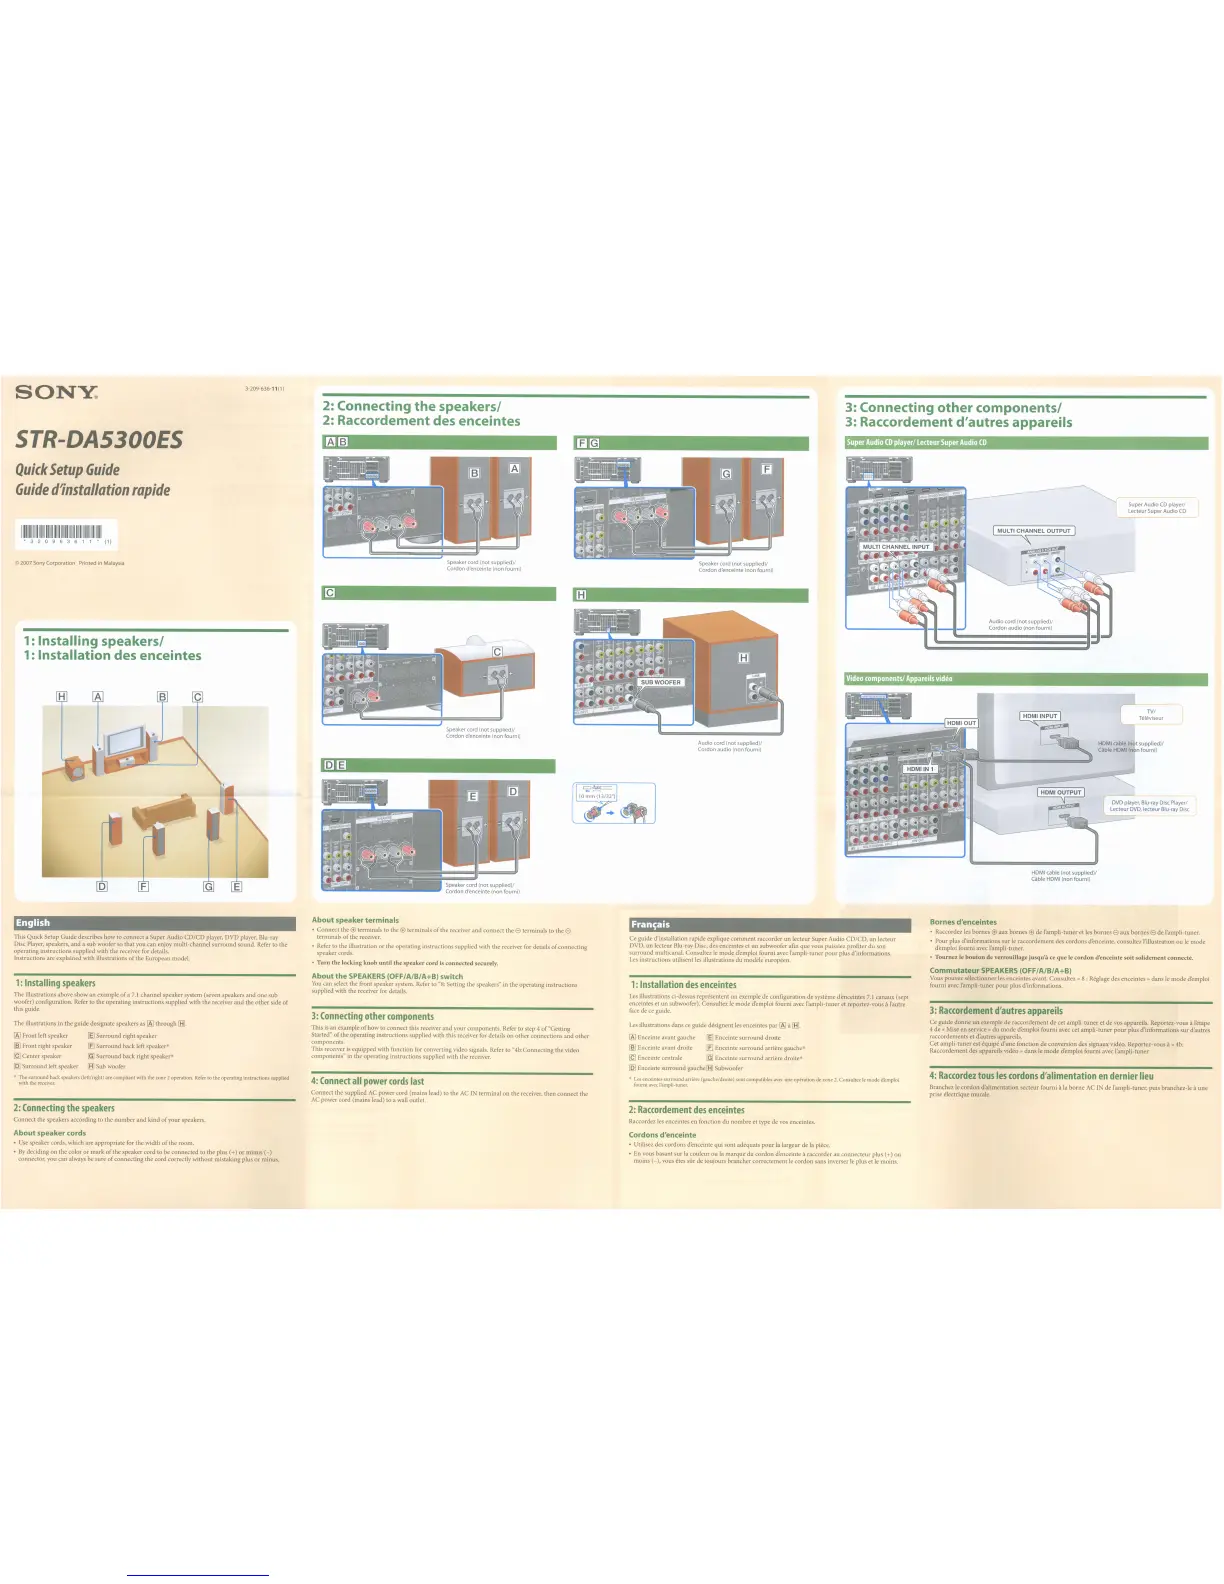
3: Connecting
other
components!
3: Raccordement d'autres appareils
Speaker cord (not supplied)/
Cordon d'enceinte
(non
fourni)
2: Connecting
the
speakers!
2: Raccordement des enceintes
Speaker cord (not supplied)/
Cordon d'enceinte (non
fourni)
Speaker cord (not supplied)/
Cordon d'enceinte
(non
fourni)
3-209-636-11(1)
1: Installing speakers!
1: Installation des enceintes
1111111111111111111111111111111111111111111111111111111
• 3 2 0 9 6 3 6 1 1 * (1)
©
2007
Sony
Corporation Printed
in
Malaysia
SONY:
Quick
Setup
Guide
Guide
d1nstallation
fapide
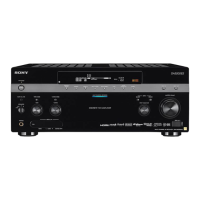
STR-DA5300ES
English
This Quick Setup Guide describes how to connect a Super Audio
CD/CD
player, DVD player, Blu-ray
Disc Player, speakers,
and
a sub woofer so that you can enjoymulti-channel
surround
sound. Refer to the
operating instructions supplied with the receiver for details.
Instructions are explained with illustrations
of
the European model.
1:
Installing
speakers
The illustrations above show an example
of
a
7.1
channel speaker system (seven speakers and one sub
woofer) configuration. Refer to the operating instructions supplied with the receiver and the
other
side
of
this guide.
The illustrations in the guide designate speakers
as
[AJ
through
[8l
[AJ
Front left speaker
[§
Surround right speaker
~
Front right speaker [£] Surround back left speaker*
[g
Center speaker [g] Surround back right speaker*
[QJ
Surround left speaker
[BJ
Sub woofer
* The surround back speakers (left/right) are compliant with the zone 2 operation. Refer
to
the operating instructions supplied
with the receiver.
2:
Connecting
the
speakers
Connect thespeakers according to the
number
and
kind
of
your speakers.
About
speaker terminals
• Connect the
<±l
terminals to the
<±l
terminals
of
the receiver and connect the e terminals to the e
terminals
of
the receiver.
• Refer to the illustration
or
the operating instructions supplied with the receiver for details
of
connecting
speaker cords.
•
Turn
the locking
knob
until
the
speaker
cord
is
connected
securely.
About
the
SPEAKERS
(OFF/A/B/A+B) switch
You
can select the front speaker system. Refer to
"8:
Setting the speakers" in the operating instructions
supplied with the receiver for details.
3:
Connecting
other
components
This
is
an example
of
how to connect this receiver and your components. Refer to step 4
of
"Getting
Started"
of
the operating instructions supplied with this receiver for details on
other
connections
and
other
components.
This receiver is equipped with function for converting video Signals. Refer to "4b:Connecting the video
components" in the operating instructions supplied with the receiver.
4:
Connect
all
power
cords
last
Connect the supplied
AC
power cord (mains lead) to the
AC
IN
terminal on the receiver, then connect the
AC power cord (mains lead) to a wall outlet.
Fran~ais
Ce guide d'installation rapide explique
comment
raccorder
un
lecteur Super Audio CD/CD, un lecteur
DVD, un lecteur Blu-ray Disc, des enceintes et un subwoofer afm que vous puissiez profiter du son
surround multicanal. Consultez
Ie
mode demploi fourni avec l'ampli-tuner
pour
plus d'informations.
Les
instructions utilisent
les
illustrations du modele europeen.
1:
Installation
des
enceintes
Les
illustrations ci-dessus representent
un
exemp!e de configuration de systeme d'enceintes
7.1
canaux (sept
enceintes et un subwoofer). Consultez
Ie
mode d'emploi fourni avec I'ampll-tuner et reportez-vous it I'autre
face de
ce
guide.
Les
illustrations dans ce guide designent les enceintes
par
[AJ
it
[BJ.
[AJ
Enceinte avant gauche
[§
Enceinte
surround
droite
~
Enceinte avant droite [£] Enceinte
surround
arriere gauche*
[g
Enceinte centrale [g] Enceinte
surround
arriere droite*
[QJ
Enceinte
surround
gauche
[BJ
Subwoofer
*
Les
enceintes surround arriece (gauche/droite) sont compatibles avec une operation de zone
2.
Consultez
Ie
mode d'emploi
fourni avec I'ampli-tuner.
2:
Raccordement
des
enceintes
Raccordez les enceintes en fonction du nombre et type de vos enceintes.
Bornes d'enceintes
• Raccordez les
barnes
<±l
aux bornes
<±l
de I'ampli-tuner
et
les
bornes e aux bornes e de l'ampli-tuner.
• Pour plus d'informations
sur
Ie
raccordement des cordons denceinte, consultez l'illustration ou
Ie
mode
d'emploi fourni avec l'ampli-tuner.
•
Tournez
Ie
bouton
de
verrouillage
jusqu'a
ce
que
Ie
cordon
d'enceinte
soit
solidement
connecte.
Commutateur
SPEAKERS
(OFF/A/B/A+B)
Vous pouvez selectionner les enceintes avant. Consultez « 8 : Reglage des enceintes » dans
Ie
mode
demploi
fourni avec l'ampli-tuner
pour
plus d'informations.
3:
Raccordement
d'autres
appareils
Ce guide donne un exemple de raccordement de cet ampli-tuner et de vos appareils. Reportez-vous
it
I'etape
4 de
« Mise en service» du mode d'emploi fourni avec cet ampli-tuner
pour
plus d'informations
sur
d'autres
raccordements et d'autres appareils.
Cet ampli-tuner est equipe d'une fonction de conversion des signaux video. Reportez-vous
it
« 4b:
Raccordement des appareils
video»
dans
Ie
mode
demploi fourni avec I'ampli-tuner.
4:
Raccordez
tous
les
cordons
d'alimentation
en
dernier
lieu
Branchez
Ie
cordon d'alimentation secteur fourni it la
borne
AC
IN
de !'ampli-tuner, puis branchez-Ie it une
prise electrique murale.
About speaker cords
• Use speaker cords, which are appropriate for the width
of
the room.
•
By
deciding on the color
or
mark
of
the speaker cord to be connected to the plus (+)
or
minus
(-)
connector, you can always be sure
of
connecting the cord correctly without mistaking plus
or
minus.
Cordons d'enceinte
• Utilisez des cordons d'enceinte qui sont adequats
pour
la largeur de la piece.
• En vous basant sur la couleur ou la marque du cordon d'enceinte
it
raccorder au connecteur plus (+) ou
moins
(-),
vous etes sur de toujours brancher correctement
Ie
cordon sans inverser
Ie
plus et
Ie
moins.