Regie les caracteristiques de toutes
les
enceintes
sur
celles des enceintes avant.
Explication
Desactive
Ie
calibrage automatique.
Rend
La
mesure de frequence de chaque
enceinte
pLane.
SeIectionne des caracteristiques de
frequence
correspondant
aux
normes
d'un
auditorium Sony.
Parametre
Front Reference
Full Flat
Engineer
OFF
Vous
devez
parametrer
chaque
appareil
de
sorte
que
Ie
son
soit
sorti
correctement
des
enceintes
lorsque
vous
utilisez
un
appareil
raccorde.
Le cas
suivant
decrit
des
appareils
Sony.
Reportez-vous
au
mode
d'emploi
fourni
avec
chaque
appareil.
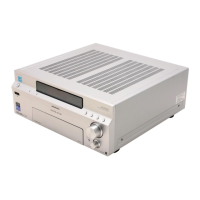
Lecteur Super Audio CD Sony
C3.I,tB
l
•
Lunite
de
distance
affichee
pour
les
modeles
aux
Etats-Unis
et
au
Canada
est
Ie
pied.
Lunite
de
distance pour
les
modeles
de
pays/regions
autres
que
les
Etats-
Unis
et
Ie
Canada
est
Ie
metre.
Vous
pouvez
changer l'unite
de
distance
utili
see
dans
« Distance Unit»
du
menu
de
parametrage
des
enceintes.
17
Appuyez sur ffi.
I.:ecran
de
fin s'affiche.
Parametrage
d'autres
appareils
Lorsque des codes d'erreur s'affichent
Lorsque
« Save
auto
calibration
(auto
speaker
setup)
results? »
s'affiche
sur
I'ecran
du
televiseur
al'etape 14,
vous
pouvez
choisir
de
confirmer
((
Yes»)
ou
non
((
No
») l'avertissement.
Suivez les
instructions
affichees
sur
lecran
du
televiseur
lorsque
vous
selectionnez
«
Yes
».
Pour
plus
de
details
sur
les
codes
d'avertissement
et
d'erreur,
voir
« Liste
des
messages
apres
une
mesure
de
calibrage
automatique
»
de
« 9 :
Calibrage
automatique
aux
reglages
appropries
(Auto
Calibration)
»
dans
Ie
mode
d'emploi.
Selectionnez
une
plage
de
lecture
adequate
(multicanaux
ou
2
canaux).
II
est
possible
que
Ie
son
ne
sorte
que
de
l'enceinte
avant
gauche/droit
lorsque
2
canaux
est
selectionne.
Vous
ne
pouvez
pas
mesurer
la
hauteur
des
enceintes surround
et
des
enceintes
surround arriere.
Reglez
la
position
des
enceintes surround depuis « Position»
dans
Ie
menu
de
parametrage
des
enceintes.
ij,"B4'tt
•
La
tailJe
d'une enceinte
(LARGE/SMALL)
est
determinee par
les
caracteristiques
basses.
Les
resuItats
de
mesure peuvent differer
selon
la
position
du
microphone d'optimisation
et
des
enceintes
et
en
fonction
de
La
forme
de
la
piece.
II
est recommande
de
suivre
les
resultats
de
mesure.
Vous
pouvez
toutefois changer
ces
parametres
dans
Ie
menu
de
parametrage
des
enceintes.
Sauvegardez
les
resultats
de
mesure avant
de
changer
eventuelleme~es
reglages.
•
Appuyez
sur
\:i:J
de
la
telecommande lorsque «
Please
Press
ENTER»
s'affiche
sur
l'ecran
du
televiseur.
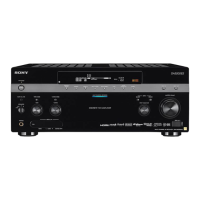
Apres Ie parametrage
Lampli-tuner
est
main
tenant
pret
al'usage.
Reportez-vous
au
mode
d'emploi
fourni
avec
l'ampli-tuner
pour
plus
d'informations.
13
La
mesure est terminee.
Lorsque
la
mesure
se
termine,
un
bip
retentit
et
Ie
resultat
de
mesure
s'affiche
sur
lecran
du
televiseur.
14
Appuyez sur
ffi
pour selectionner
{(
Next ».
15
Appuyez plusieurs fois sur
+-/-+
pour
selectionner
{(
Yes
» puis appuyez sur ffi .
16
Appuyez plusieurs fois sur t /
...
pour selectionner
Ie
type
de calibrage automatique, puis appuyez
sur-+.
Les
resultats
de
mesure
sont
sauvegardes.
~Av'ant
d-~
-commence;'ie"ca'libra~Je'
~.::.:
":.~,,
w;~:
au~omatiqu~
li.1
'.
"':.:-
. .
.>
..
::};
Fran~ais
Execution du calibrage
automatique
.m
[!]
La
fonction
de
calibrage
automatique
vous
permet
de
determiner
ce
qui
suit:
la
connexion,
la
polarite,
la
distance,
l'angle, la taille,
Ie
niveau
des
enceintes,
les
caracteristiques
de
la
frequence.
3 Installez Ie microphone d'optimisation.
Placez Ie
microphone
d'optimisation
a
votre
postion
d'ecoute.
Utilisez
un
tabouret
ou
un
trepied
pour
que
Ie
microphone
d'optimisation
soit ala
meme
hauteur
que
vos oreilles.
Orientez
Ihtremite
L
du
microphone
d'optimisation
vers
l'enceinte
avant
gauche
et
l'extremite R vers
lenceinte
avant
droite.
1 Raccordez un ecran de televiseur acet ampli-
tuner.
Consultez
« 3 :
Raccordement
de
l'ecran »
dans
Ie
mode
d'emploi.
2 Allumez I'ampli-tuner et Ie televiseur.
Selectionnez
la
source
d'entree
du
televiseur
de
fac;:on
que
l'image
du
menu
soit affichee.
3 Appuyez sur AMP pour activer la commande de
I'ampli-tuner.
4 Appuyez sur SHIFT puis sur MENU.
La Iiste
du
menu
de
cet
ampli-tuner
s'affiche
sur
l'ecran
du
televiseur.
Appuyez
sur
AMP
MENU
si la liste
du
menu
n'apparait
pas
sur
l'ecran
du
televiseur.
Le
menu
s'affiche
sur
l'ecran
du
televiseur
lorsque
«
GUI
MODE»
apparait
sur
l'affichage.
5 Appuyez plusieurs
fois
sur
t/
...
pour selectionner
{(
Settings» puis appuyez sur (B ou
-+.
La liste
du
menu
de
reglage s'affiche
sur
l'ecran
du
televiseur.
6 Appuyez plusieurs
fois
sur
t/
...
pour selectionner
{(
Auto Calibration» puis appuyez sur
ffi
ou
-+.
7 Appuyez plusieurs
fois
sur
t/
...
pour selectionner
{(
Quick
Setup»
puis appuyez sur ffi.
8 Appuyez plusieurs fois sur
t,
...
et
ffi
pour
decocher les options que vous ne voulez pas
mesurer.
•
Speaker
Distance
•
Speaker
Level
•
Frequency
Characteristic
Reglage du subwoofer amplifie
•
Si
un
subwoofer
est
raccorde,
allumez-Ie
et
augmentez
Ie
volume
au prealable.
Tournez
Ie
bouton
MASTER
VOLUME
jusqu'un
peu
avant
Ie
point
central.
•
Si
Ie
subwoofer
est
dote
d'une
fonction
de
selection
de
la
frequence
de
recouvrement,
choisissez la
valeur
maximale.
•
Si
Ie
subwoofer
est
dote
d'une
fonction
de
mise
en
veille
automatique,
desactivez
cette
fonction.
2 Raccordez Ie microphone d'optimisation fourni a
la prise AUTO
CAL
MIC.
La
prise
AUTO
CAL
MIC
ne
doit
etre
utilisee
que
pour
Ie
microphone
d'optimisation
fourni.
Ne
raccordez
pas
un
autre
microphone.
Ceci
pourrait
endommager
l'ampli-tuner
et
Ie
microphone.
9 Appuyez sur
-+.
10
Appuyez sur
ffi
pour selectionner
{(
Start ».
11
La
mesure commence dans
les
cinq secondes.
12
La
mesure commence.
L'operation
de
mesure
demande
environ
30
secondes
avec
un
signal
de
test.
Attendez
la fin
de
l'operation
de
mesure.
• Pendant
Ie
calibrage,
Ie
son
emis
par
les
enceintes
est
tres
fort.
Veillez
a
ce
qu'i1
n'y
ait
pas
denfants aproximite
et
a
ne
pas
perturber
Ie
voisinage.
•
Effectuez
la
mesure
dans
un
environnement silencieux pour eviter
reffet
de
bruit
et
obtenir
une
mesure
plus
precise.
•
S'il
ya
des
obstacles dans
la
trajectoire entre
Ie
microphone d'optimisation
et
les
enceintes,
Ie
calibrage
ne
s'effectuera
pas
correctement. Pour eviter
des
erreurs
de
mesure,
enlevez
tout
obstacle
de
la
zone
de
mesure.
Vous
pouvez
regler les
enceintes
pour
obtenir
automatiquement
Ie
son
souhaite
depuis
to
utes les
enceintes
raccordees
al'aide
de
la
fonction
de
calibrage
automatique.
1 Installez et raccordez
les
enceintes et Ie televiseur.
Pour
plus
d'informations,
voir
la
couverture.
Calibrage
automatique
aux
reglages
appropries
(Auto
Calibration)
Explanation
Adjusts the characteristics
of
all
the
speakers to match the characteristics
of
the
front speaker.
Makes the
measurement
of
frequency from
each speaker flat.
Sets the frequency to
one
that matches that
of
the Sony listening
room
standard.
Sets the auto calibration to off.
Front Reference
Full Flat
Parameter
OFF
Engineer
After
the
setting
The
receiver is
now
ready
to
use. Refer to
the
operating
instruction
supplied
with
the
receiver
for
details.
•
The
size
of aspeaker
(LARGE/SMALL)
is
determined
by
the
low
characteristics.
The
measurement results
may
vary,
depending
on
the
position
of
the
optimizer microphone
and
speakers,
and
the
shape of
the
room.
It
is
recommended that
you
follow
the
measurement
results.
However,
you
can
change
those settings
in
the
Speaker
settings
menu.
Save
the
measurement
results
first,
then try
to
change
the
settings if
you
want.
Press
ffi
on
the
remote
when
"Please
Press
ENTElt' appears
on
the
TV
screen.
Setting
up
other
components
You
should
set
up
each
component
so
that
take
out
sound
is
output
from
speakers
correctly
when
you
play
back
a
connected
component.
The
following case
describes
Sony
components.
Refer
to
the
operating
instructions
supplied
with
each
component.
Sony Super Audio CD player
15
Press
+-/-+
repeatedly
to
select "Yes:' then press
ffi·
When error codes appear
When
"Save
auto
calibration
(auto
speaker
setup)
results?"
appears
on
the
TV
screen
in
step
14, you
can
select
whether
to
confirm
the
warning
("Yes")
or
not
("No"). Follow
the
instructions
of
the
TV
screen
when
you
select "Yes:'
For
details
on
warning
and
error
codes,
see
"Message list
after
auto
calibration
measurement"
in
"9:
Calibrating
the
appropriate
speaker
settings
automatically
(Auto
Calibration)"
in
the
operating
instructions.
Select a
suitable
playback
area
(multi-channel
or
2
channel).
Sound
may
come
out
from
only
the
front
speaker
left/right
when
2
channel
is selected.
16
Press
t /
...
repeatedly
to
select the autocalibration
type, then press
-+.
The
measurement
results
are
saved.
17
Press
ffi.
The
exit
screen
appears.
GD
You
cannot measure
the
speaker
height
of
the
surround speakers
and
the
surround
back
speakers.
Set
the
position of the surround speaker
from
the
"Position"
in
the
Speaker
settings
menu.
The
auto
calibration
function
allows
you
to
measure
the
following:
speaker
connections,
polarity
of
speakers,
speaker
distance,
speaker
angle,
speaker
size,
speaker
level,
frequency
characteristics.
English
• During
the
calibration,
the
sound that
comes
out of
the
speakers
is
very
loud.
Pay
attention
to
the
presence ofchildren or
to
the
effect
on
your
neighborhood.
•
Perform
the
measurement
in
a quiet environment
to
avoid
the
effect
of
noise
and
get
a
more
accurate measurement.
•
If
there
are
any
obstacles
in
the
path
between
the
optimizer microphone
and
the
speakers,
the
calibration cannot
be
performed
correctly.
Remove
any
obstacle
from
the
measurement
area
to
avoid
measurement error.
Before you perform
the
auto
calibration
rE!
.
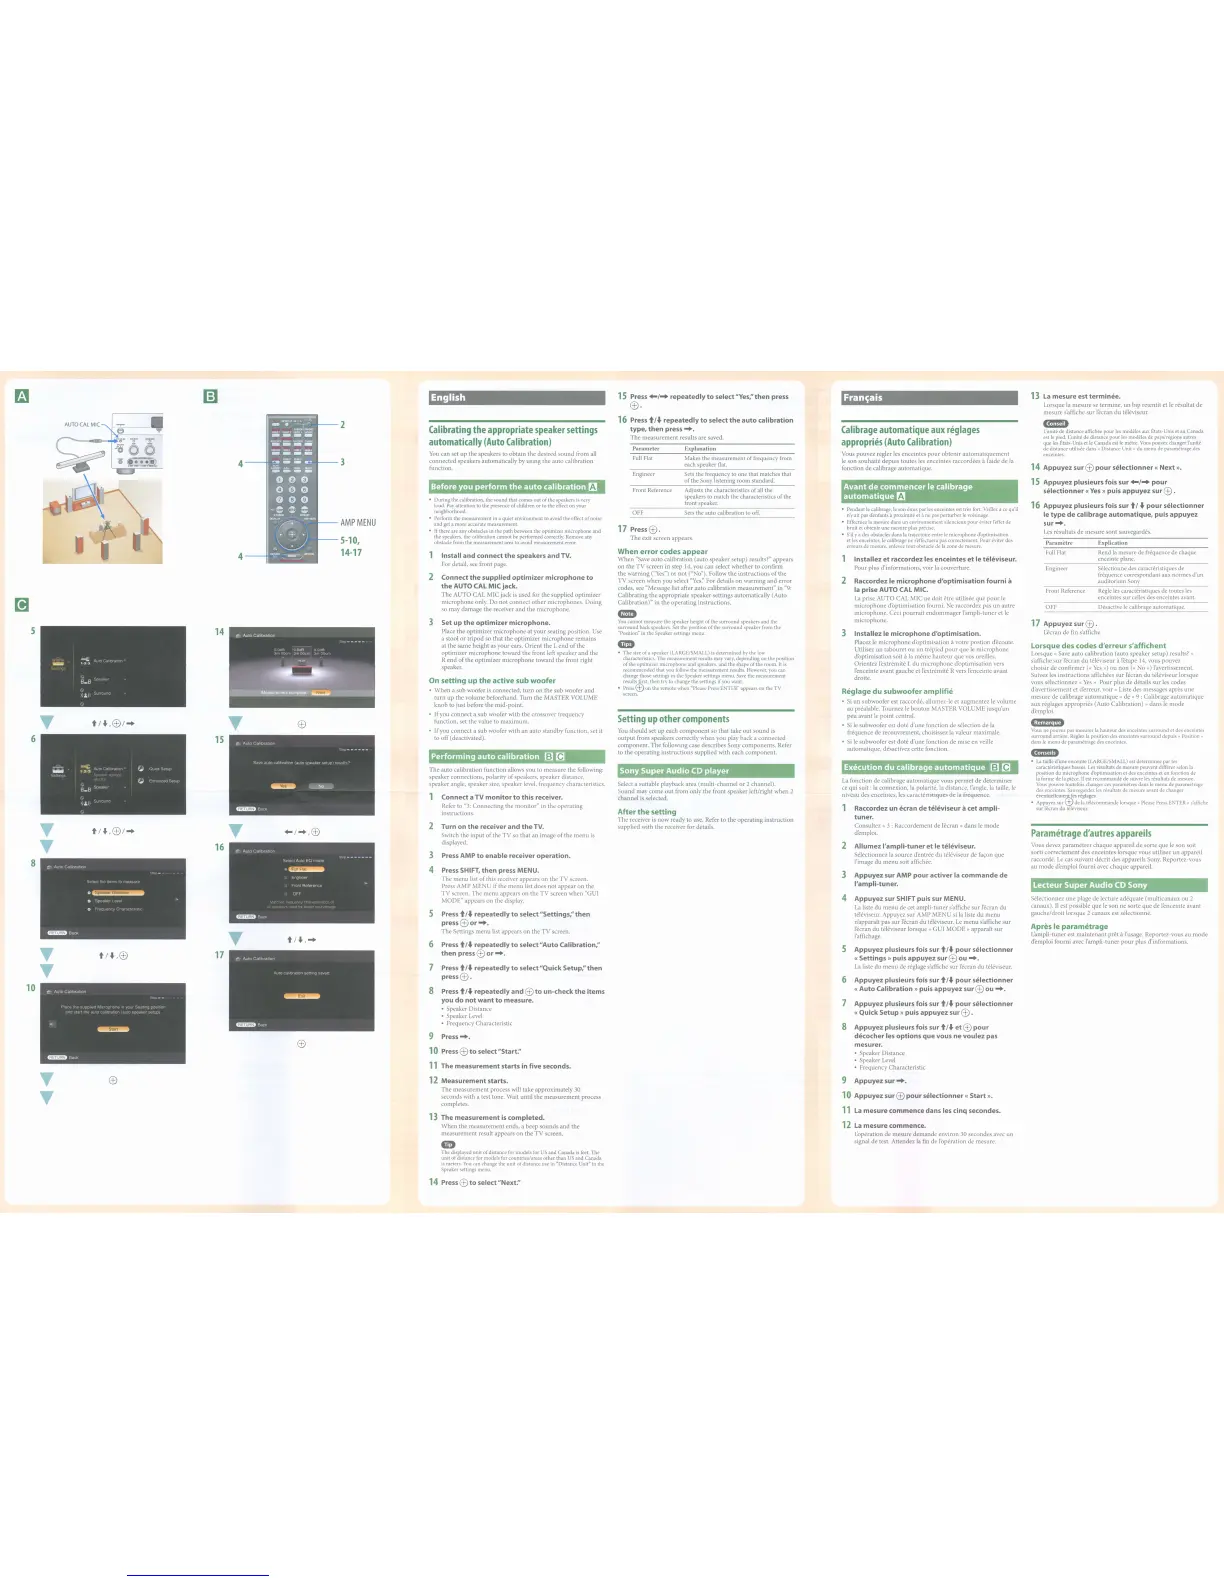
3 Set up
the
optimizer microphone.
Place
the
optimizer
microphone
at
your
seating
position.
Use
a
stool
or
tripod
so
that
the
optimizer
microphone
remains
at
the
same
height
as
your
ears.
Orient
the
L
end
of
the
optimizer
microphone
toward
the
front
left
speaker
and
the
R
end
of
the
optimizer
microphone
toward
the
front
right
speaker.
On setting up the active sub woofer
•
When
a
sub
woofer
is
connected,
turn
on
the
sub
woofer
and
turn
up
the
volume
beforehand.
Turn
the
MASTER
VOLUME
knob
to
just
before
the
mid-point.
•
If
you
connect
a
sub
woofer
with
the
crossover
frequency
function,
set
the
value
to
maximum.
•
If
you
connect
a
sub
woofer
with
an
auto
standby
function,
set it
to
off
(deactivated).
Performing autocalibration
:rn:![!]:
1 Install and connect
the
speakers and TV.
For
detail,
see
front
page.
2 Connect the supplied optimizer microphoneto
the
AUTO
CAL
MIC jack.
The
AUTO
CAL
MIC
jack
is
used
for
the
supplied
optimizer
microphone
only.
Do
not
connect
other
microphones.
Doing
so
may
damage
the
receiver
and
the
microphone.
Calibrating
the
appropriate
speaker
settings
automatically
(Auto
Calibration)
You
can
set
up
the
speakers
to
obtain
the
desired
sound
from
all
connected
speakers
automatically
by
using
the
auto
calibration
function.
AMP
MENU
2
3
5-10,
14-17
4
4---+
15
14
6
5
1
Connect a TV monitor
to
this receiver.
Refer
to
"3:
Connecting
the
monitor"
in
the
operating
instructions.
T
t/"',ffi/-+
T
+-/-+,ffi
2
Turn on
the
receiver and theTV.
Switch
the
input
of
the
TV
so
that
an
image
of
the
menu
is
T
16
displayed.
3
Press
AMP
to
enable receiver operation.
8
4
Press
SHIFT, then press MENU.
The
menu
list
of
this
receiver
appears
on
the
TV
screen.
Press
AMP
MENU
if
the
menu
list
does
not
appear
on
the
TV
screen.
The
menu
appears
on
the
TV
screen
when
"GUI
MODE"
appears
on
the
display.
5
Press
t /
...
repeatedly
to
select "Settings:' then
press
ffi
or
-+.
T
The
Settings
menu
list
appears
on
the
TV
screen.
t/
...
,-+
6
Press
t/
...
repeatedly
to
select
"Auto Calibration:'
T
t/"',ffi
17
then press
ffi
or
-+.
T
7
Press
t /
...
repeatedly
to
select "Quick Setup:'then
pressffi
.
10
8
Press
t/
...
repeatedly and
ffi
to
un-check
the
items
you do notwant
to
measure.
•
Speaker
Distance
•
Speaker
Level
•
Frequency
Characteristic
9
Press-+.
ffi
10
Press
ffi
to
select "Start:'
11
The measurement starts in five seconds.
T
ffi
12
Measurement starts.
T
The
measurement
process
will
take
approximately
30
seconds
with
a test tone. Wait
until
the
measurement
process
completes.
13
The measurement
is
completed.
When
the
measurement
ends,
a
beep
sounds
and
the
measurement
result
appears
on
the
TV
screen.
•
The
displayed
unit of distance
for
models
for
US
and
Canada
is
feet.
The
unit of distance
for
models
for
countries/areas other than
US
and Canada
is
meters.
You
can
change
the unit of distance
use
in
"Distance
Unit"
in
the
Speaker
settings
menu.
14
Press
ffi
to
select "Next:'