STIHL TS 460 28
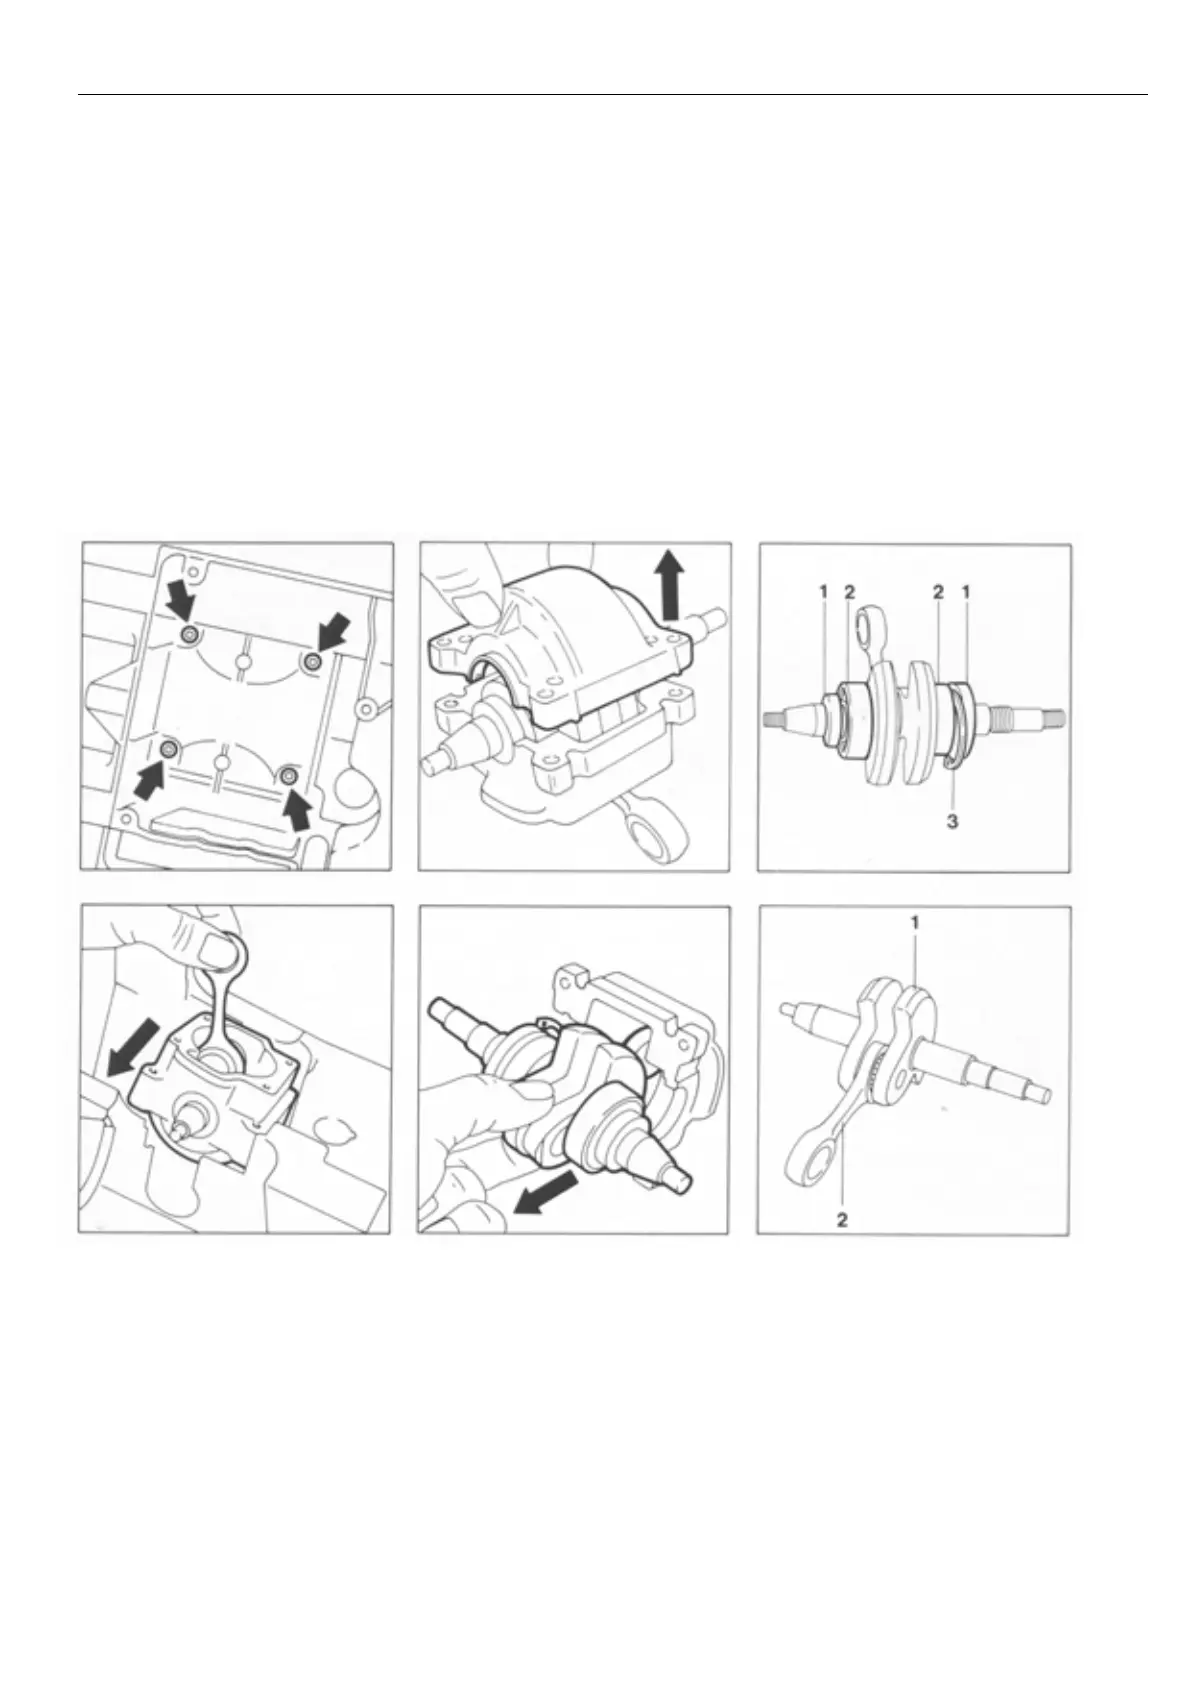
Top:
Crankcase mounting
screws
Bottom:
Removing the crankcase
Top:
Removing the bottom of the crankcase
Below:
Removing the crankshaft
Top:
1 = Oil seal
2 = Ball bearing
3 = Circlip
Bottom:
1 = Crankshaft
2 = Connecting rod
- Remove the crankcase
mounting screws.
- Remove the crankcase from
the engine housing.
- Remove bottom of
crankcase.
- Remove crankshaft from
crankcase.
- Remove oil seals, circlip, and
ball bearings from crankshaft.
- The crankshaft, connecting
rod and needle bearing form
an inseperable unit. This
means that the crankshaft
must always be replaced as a
complete unit in the event of
any damage to any one of
these parts. When fitting a
replacement crankshaft
always install new oil seals
and ball bearings.
- Inspect both halves of the
crankcase for cracks and
replace if necessary.
 Loading...