STIHL TS 460 45
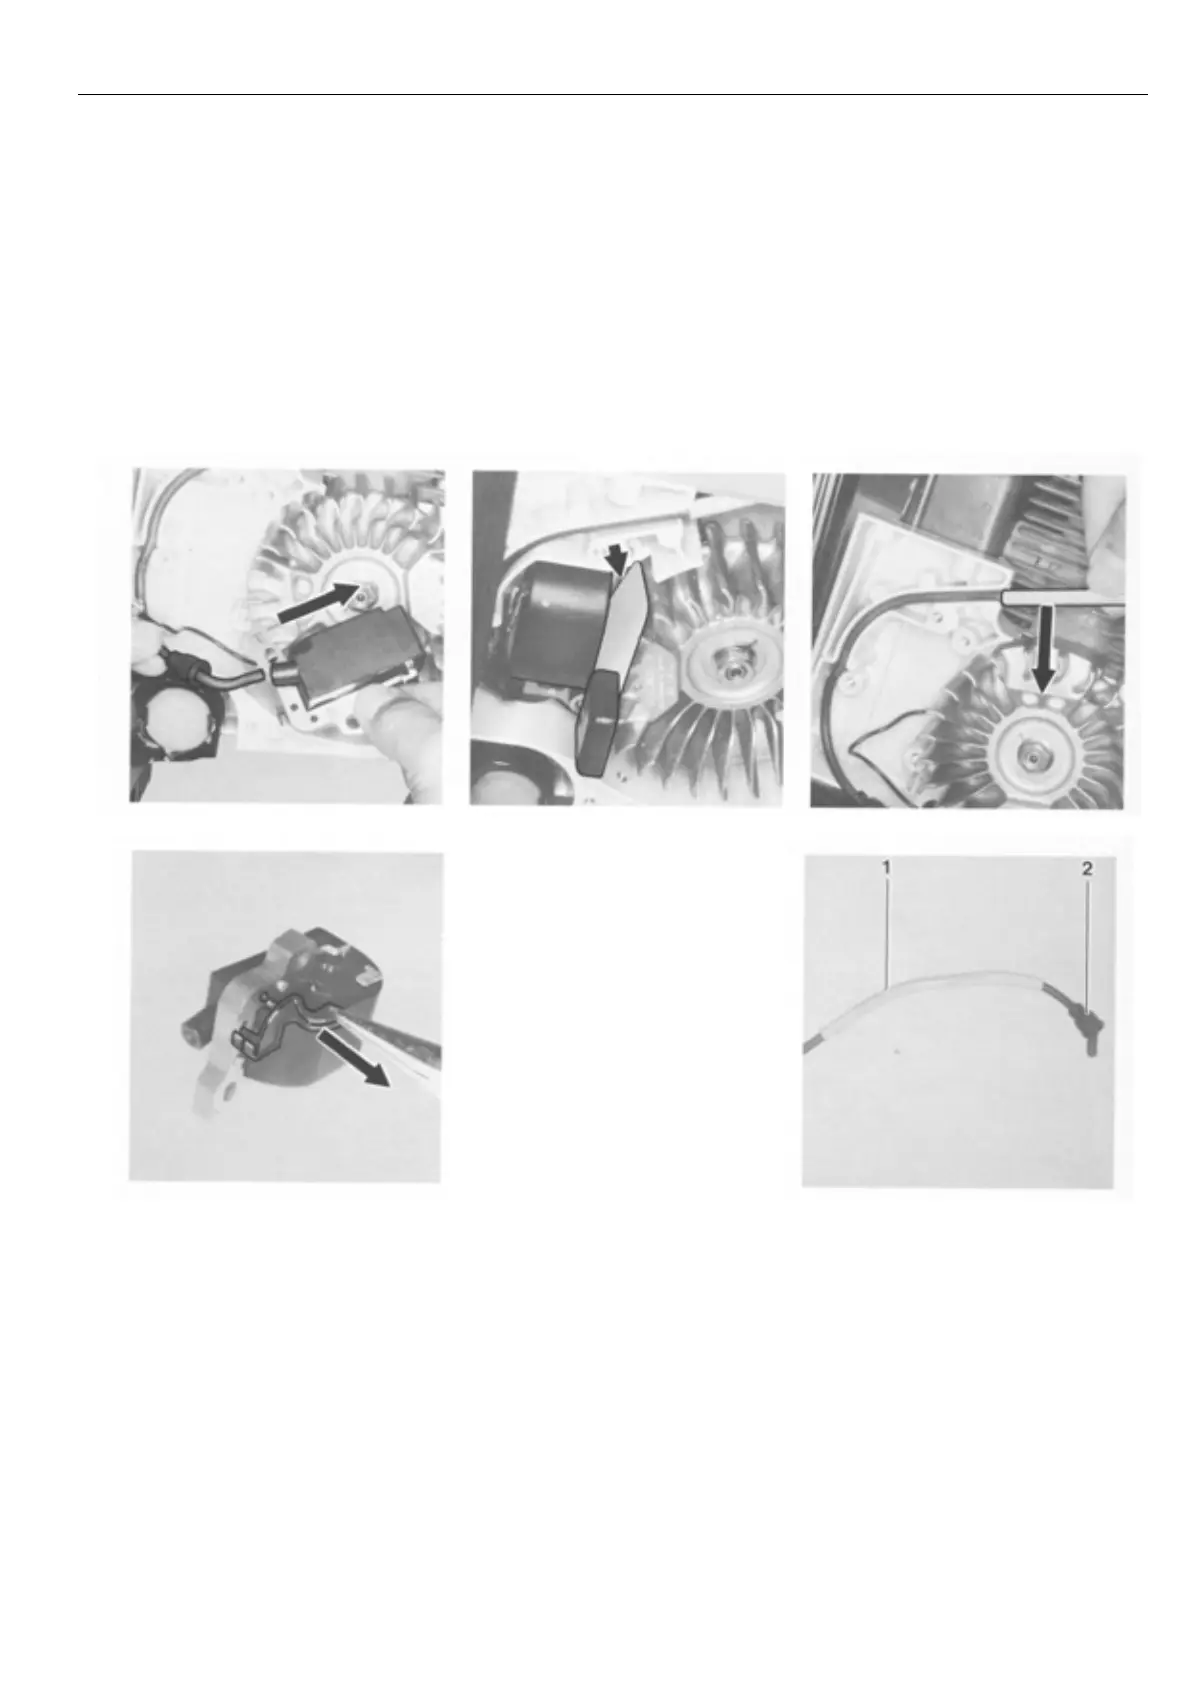
6.1.3 Ignition Lead/
Spark Plug Terminal
Top: Removing the unscrewed ignition
lead from the high voltage outlet
Bottom:
Removing the wire holder
Adjusting gauge 1111 890 6400 positioned
between the flywheel and the ignition
module
Top:
Removal of the ignition lead
Bottom:
1 = Insulating tube
2 = Grommet
Note: Before screwing in the
ignition lead, fill the high voltage
output with STIHL Multipurpose
Grease, see 11.2.
Caution: Do not use graphite
(Molykote) grease or silicon
insulating paste.
- Slide grommet over the high
voltage output.
- Fit ignition module and slightly
tighten screws.
Important: There must be a
washer under the head of each
screw.
- Slide adjusting gauge between
legs of ignition module and
magnet poles of flywheel.
- Press ignition module against
adjusting gauge, tighten
mounting screws to 8.0 Nm.
Further assembly is carried out in
reverse order.
- Remove grommet from
high voltage output.
- Unscrew ignition lead from
contact pin; to this end, turn
ignition module and pull
ignition lead out of high
voltage output.
- If necessary, press out the
pegs of the wire holder and
remove the wire holder.
- Remove shroud, see 6.1.5.
- Remove ignition module,
see 6.1.2.2.
- Pull ignition lead out of
mounting in engine housing.
- Remove grommet and
insulating tube from ignition
lead.

 Loading...