42 TS 410, TS 420
: Take out the needle bearing (1),
examine and clean it, replace if
necessary.
Removing the clutch-side half of
the crankcase
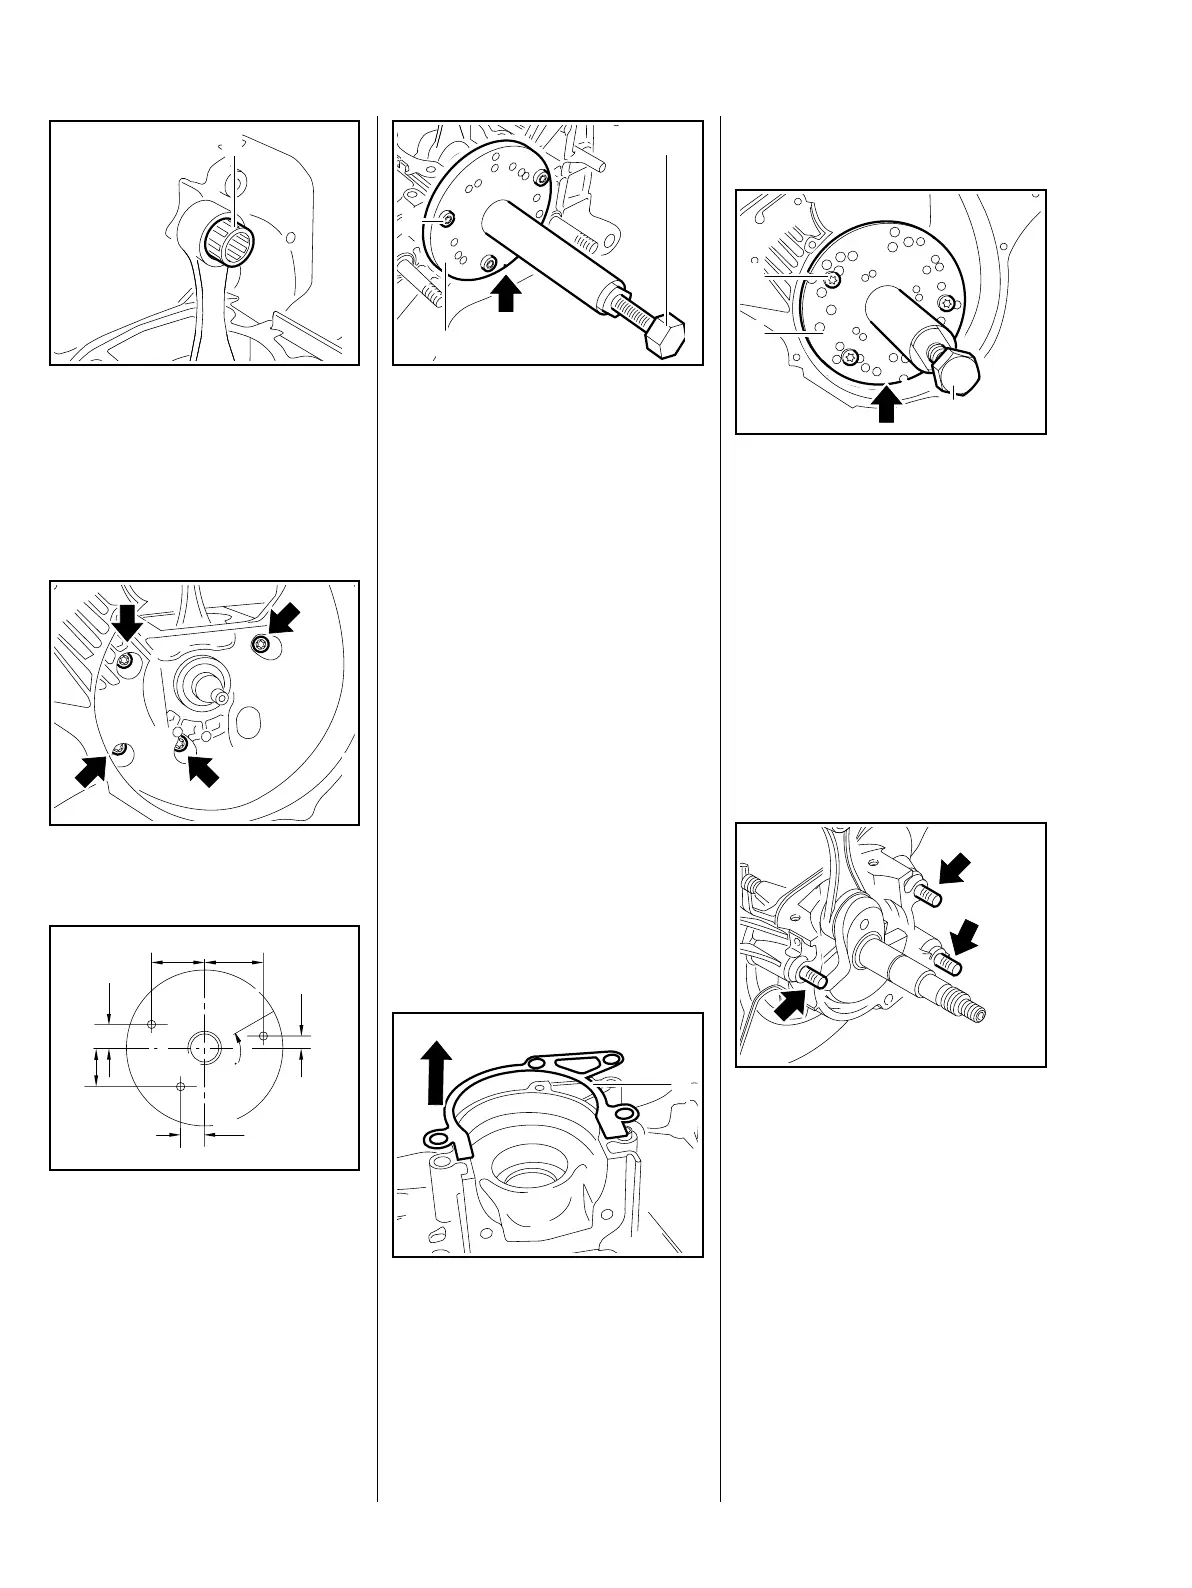
: Take out the screws (arrows).
Assembly tools without holes "21"
can be reworked with 5.5 mm holes
as illustrated.
The drilled plate is shown from
above in the illustration.
Dimensions are given in millimeters.
370RA161 TG
1
370RA136 TG
34.4
11.2
21.1
42.2
21
21
21
21
38.2
17.3
370RA137 TG
– Unscrew the spindle (1) of the
installing tool 5910 893 2102
until the flange contacts the
crankcase – left-hand thread.
: Align the installing tool with the
flange (2) 5910 893 2102 with
the clutch-side half of the
crankcase so that the edge
number "21" (arrow) is at the
bottom.
: Insert three M5x72 screws (3)
through the holes marked "21"
and screw them as far as
possible into the crankcase half.
The clutch-side half of the
crankcase is pulled off in this way
and the two halves of the crankcase
separated.
– Fit new grooved ball bearings
and oil seals, b 7.6.2.
: Remove the gasket (1).
21
21
21
21
370RA138 TG
1
2
3
370RA139 TG
1
Removing the ignition-side half
of the crankcase
– Unscrew the spindle (1) of the
installing tool 5910 893 2102
until the flange contacts the
crankcase – left-hand thread.
: Align the installing tool with the
flange (2) 5910 893 2102 with the
ignition-side half of the crankcase
so that the edge number "21"
(arrow) is at the bottom.
: Insert three M5x72 screws (3)
through the holes marked "21".
: Insert screws (arrows) through
the holes in the crankcase half.
21
21
21
21
370RA140 TG
2
1
3
370RA141 TG

 Loading...