60 6390-009-002 REV D www.stryker.com
Service
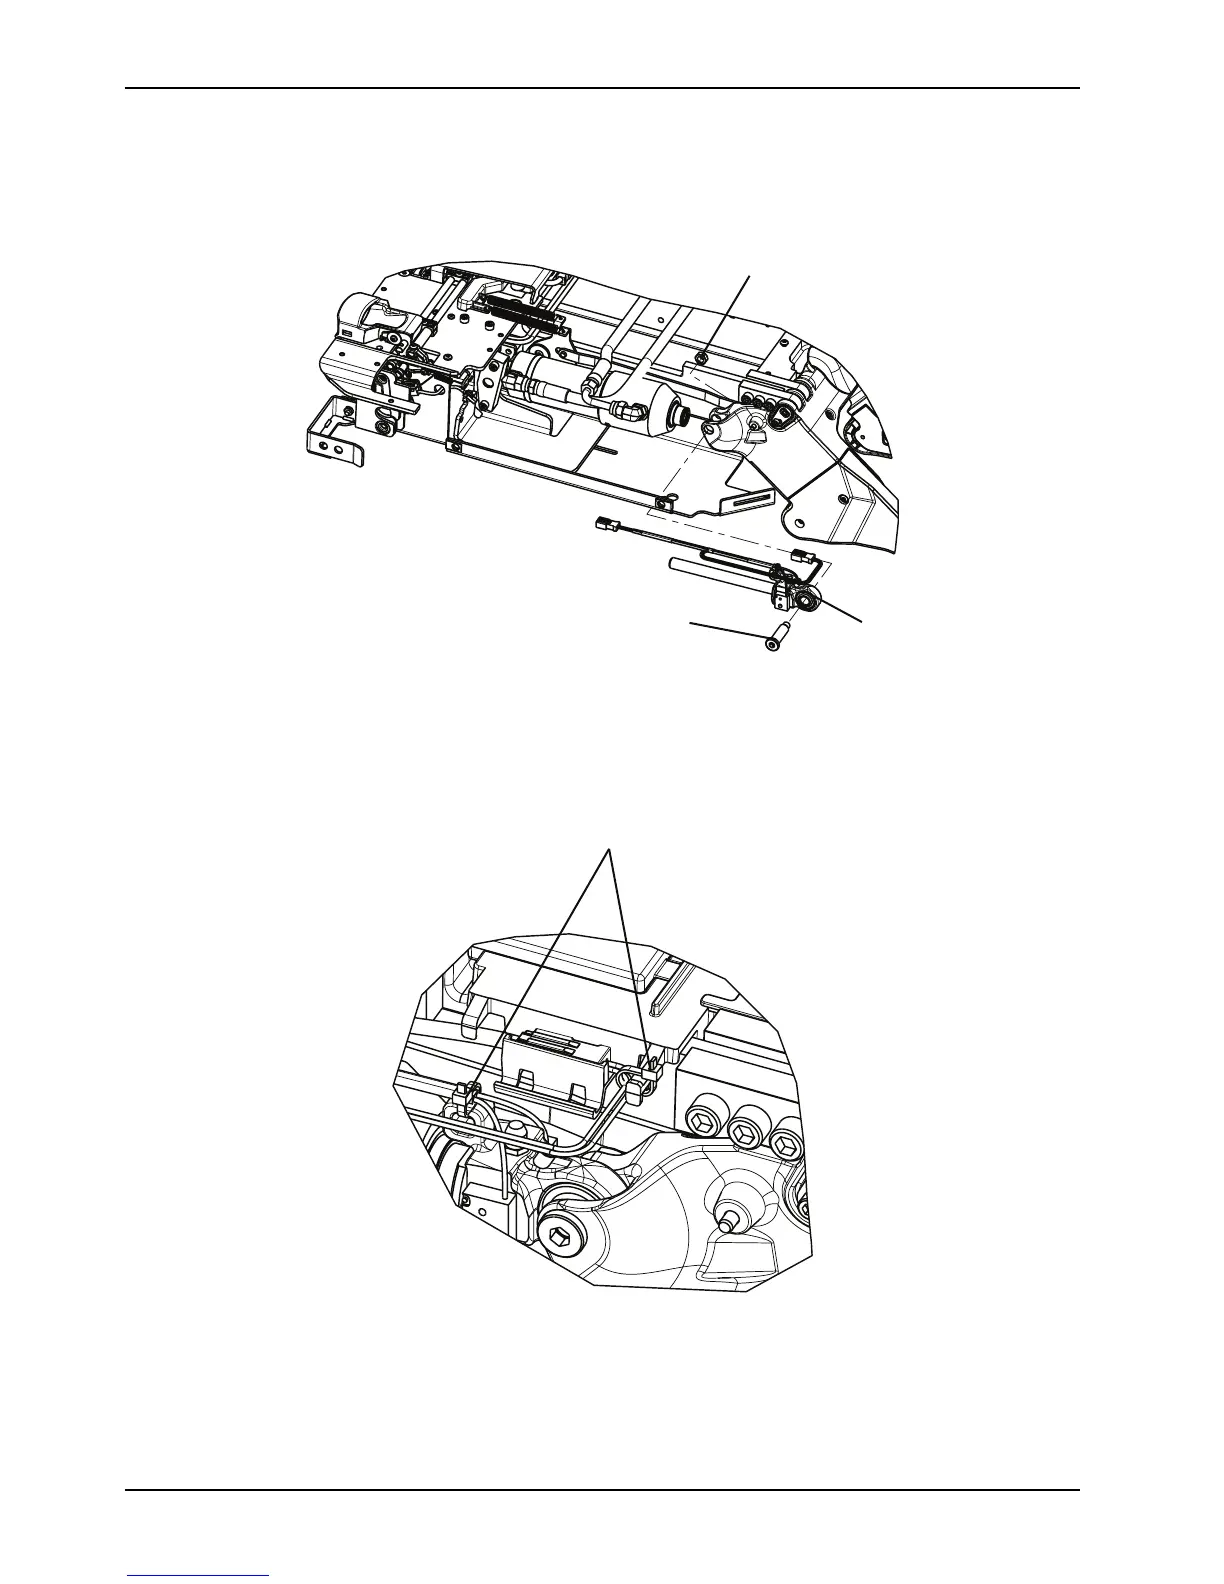
Hydraulic cylinder removal and replacement (Continued)
4. Using a 1/4" hex wrench and a 1/2" combination wrench, remove the end cap cylinder pin (A) and nut (B) (Figure
27 on page 60).
Figure 27: Hydraulic cylinder assembly
5. Using diagonal pliers, cut the cable ties (D) (Figure 28 on page 60) that secure the hydraulic cylinder rod end
assembly (C) cable to the plastic cover (Figure 27 on page 60).
Note: Pay attention to the location of all the cable ties for reinstallation.
Figure 28: Cable ties locations
6. While lifting up on the cylinder, remove the hydraulic cylinder rod end assembly (C) (Figure 27 on page 60). Save
the hydraulic cylinder rod end assembly for reinstallation.

 Loading...