76 6390-009-002 REV D www.stryker.com
Service
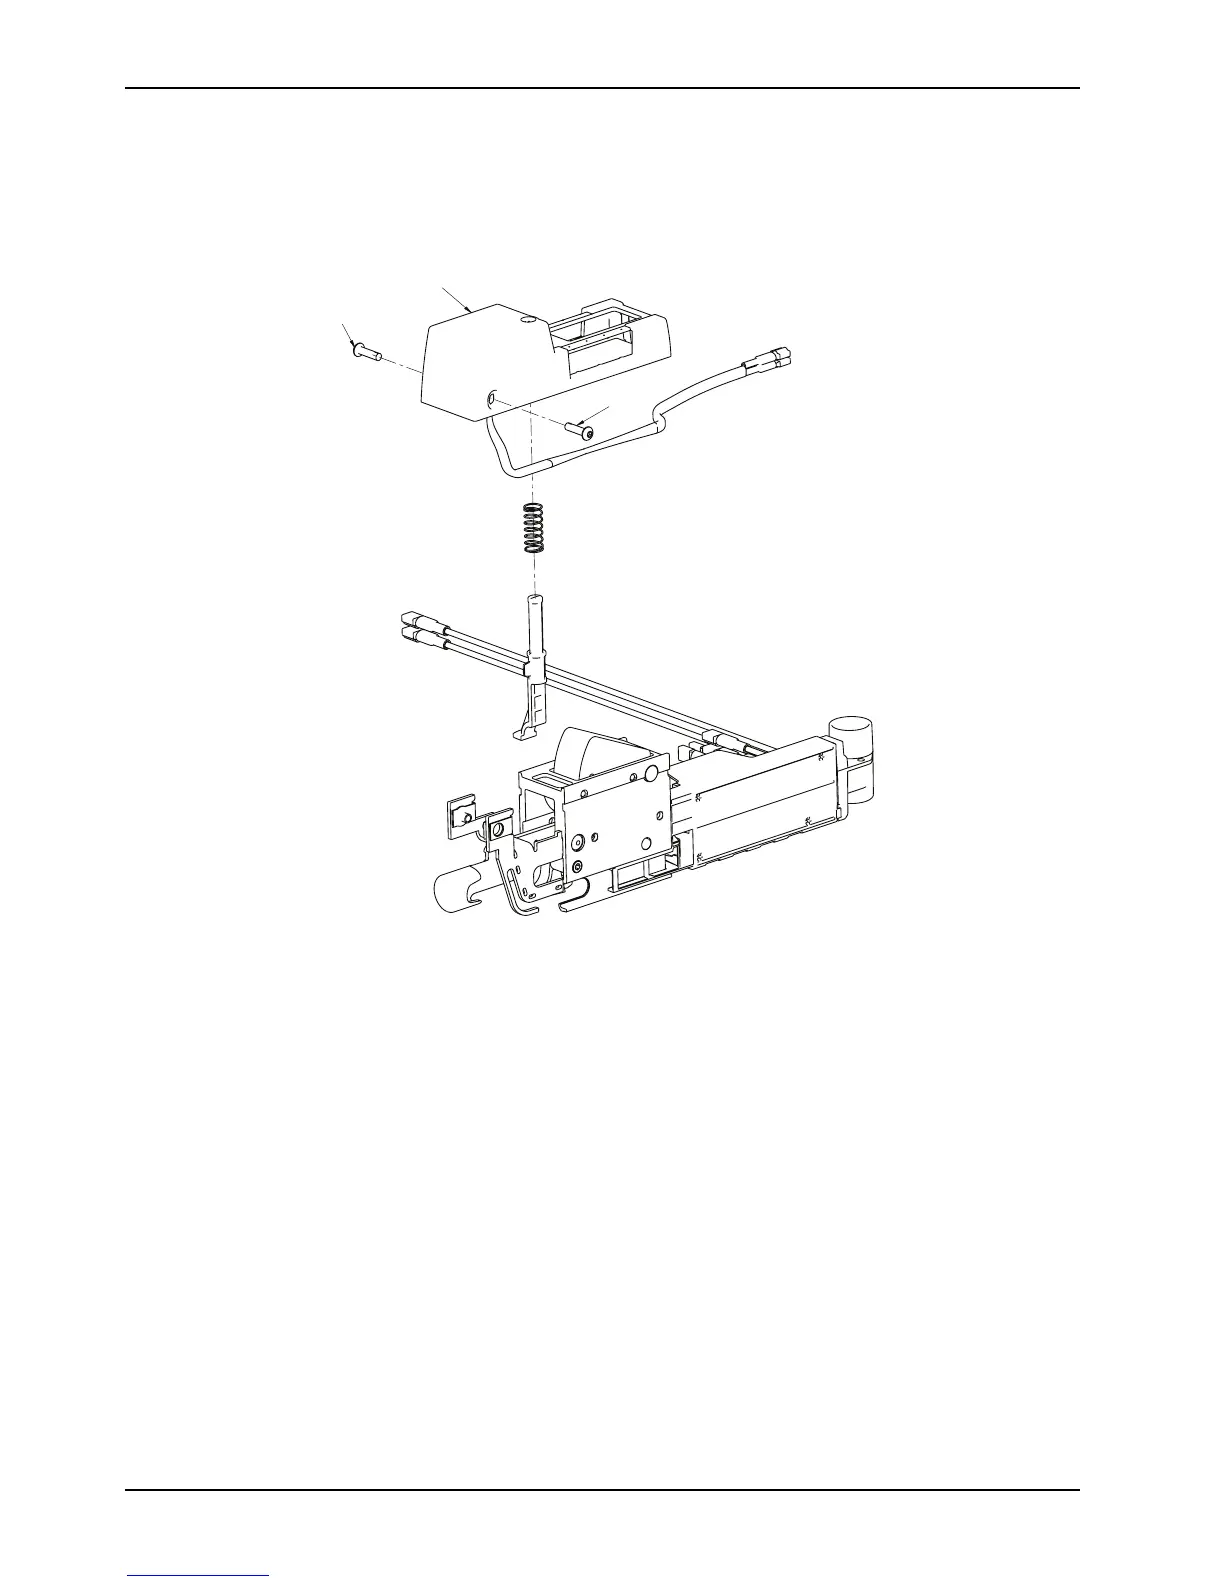
Primary coil replacement, head end (Continued)
12. Using a 1/8'' hex wrench, remove the two button head cap screws (F) that secure the anchor housing assembly
head end to the anchor pawl assembly. Remove the anchor housing assembly (G) (Figure 46 on page 76).
Figure 46: Remove the anchor housing assembly
13. Remove and discard the anchor housing.
Note: Do not dispose of as unsorted municipal waste. Refer to your local distributor for return, and or collection
systems available in your country.
14. Reverse steps to reinstall. When reinstalling, use a torque wrench to tighten each anchor mounting post to 60 ± 10
ft-lb.
15. Verify proper operation before returning the product to service.
Transfer lock bearing removal and replacement
Tools required
• 5/32'' hex wrench
Procedure
1. Remove the trolley. See Trolley removal on page 37.
2. Remove the transfer. See Transfer removal on page 37.
 Loading...


