62 6390-009-002 REV D www.stryker.com
Service
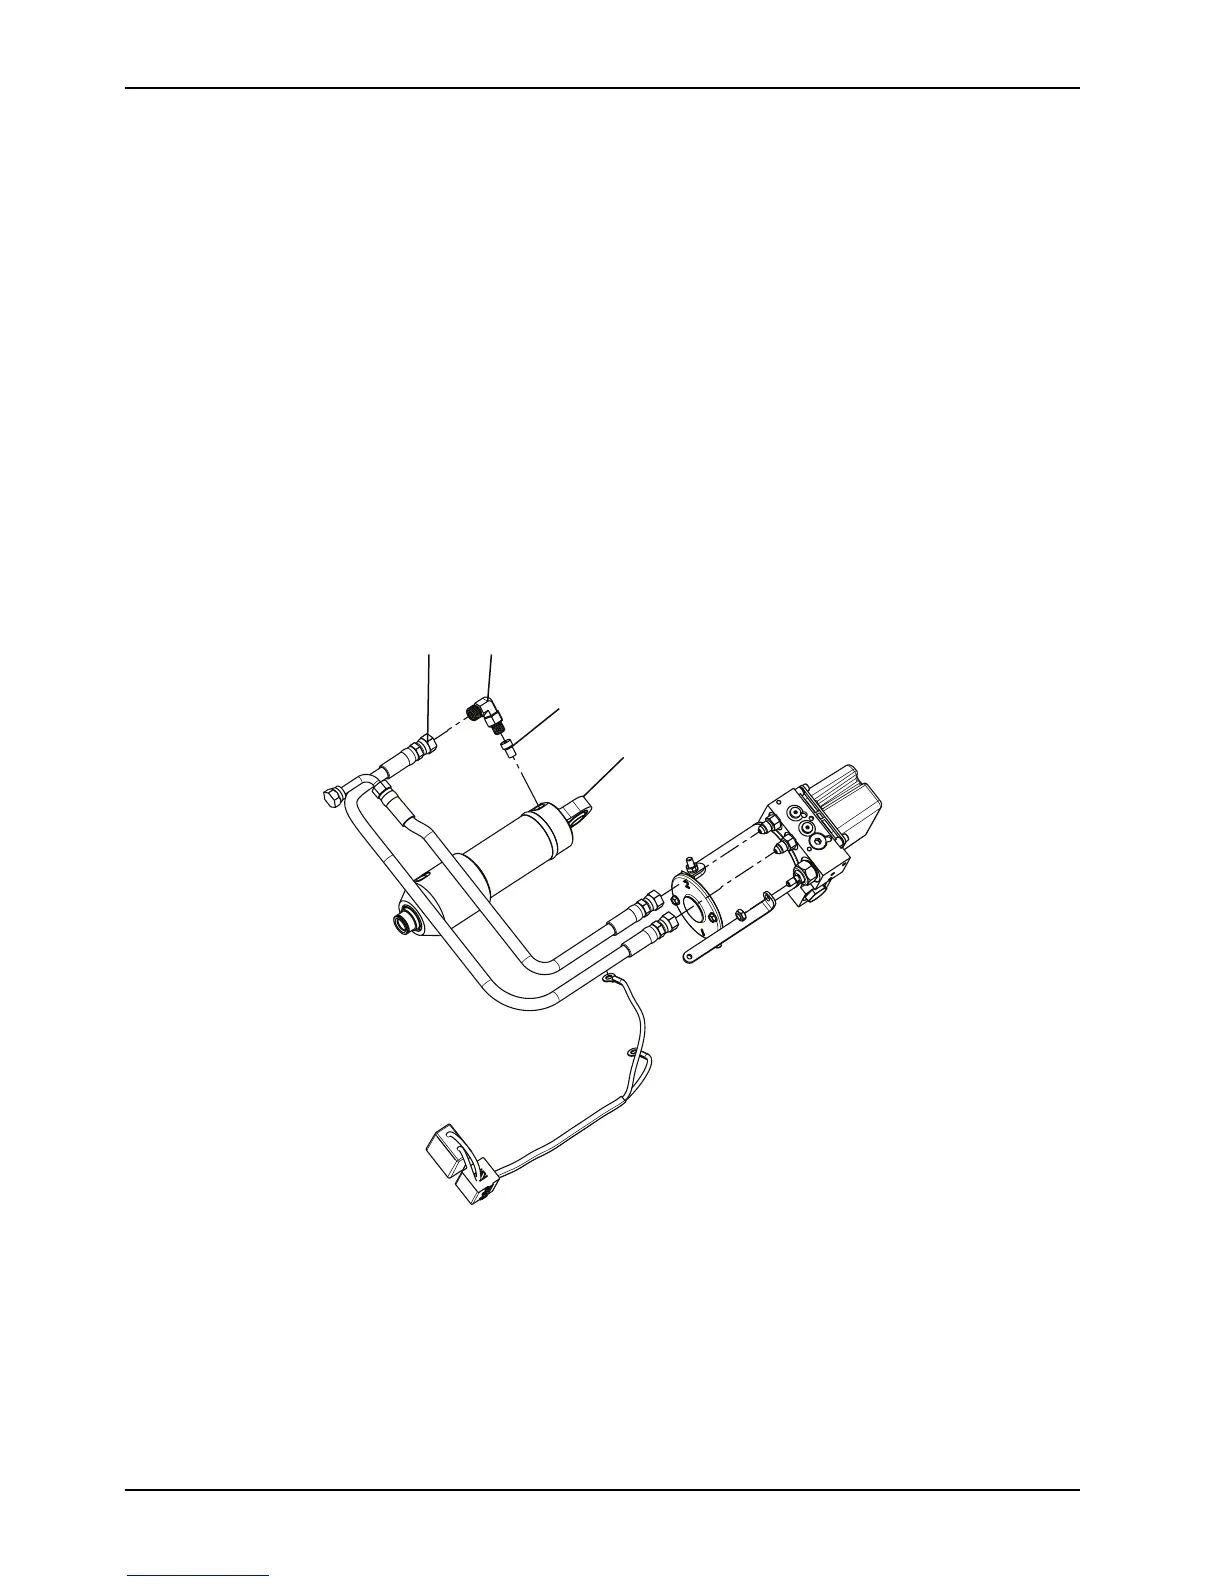
Velocity fuse removal and replacement (Continued)
Note: This makes working on the product easier, but is not required.
2. Remove the trolley covers. See Cover removal and replacement on page 40.
3. Using an 11/16" combination wrench, disconnect the hydraulic hose (A) closest to the mounting bracket at the head
end of the trolley (Figure 30 on page 62).
Note: Hydraulic fluid will leak from the cylinder and hoses. Lay down towels to catch fluid.
4. Using a 5/8" combination wrench loosen (do not remove) the jam nut on the cylinder hose fitting (B) and unthread
the fitting from the hydraulic cylinder (C) (Figure 30 on page 62). Save all parts for reinstallation.
5. Using a 1/8" hex wrench remove the velocity fuse (D) from the hydraulic cylinder (C) (Figure 30 on page 62).
Discard the fuse.
6. Reverse steps to reinstall.
Note: When reinstalling the cylinder hose fitting (B) lubricate the O-ring with ATF and only thread the fitting in until
you feel resistance. When aligning the fitting for proper position, do not back out more the 340 degrees from where
resistance was felt. Using a torque wrench, torque the jam nut of the fitting to 190±10 in-lb.
7. Check the fluid level before returning the product to service. See Filling the reservoir on page 70.
8. Verify proper operation of the product before returning it to service.
Figure 30: Velocity fuse components
Non-locking manual valve removal and replacement
Tools Required
• 7/16" deep well socket
• 7/8" deep well socket
• 3/8" drive ratchet