www.stryker.com 6390-009-002 REV D 69
Service
Pressure compensated flow control valve replacement (Continued)
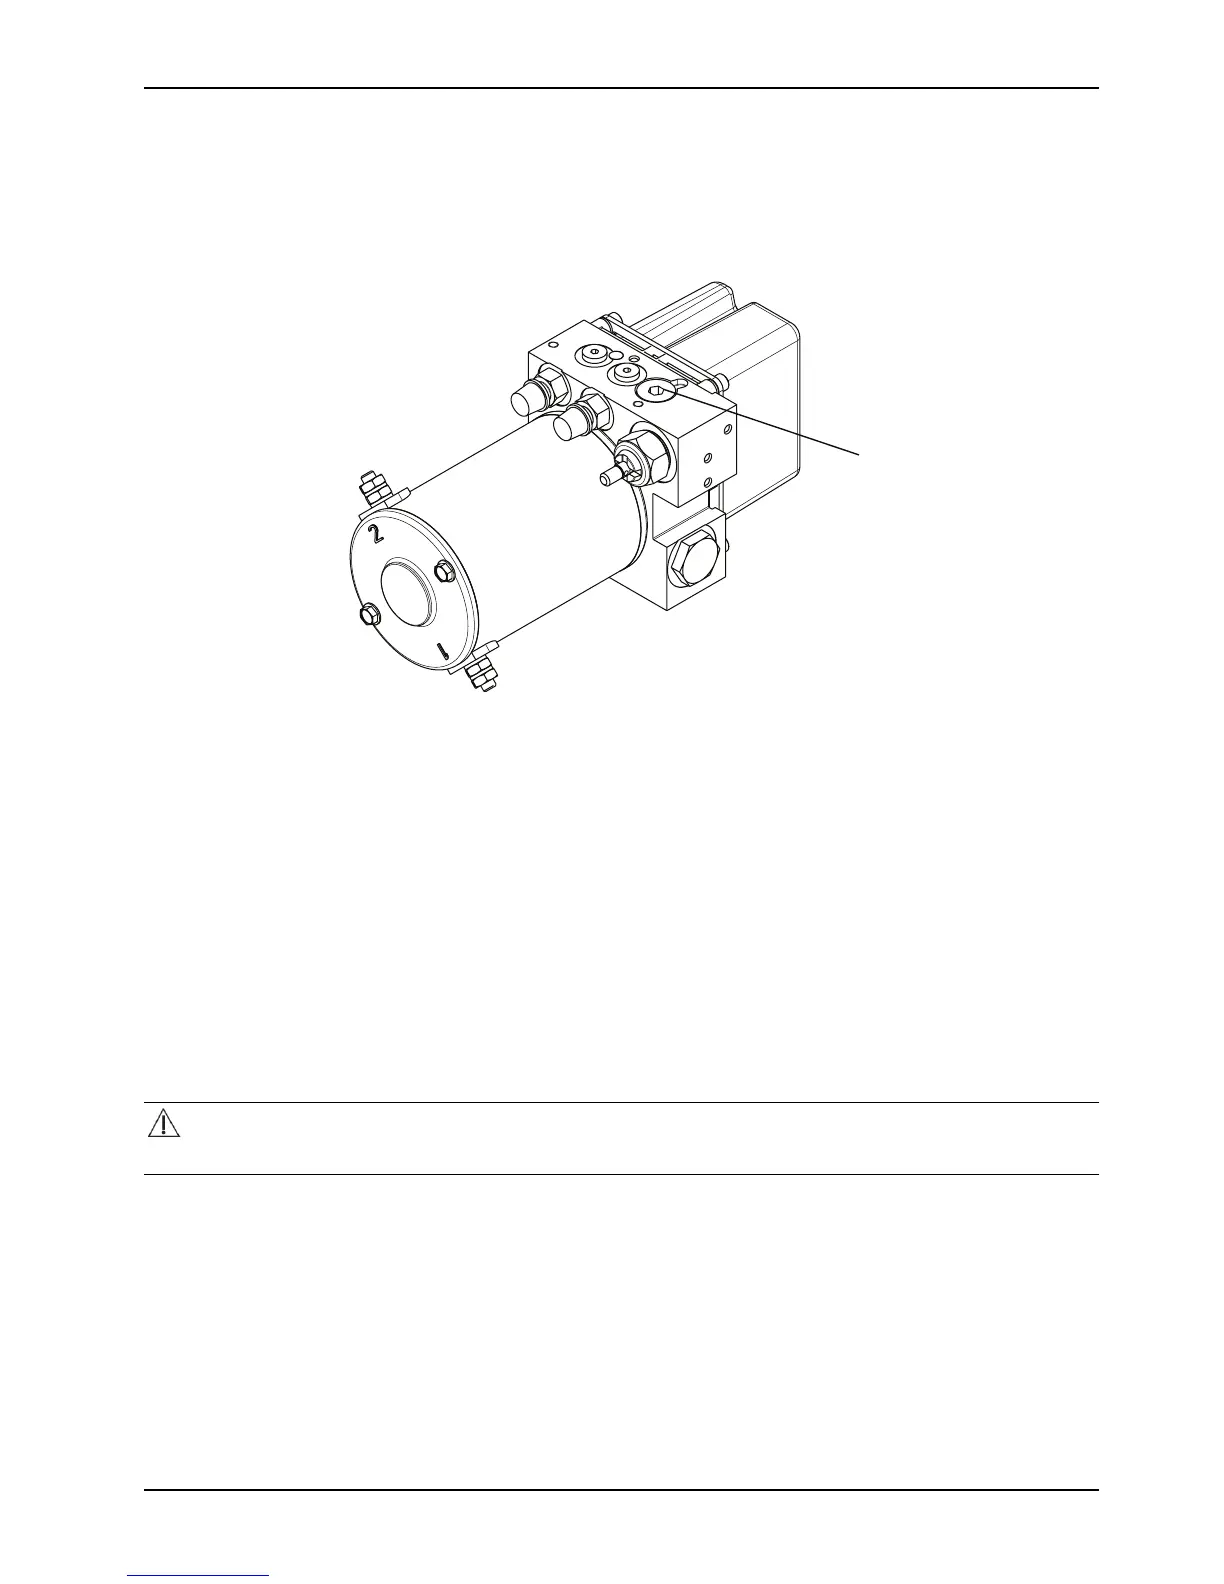
4. Using a 1/4" hex wrench, remove the hex plug (A) from the top of the hydraulic manifold assembly (Figure 37 on
page 69).
Note: Pay attention to the orientation of the valve for reinstallation.
Figure 37: Hex plug location
5. Install the replacement pressure compensated flow control valve.
Note: Install the O-ring side of the valve down into the port.
6. Reverse steps to reinstall.
7. Check the fluid level before returning the product to service. See Filling the reservoir on page 70.
8. Verify proper operation of the product before returning it to service.
Battery replacement
Tools Required
• T25 Torx driver
Procedure
CAUTION
When replacing the battery, do not touch the negative and positive battery terminals together on any metal surface.
1. Press the main power button to turn the product off.
2. Using a T25 Torx driver, remove the two button head cap screws (A) that secure the rear trolley plate cover (B) to
the trolley frame (Figure 38 on page 70). Remove the cover.
 Loading...


