www.stryker.com 6390-009-002 REV D 37
Service
Transfer removal
Tools Required
• T25 Torx driver
• 5/32'' hex wrench
Procedure
1. Remove the trolley. See Trolley removal on page 37.
2. Put the transfer into the transport position all the way into the vehicle compartment.
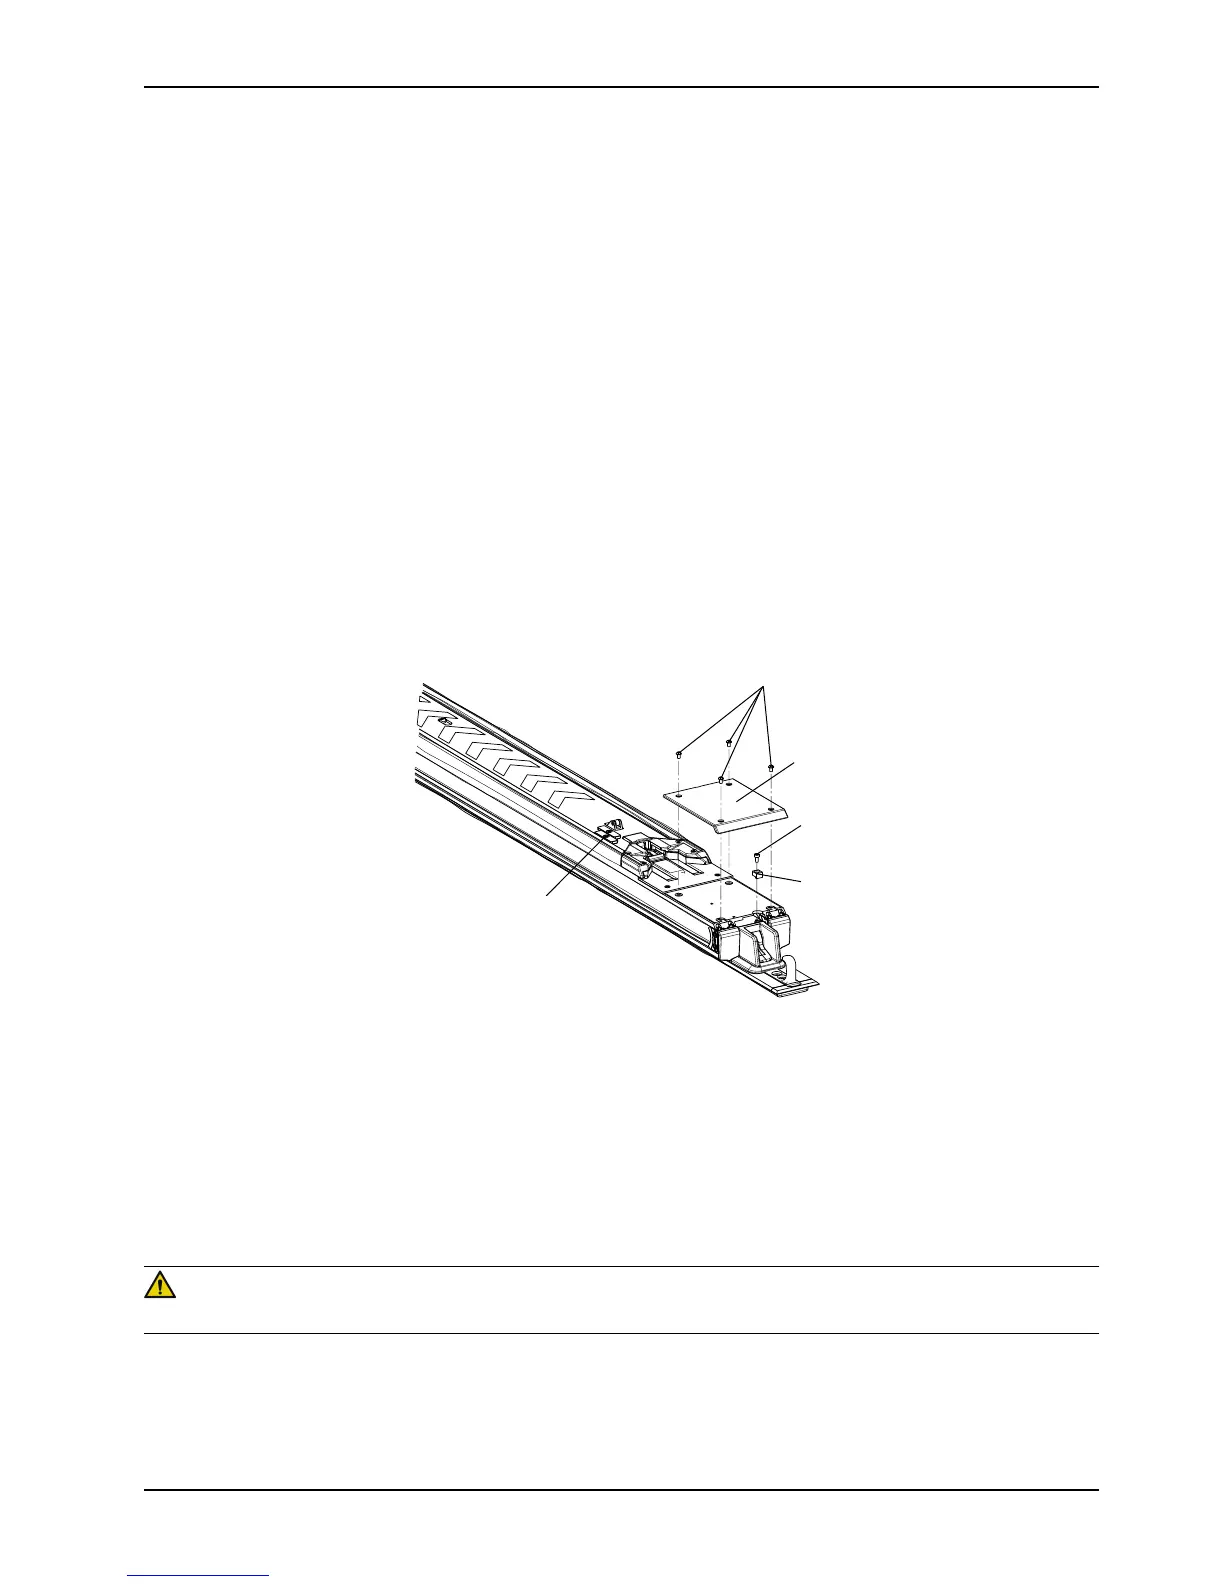
3. Using a T25 Torx driver, remove the four screws (A) that secure the foot end transfer wear pad (B) to the transfer
extrusion (Figure 2 on page 37).
4. Using a 5/32" hex wrench, remove the screw (C) that secures the trolley magnet activator (D) to the anchor
extrusion to remove the trolley magnet activator (Figure 2 on page 37).
5. Slide both transfer lock triggers (E) to extend and pull the transfer off of the anchor completely (Figure 2 on page
37).
Note: The transfer assembly is heavy and may require assistance to remove.
6. Reverse steps to reinstall.
7. Verify proper operation of the product before returning it to service.
Figure 2: Foot end transfer components
Trolley removal
Tools Required
• T25 Torx driver
• 3/16'' hex wrench
Procedure
WARNING
Two installers are required when lifting and positioning the trolley assembly.
1. Raise the lifting arms (A) (Figure 3 on page 38).
2. Press the trolley release button at the head end of the anchor (B) (Figure 3 on page 38).
3. Pull the trolley toward the foot end to the middle of the transfer assembly.