FFiigguurree 4400 –– SSeeccuurriinngg tthhee cchhaarrggeerr ttoo tthhee mmoouunnttiinngg ppllaattee
PPoowweerriinngg tthhee cchhaarrggeerr
CCAAUUTTIIOONN
• Always place the electrical charger power cord where it will not be stepped on, tripped over, or otherwise subjected to
damage or stress.
• Do not touch the battery receptacle terminals with metal objects.
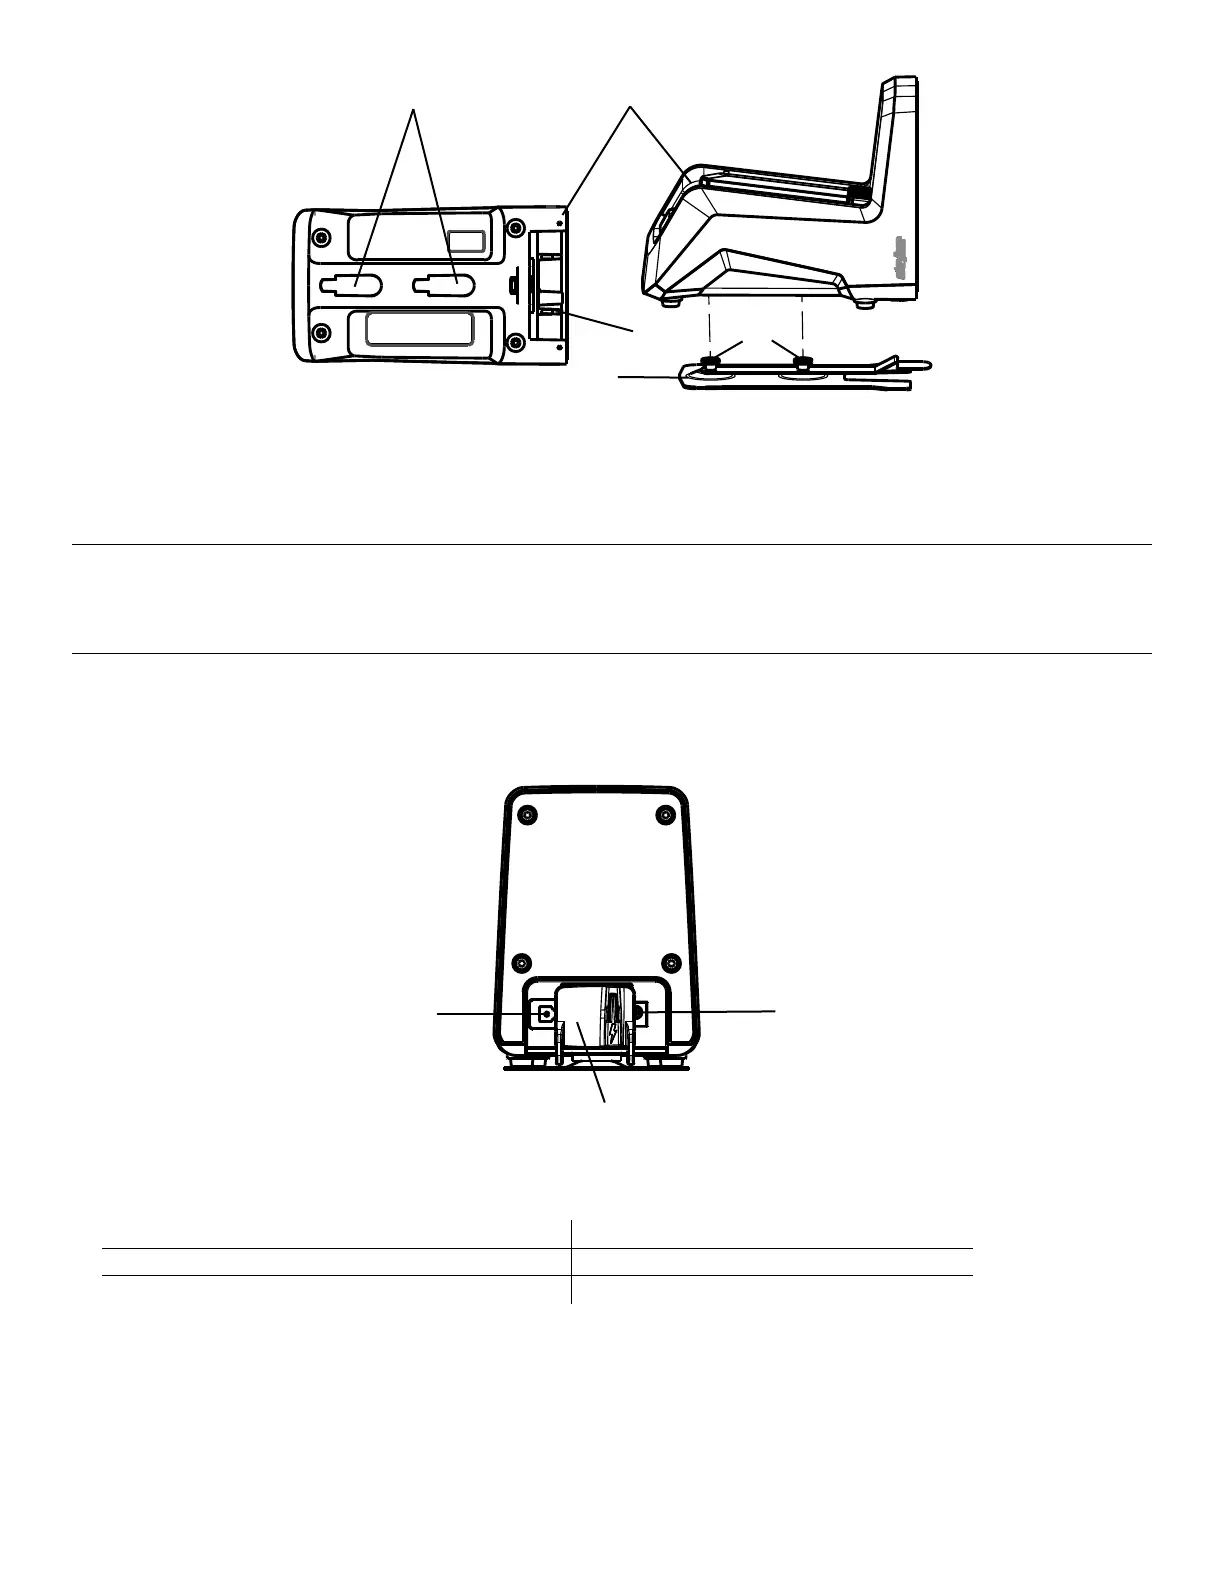
To power the charger (Figure 41):
1. Locate the power connection on the back of the charger.
2. Move the red AC/DC slider to expose the port and select the desired voltage configuration (AC or DC).
FFiigguurree 4411 –– CChhaarrggeerr rreeaarr vviieeww
A
AC input
B
Red AC/DC slider
C
DC input
3. Insert the power cord into the exposed charger port.
4. Insert the other end of the charger power cord into a clean, uninterruptible power source.
NNoottee -- Use only Stryker approved parts to power the charger.
EN 52 6507-009-001 Rev AB.3
 Loading...


