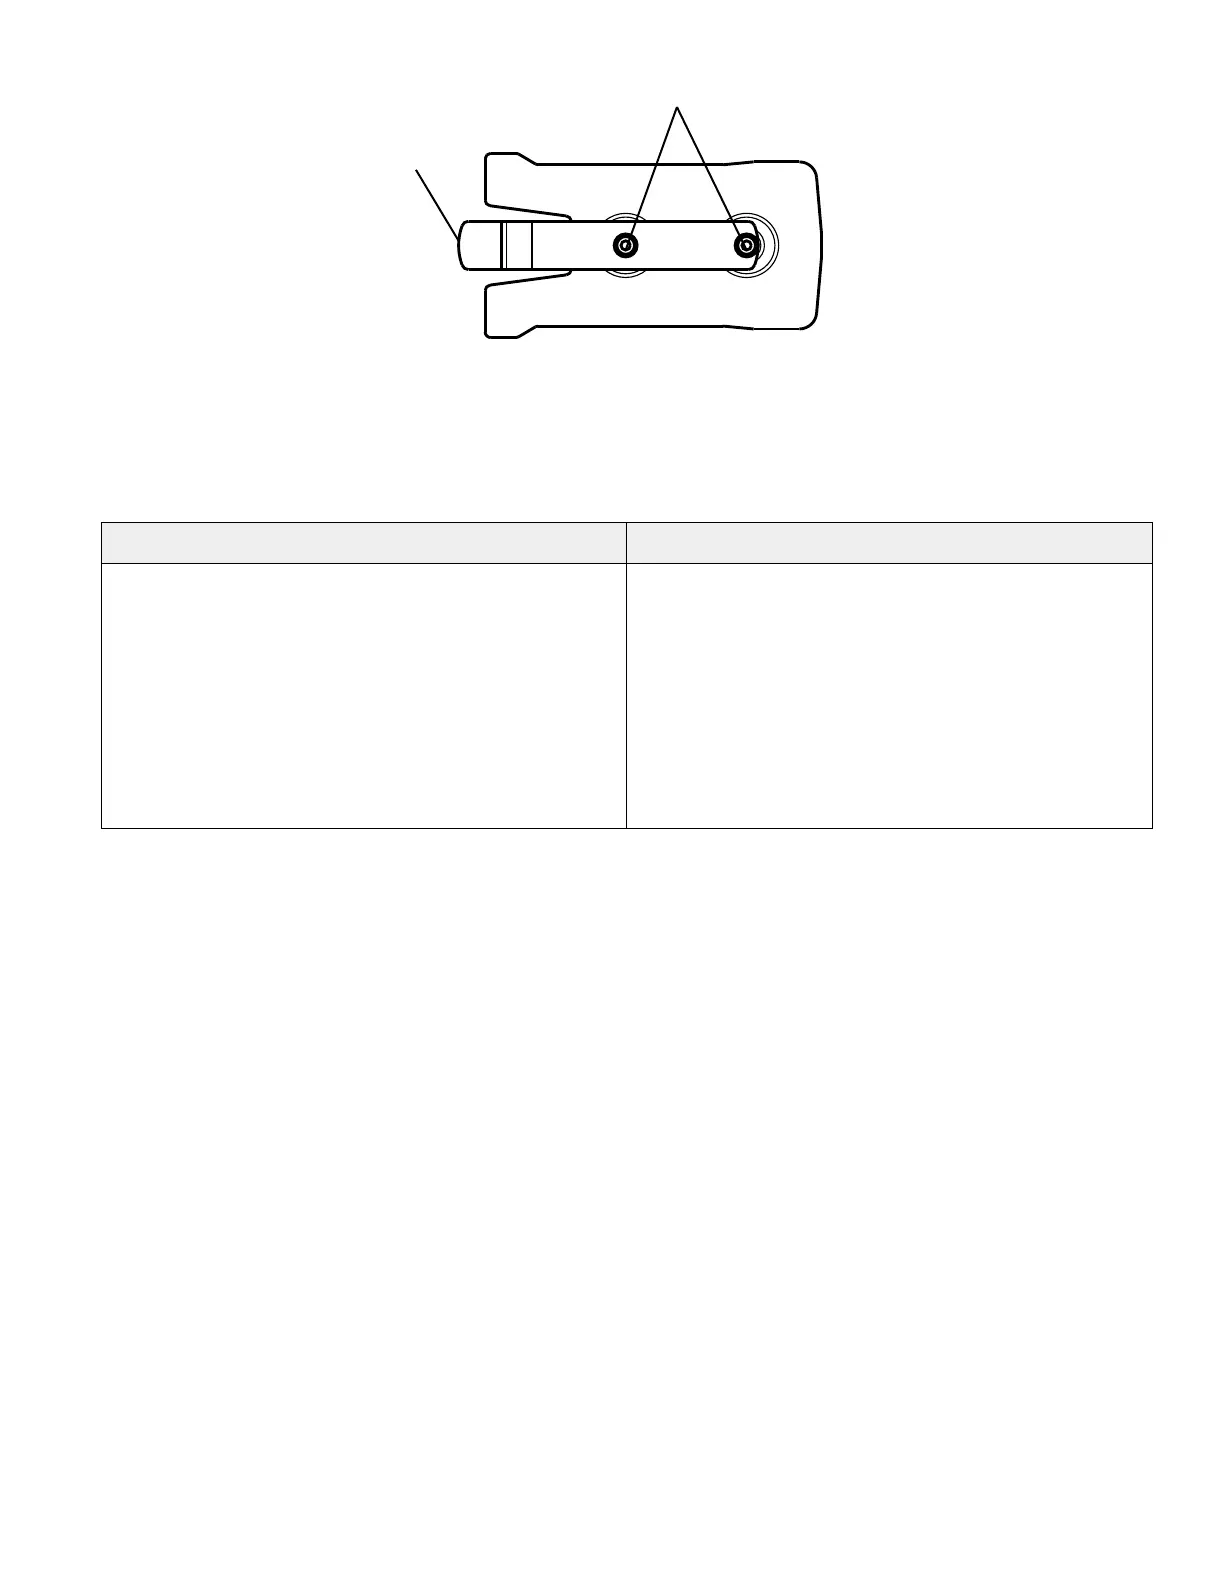
FFiigguurree 3399 –– MMoouunnttiinngg PPllaattee
b. Power cord easily plugs into the rear of the charger.
c. Charger slides from front to back to connect to the plate after mounting.
d. Mounting plate is secured correctly for the ambulance or station location:
AAmmbbuullaannccee llooccaattiioonn ((AACC oorr DDCC ppoowweerr)) SSttaattiioonn llooccaattiioonn ((AACC ppoowweerr))
• Secure the plate to a horizontal surface or shelf with
size #10, grade 5 flat head screws minimum (not
supplied).
• Check that the selected mounting surface is strong
enough to support the charger and battery during
transport.
• Allow for easy battery insertion and removal.
• Locate the power supply within reach of the power
cord.
• Secure the plate to a horizontal or vertical surface with
size #10, grade 5 flat head screws minimum (not
supplied).
• For vertical securement, position the mounting plate
with the spring tab directly below the mounting
screws, so the battery remains supported by the
charger even if the battery release button is
accidentally pressed.
• Allow for easy battery insertion and removal.
SSeeccuurriinngg tthhee cchhaarrggeerr ttoo tthhee mmoouunnttiinngg ppllaattee ooppttiioonn
To secure the charger to the mounting plate (Figure 40):
1. Move the red AC/DC slider (A) to the center position. Avoid interference between the hook features and charger mount
spring.
2. Align the rear keyway slots (B) onto the mounting plate fasteners (C).
3. Slide the charger (D) onto the mounting plate (E) until locked.
6507-009-001 Rev AB.3 51 EN