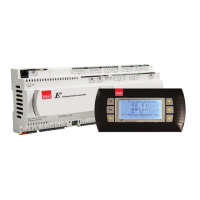
STULZ E
2
SERIES CONTROLLER FOR PERIMETER SYSTEMS OPERATION MANUAL
62
8.0 MAINTENANCE AND REPAIRS
8.1 General Maintenance
Because conditions vary greatly, individual maintenance
schedules must be determined for each location, based upon
periodic examination of the controller.
Check for corrosion on electrical connections. Clean corrosion
and apply anti-corrosion grease.
Periodically, check and tighten all terminal connections.
A system should be established for trend analysis. Record all
problems, defects and defi ciencies noted by operators and
discovered during maintenance inspections together with the
corrective actions taken. For maintenance assistance, contact
STULZ Product Support.
8.2 Troubleshooting
The STULZ E
2
Series controller is designed for continuous
and dependable operation. In the event that a problem is
encountered with the A/C system, the system controller may
be used to diagnose the cause. The controller signals an alarm
condition when the red backlight LED is illuminated behind the
alarm function key. An alarm indication is accompanied by a
screen text message with a brief description of the cause (See
"5.3.4 Alarm Screen Messages"). Often the remedy is simple
to determine by reading the alarm message i.e. “Dirty Filter
Alarm” (replace fi lter).
The following guidelines are included to assist in troubleshooting
the controller due to operational or performance problems. If
the problem can’t be resolved using the alarm screens and these
guidelines, contact STULZ Product Support for assistance (See
Section 9.0).
WARNING
Turn off all power to the unit before conducting any
troubleshooting procedures, unless the procedure
specifically requires the system to operate. Keep
hands, clothing and tools clear of the electrical
terminals.
Problem: Control Is Erratic
1. Wiring improperly connected or broken. Check wiring
against the schematic diagram included with the unit.
2. Wires shorted. Check all wire connections to ensure they
are tight and that no shorts are present.
Problem: “Alarm” Lamp is ON
1. Use the system controller to check the Alarm display
message(s).
2. Identify and correct cause of alarm condition.
3. Reset if necessary.
8.3 Repair Procedures
8.3.1 General
Under normal operating conditions and with the proper
preventive maintenance, the unit should provide excellent
service for many years. If necessary, the unit may be returned
to the manufacturer for major overhaul and refurbishment. All
work must be performed by qualifi ed technicians.
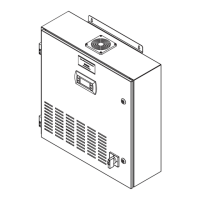
8.3.2 Component Replacement
Replaceable components may be removed and replaced from
the controller using common hand tools. Ensure power is
disconnected from the controller before removing or replacing
components.
WARNING
Power may still be present inside the controller when
the On/Off switch on the A/C unit door is OFF.